|help_text = Travel to this Map by using it in the Templar Laboratory or a personal Map Device. Maps can only be used once.
|help_text = Travel to this Map by using it in the Templar Laboratory or a personal Map Device. Maps can only be used once.
|purchase_cost_normal1_name = Orb of Chance
|map_tier = 3
|purchase_cost_normal1_amount = 2
|map_guild_character = *
|purchase_cost_magic1_name = Orb of Chance
|map_area_id = MapWorldsPeninsula
|purchase_cost_magic1_amount = 3
|map_series = War for the Atlas
|purchase_cost_rare1_name = Orb of Chance
|map_area_level = 70
|purchase_cost_rare1_amount = 4
|inventory_icon = Peninsula Map (War for the Atlas)
|purchase_cost_unique1_name = Chaos Orb
|drop_enabled = False
|purchase_cost_unique1_amount = 10
|release_version = 3.1.0
|map_tier = 3
|map_guild_character = *
|map_area_id = MapWorldsPeninsula
|map_area_level = 70
|inventory_icon = Peninsula Map (War for the Atlas)
}}
}}
'''Peninsula Map''' is a [[map]] based on [[The Southern Forest]] zone in [[Act 2]].
'''Peninsula Map''' is a [[map]] based on [[The Old Fields]] zone in [[Act 2]].
'''Map type''': Outdoors
==Layout==
==Layout==
The layout of the map is a large ring, with the boss arena more or less on the opposite side of the ring from where the player started.
The layout of the map is a large ring, with the boss arena more or less on the opposite side of the ring from where the player started.
Line 32:
Line 26:
==Encounters==
==Encounters==
===Boss===
===Boss===
Large arena that seals upon entering. Boss waits in rock form on the far side. Arena has [[Golem Totem]] rubbles. Golem totems use {{sl|Earthquake}} and, when killed, cannot be revived for 30 seconds.
Large arena that seals upon entering. Boss waits in rock form on the far side. Arena has [[Golem Totem]] rubbles. Golem totems use {{il|Earthquake}} and, when killed, cannot be revived for 30 seconds.
[[Titan of the Grove]] (a unique [[Rock Golem]])
[[Titan of the Grove]] (a unique [[rock elemental]])
*Additional Life
*Additional Life
*Other allies Cannot Die
*Other allies Cannot Die
Line 43:
Line 37:
The boss itself is not terribly difficult due to its low movement and attack speed and only moderate damage for a boss. Depending on your build and what pack spawns next to the boss, you may want to separate and kill them first.
The boss itself is not terribly difficult due to its low movement and attack speed and only moderate damage for a boss. Depending on your build and what pack spawns next to the boss, you may want to separate and kill them first.
One tricky situation occurs when the map has the Twinned affix. The auras of the two bosses will affect each other, rendering them impossible to kill unless they are separated somehow. Skills such as {{sl|Frost Wall}} can be used to try to push the bosses apart, or they may be lured apart using minions. However, one easy way to separate the bosses is to retreat into the corner between the wall and the shore. One boss will block off the corner, causing the other to wander off.
One tricky situation occurs when the map has the Twinned affix. The auras of the two bosses will affect each other, rendering them impossible to kill unless they are separated somehow. Skills such as {{il|Frost Wall}} can be used to try to push the bosses apart, or they may be lured apart using minions. However, one easy way to separate the bosses is to retreat into the corner between the wall and the shore. One boss will block off the corner, causing the other to wander off.
===Boss video===
===Boss video===
{{Map item drops}}
{{Map item drops}}
{{Item acquisition}}
{{Item acquisition}}
{{Item unique versions}}
{{Item unique versions}}
==Version history==
{{Map variants}}
{{VersionHistoryTable}}
{{VersionHistoryRow|3.1.0}}
{{#lst:Peninsula Map|version history}}
* Added 32 new maps including two new Unique maps.
* The entire Atlas has been reworked. Many map names have changed, as have their balance, tier and position on the Atlas. Many maps have also had their boss fights swapped or completely reworked.
* The rules used to generate monsters in endgame maps have been significantly reworked and rebalanced around the rate at which we expect players to reliably clear out the map. In general, narrow, linear maps will contain fewer total monsters than maps with complex layouts. We will be closely monitoring and adjusting the balance of this change and expect to make further changes and improvements over time.
|}
{{Navbox maps}}
{{Navbox maps}}
[[ru:Карта мыса (Война за Атлас)]]
Latest revision as of 15:33, 30 May 2024
Peninsula MapMap Level: 70 Map Tier: 3 Guild Character: *Travel to this Map by using it in the Templar Laboratory or a personal Map Device. Maps can only be used once.
Acquisition Drop disabled Drop level: 70Vendor Offer 1x Scroll FragmentMetadata Item class: Map Metadata ID: Metadata/Items/Maps/MapWorldsPeninsula
The layout of the map is a large ring, with the boss arena more or less on the opposite side of the ring from where the player started.
Encounters
Boss
Large arena that seals upon entering. Boss waits in rock form on the far side. Arena has Golem Totem rubbles. Golem totems use EarthquakeEarthquakeAttack, AoE, Duration, Slam, Melee Level: (1-20) Cost: 10 Mana Attack Speed: 75% of base Attack Damage: (85-150)% of base Effectiveness of Added Damage: (85-150)% AoE Radius: 18 / 28Requires Level 28Smashes the ground, dealing damage in an area and cracking the earth. The crack will erupt in a powerful aftershock after a duration. Cracks created before the first one has erupted will not generate their own aftershocks. Requires an Axe, Mace, Sceptre, Staff or Unarmed.Base duration is 1.00 seconds Aftershock deals 150% more Damage with Hits and Ailments
Additional Effects From 1-20% Quality: Aftershock deals +(1.5-30)% more Damage with Hits and AilmentsPlace into an item socket of the right colour to gain this skill. Right click to remove from a socket. and, when killed, cannot be revived for 30 seconds.
The boss itself is not terribly difficult due to its low movement and attack speed and only moderate damage for a boss. Depending on your build and what pack spawns next to the boss, you may want to separate and kill them first.
One tricky situation occurs when the map has the Twinned affix. The auras of the two bosses will affect each other, rendering them impossible to kill unless they are separated somehow. Skills such as Frost WallFrost WallSpell, Duration, Cold Level: (1-20) Cost: (9-33) Mana Cooldown Time: 3.00 sec Can Store 3 Use(s) Cast Time: 0.50 secRequires Level 4Creates a wall of ice which holds back enemies. Targets under the wall are damaged and pushed back.Deals (8-462) to (12-693) Cold Damage Base duration is (3.00-4.90) seconds 0.15 seconds between appearance of Wall sections Wall will be (2.8-5.6) meters long
Additional Effects From 1-20% Quality: (2-40)% increased Cooldown Recovery RatePlace into an item socket of the right colour to gain this skill. Right click to remove from a socket. can be used to try to push the bosses apart, or they may be lured apart using minions. However, one easy way to separate the bosses is to retreat into the corner between the wall and the shore. One boss will block off the corner, causing the other to wander off.
Her MaskHer Mask4Sacrifice FragmentTo her beauty you submit, lest your neck the great Queen slit.
23
HopeHope5Prismatic Ring CorruptedThe others succumbed to madness and depravity, but Lori fought on. Alone in the darkness, she could still see the dull light of hope's distant dawn.
68
Lantador's Lost LoveLantador's Lost Love7Two-Stone RingThey fought the storm together as one, Until the longest of days was done. Their love grew stronger with every breath, Until it was broken apart in death.
The PrimordialThe Primordial5Jewel PrimordialWe play at God with our necromancy, but forces far more potent sleep within these stones.
23
The Rite of ElementsThe Rite of Elements5Level 21 Golem Gem CorruptedA mind as quick as lightning, fists as hard as stone, a heart that burns with fury, and eyes that chill to the bone.
72
The Scarred MeadowThe Scarred Meadow9Wake of DestructionThe earth offers nourishment, growth and healing. Unless, of course, the sky has other plans.
23
The Tinkerer's TableThe Tinkerer's Table55x FossilTrying to bring your vision to life is enough to drive you mad.
33
The TrialThe Trial7Map Map Tier:15 CorruptedYou cannot journey to new lands until you have the courage to leave the safety of home.
73
TranquillityTranquillity7Voltaxic RiftBeware the sudden calm, for it is a sure sign of a storm on the horizon.
48
The CatchThe Catch18Fishing Rod Incubated Item Level:99The largest hooks offer the greatest catch, but often the catch is the hook.
There are currently no unique items for this base item type.
Map variants
Item
Map Tier
Map Level
Map Series
Peninsula MapPeninsula MapMap Level: 73 Map Tier: 6 Guild Character: *The farmer no longer plows or sows. Only the flattened soil remains.Travel to this Map by using it in a personal Map Device. Maps can only be used once.
6
73
The Forbidden Sanctum
Peninsula MapPeninsula MapMap Level: 78 Map Tier: 11 Guild Character: *The farmer no longer plows or sows. Only the flattened soil remains.Travel to this Map by using it in a personal Map Device. Maps can only be used once.
11
78
Kalandra
Peninsula MapPeninsula MapMap Level: 69 Map Tier: 2 Guild Character: *The farmer no longer plows or sows. Only the flattened soil remains.Travel to this Map by using it in a personal Map Device. Maps can only be used once.
2
69
Sentinel
Peninsula MapPeninsula MapMap Level: 79 Map Tier: 12 Guild Character: *The farmer no longer plows or sows. Only the flattened soil remains.Travel to this Map by using it in a personal Map Device. Maps can only be used once.
12
79
Archnemesis
Peninsula MapPeninsula MapMap Level: 71 Map Tier: 4 Guild Character: *The farmer no longer plows or sows. Only the flattened soil remains.Travel to this Map by using it in a personal Map Device. Maps can only be used once.
4
71
Expedition
Peninsula MapPeninsula MapMap Level: 69 Map Tier: 2 Guild Character: *The farmer no longer plows or sows. Only the flattened soil remains.Travel to this Map by using it in a personal Map Device. Maps can only be used once.
2
69
Ritual
Peninsula MapPeninsula MapMap Level: 81 Map Tier: 14 Guild Character: *The farmer no longer plows or sows. Only the flattened soil remains.Travel to this Map by using it in a personal Map Device. Maps can only be used once.
14
81
Heist
Peninsula MapPeninsula MapMap Level: 71 Map Tier: 4 Guild Character: *The farmer no longer plows or sows. Only the flattened soil remains.Travel to this Map by using it in a personal Map Device. Maps can only be used once.
4
71
Harvest
Peninsula MapPeninsula MapMap Level: 69 Map Tier: 2 Guild Character: *The farmer no longer plows or sows. Only the flattened soil remains.Travel to this Map by using it in a personal Map Device. Maps can only be used once.
2
69
Delirium
Peninsula MapPeninsula MapMap Level: 69 Map Tier: 2 Guild Character: *The farmer no longer plows or sows. Only the flattened soil remains.Travel to this Map by using it in a personal Map Device. Maps can only be used once.
2
69
Metamorph
Peninsula MapPeninsula MapMap Level: 72 Map Tier: 5 Guild Character: *The farmer no longer plows or sows. Only the flattened soil remains.Travel to this Map by using it in a personal Map Device. Maps can only be used once.
5
72
Blight
Peninsula MapPeninsula MapMap Level: 72 Map Tier: 5 Guild Character: *The farmer no longer plows or sows. Only the flattened soil remains.Travel to this Map by using it in the Templar Laboratory or a personal Map Device. Maps can only be used once.
5
72
Legion
Peninsula MapPeninsula MapMap Level: 69 Map Tier: 2 Guild Character: *The farmer no longer plows or sows. Only the flattened soil remains.Travel to this Map by using it in the Templar Laboratory or a personal Map Device. Maps can only be used once.
2
69
Synthesis
Peninsula MapPeninsula MapMap Level: 70 Map Tier: 3 Guild Character: *The farmer no longer plows or sows. Only the flattened soil remains.Travel to this Map by using it in the Templar Laboratory or a personal Map Device. Maps can only be used once.
3
70
Betrayal
Peninsula MapPeninsula MapMap Level: 70 Map Tier: 3 Guild Character: *Travel to this Map by using it in the Templar Laboratory or a personal Map Device. Maps can only be used once.
3
70
War for the Atlas
Peninsula MapPeninsula MapMap Level: 72 Map Tier: 5 Guild Character: 8Travel to this Map by using it in the Templar Laboratory or a personal Map Device. Maps can only be used once.
5
72
Atlas of Worlds
Shaped Peninsula MapShaped Peninsula MapMap Level: 77 Map Tier: 10 Guild Character: 8Travel to this Map by using it in the Templar Laboratory or a personal Map Device. Maps can only be used once.
10
77
Atlas of Worlds
Peninsula MapPeninsula MapMap Level: 75 Map Tier: 8 Guild Character: 8Travel to this Map by using it in the Templar Laboratory or a personal Map Device. Maps can only be used once.
8
75
The Awakening
Peninsula MapPeninsula MapMap Level: 73 Map Tier: 8 Guild Character: 8Travel to this Map by using it in the Templar Laboratory or a personal Map Device. Maps can only be used once.
The following Maps have been removed from the Atlas: Academy, Acid Caverns, Ancient City, Ashen Wood, Bazaar, Bog, Burial Chambers, Cage, Carcass, Channel, Courthouse, Dark Forest, Desert, Estuary, Forking River, Gardens, Ghetto, Grave Trough, Graveyard, Haunted Mansion, Iceberg, Ivory Temple, Lava Lake, Lookout, Mausoleum, Mesa, Peninsula, Sepulchre, Spider Forest, Spider Lair, Sunken City, and Villa.
The following Maps have been added back to the Atlas: Bazaar, Beach, Belfry, Bramble Valley, Burial Chambers, Cage, Channel, City Square, Cold River, Coral Ruins, Coves, Desert Spring, Frozen Cabins, Graveyard, Iceberg, Infested Valley, Ivory Temple, Jungle Valley, Lava Chamber, Marshes, Mesa, Peninsula, Phantasmagoria, Precinct, Primordial Pool, Shipyard, Shrine, and Volcano.
The entire Atlas has been reworked. Many map names have changed, as have their balance, tier and position on the Atlas. Many maps have also had their boss fights swapped or completely reworked.
The rules used to generate monsters in endgame maps have been significantly reworked and rebalanced around the rate at which we expect players to reliably clear out the map. In general, narrow, linear maps will contain fewer total monsters than maps with complex layouts. We will be closely monitoring and adjusting the balance of this change and expect to make further changes and improvements over time.
Most existing maps have been revamped to have more balanced monster composition, layouts, boss fights and rewards.
Name changed from Dry Peninsula Map to Peninsula Map. [Undocumented This change was not documented by any official sources. It was discovered through player testing or datamining.]

 Her Mask
 4Sacrifice FragmentTo her beauty you submit,
 Hope
Hope 5Prismatic Ring
 Lantador's Lost Love
 7Two-Stone RingThey fought the storm together as one,
  Lingering Remnants
 16
16 Prosperity
 10Perandus' Gold RingAccumulating wealth has its own costs.
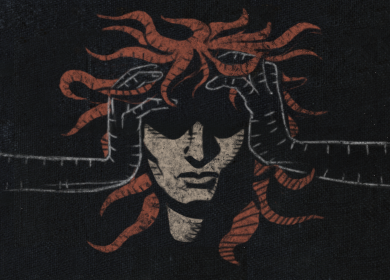 The Encroaching Darkness
 8Map
8Map The Gambler
 5Divination Card"I don't believe in karma. If it were real, I would never win."
 The Journey
 3
3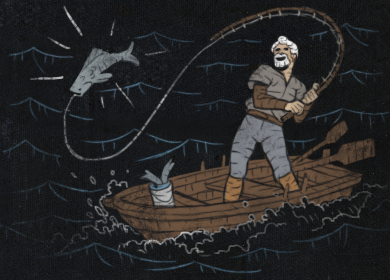 The Old Man
 12Fishing Rod
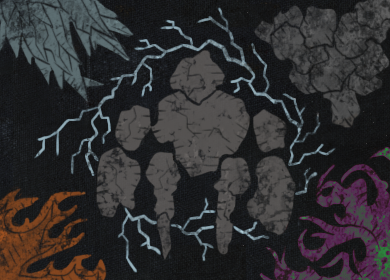 The Primordial
 5Jewel
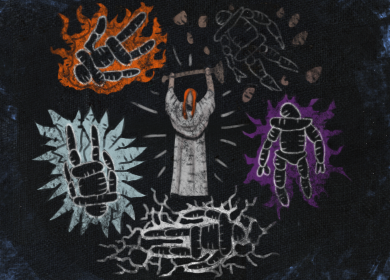 The Rite of Elements
 5Level 21 Golem Gem
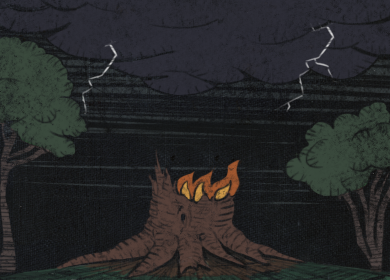 The Scarred Meadow
 9
9 The Tinkerer's Table
 55x FossilTrying to bring your vision to life is enough to drive you mad.
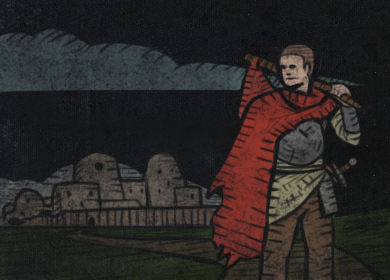 The Trial
 7Map
7Map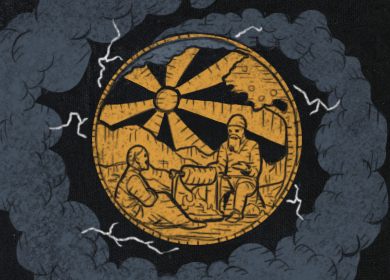 Tranquillity
 7
7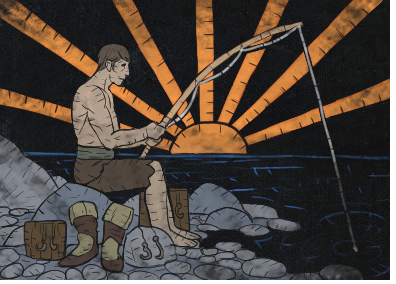 The Catch
 18Fishing Rod
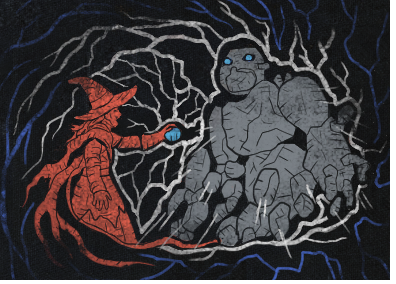 A Stone Perfected
 5Jewel
 The Fortunate
 122x
122x 