Guide:Acts quick guide
This is a guide on the subject of Act progression.
Last updated on Dec 5, 2021.
The Acts quick guide helps players complete the Acts in the the fastest and most efficient manner. It is designed for experienced players who have completed the Acts at least once and are aware of the game mechanics. Therefore we do not cover basic gameplay aspects in this guide.
This guide includes:
- All Book of Skill Quests
- All Trials
- All minor and major Gods (to fully unlock The Pantheon)
- Kills all Bandits (optional, you can save the bandit of your choice as per your build guide)
This guide does not include:
- All Book of Regrets Quests, because regret points can be easily obtained through
 Orb of RegretOrb of RegretStack Size: 40Grants a passive skill refund pointRight click on this item to use it.
 s.
s.
Leveling Gear
Tip: For fastest progression through the Acts, prioritize obtaining a ![]() Quicksilver Flask of AdrenalineQuicksilver FlaskLasts 6.00 Seconds
Quicksilver Flask of AdrenalineQuicksilver FlaskLasts 6.00 Seconds
Consumes 30 of 60 Charges on use
40% increased Movement SpeedRequires Level 4Right click to drink. Can only hold charges while in belt. Refills as you kill monsters.![]() and any Boots with +30 Increased Movement Speed (or a lower value).
and any Boots with +30 Increased Movement Speed (or a lower value).
Unique items
The following gear is helpful while leveling during the Acts, as they are cheap Unique items that provide significant boosts, and can be worn from a low level onwards. These are not necessarily required, and players with no currency can simply use the gear that drops during the Acts, and linked gear purchased from town vendors.
| Slot | Builds | Item | Benefits | |
|---|---|---|---|---|
| Helmet | All | Module Error: No results found for item using search term "item_name = Goldrim" | Elemental resistances | |
| Body | All | Module Error: No results found for item using search term "item_name = Tabula Rasa" | Ability to 6-link your main attack ability | |
| Gloves | All | Module Error: No results found for item using search term "item_name = Lochtonial Caress" | More damage and and charge generation | |
| Boots | All | Module Error: No results found for item using search term "item_name = Wanderlust" / Module Error: No results found for item using search term "item_name = Nomic's Storm" / Module Error: No results found for item using search term "item_name = Shavronne's Pace" / Module Error: No results found for item using search term "item_name = Victario's Flight" / Module Error: No results found for item using search term "item_name = Seven-League Step" | Faster movement | |
| Belt | Melee/Ranger | Module Error: No results found for item using search term "item_name = Meginord's Girdle" / Module Error: No results found for item using search term "item_name = Perandus Blazon" / Module Error: No results found for item using search term "item_name = Belt of the Deceiver" / Module Error: No results found for item using search term "item_name = Wurm's Molt" | More damage and elemental resistances | |
| Spellcaster | Module Error: No results found for item using search term "item_name = Perandus Blazon" | Easier leveling | ||
| Rings | All | 2 Module Error: No results found for item using search term "item_name = Praxis" / 2 Module Error: No results found for item using search term "item_name = Perandus Signet" / Module Error: No results found for item using search term "item_name = Kaom's Sign" / Module Error: No results found for item using search term "item_name = Blackheart" / Module Error: No results found for item using search term "item_name = Le Heup of All" | Reduced mana cost of skills / Increased XP gain | |
| Amulet | Melee/Ranger | Module Error: No results found for item using search term "item_name = Karui Ward" | More damage, faster attacks | |
| Spellcaster | Module Error: No results found for item using search term "item_name = Atziri's Foible" | More mana, improved mana regeneration | ||
| Weapons | Melee | 2 Module Error: No results found for item using search term "item_name = The Screaming Eagle" / 2 Module Error: No results found for item using search term "item_name = Dreadarc" / Module Error: No results found for item using search term "item_name = Limbsplit" / 2 Module Error: No results found for item using search term "item_name = The Princess" | High damage output with low level requirement | |
| Ranger | Module Error: No results found for item using search term "item_name = Silverbranch" / Module Error: No results found for item using search term "item_name = Roth's Reach", along with Module Error: No results found for item using search term "item_name = Asphyxia's Wrath" / Module Error: No results found for item using search term "item_name = Hyrri's Bite" | |||
| Spellcaster | 2 Module Error: No results found for item using search term "item_name = Lifesprig" / 2 Module Error: No results found for item using search term "item_name = Axiom Perpetuum" / Module Error: No results found for item using search term "item_name = Fencoil" / 2 Goat's HornWand Physical Damage: 9-16 Critical Strike Chance: 7.00% Attacks per Second: 1.20Requires Level 6, 29 IntAdds (1-2) to (3-4) Fire Damage to Spells and Attacks(20-30)% increased Fire Damage Adds (4-6) to (8-12) Fire Damage to Spells (40-60)% increased Global Critical Strike Chance Gain 10 Life per Ignited Enemy Killed 25% reduced Ignite Duration on EnemiesThe Goat King drank the smoke and ate the flames as his ruin spread across the land. | |||
| Poison | 2 Module Error: No results found for item using search term "item_name = Goredrill" / 2 Module Error: No results found for item using search term "item_name = Bloodplay" | |||
Self-crafted items

Players can use vendor recipes to easily craft weapons that are required for leveling, if they have no currency to purchase items, or if they are playing in SSF mode (solo self-found).
To do this, simply sell the items in the "Recipe" column to any vendor at any town, in order to receive the item in the "Result" column.
| Item | Recipe | Result |
|---|---|---|
|
Magic Boots with 10% increased Movement Speed | |
|
Magic Boots with (X+5)% increased Movement Speed | |
|
Magic Weapon with Adds x Physical Damage | |
|
Magic Weapon with Adds x Fire Damage | |
|
Magic Weapon with Adds x Cold Damage | |
|
Magic Weapon with Adds x Lightning Damage | |
|
Magic Weapon with Adds x Fire Damage to Spells | |
|
Magic Weapon with Adds x Cold Damage to Spells | |
|
Magic Weapon with Adds x Lightning Damage to Spells
| |
|
Magic Weapon with +1 to Level of all Physical Spell Skill Gems | |
|
Magic Weapon with +1 to Level of all Fire Spell Skill Gems | |
|
Magic Weapon with +1 to Level of all Cold Spell Skill Gems | |
|
Magic Weapon with +1 to Level of all Lightning Spell Skill Gems | |
|
Magic Weapon with +1 to Level of all Chaos Spell Skill Gems
|
Additionally, for several builds that rely on spells that scale extremely well with levels - for instance: ![]() AbsolutionAbsolutionSpell, Minion, Duration, Physical, Lightning, AoE
AbsolutionAbsolutionSpell, Minion, Duration, Physical, Lightning, AoE
Level: (1-20)
Cost: (9-26) Mana
Cast Time: 0.75 sec
Critical Strike Chance: 6.00%
Effectiveness of Added Damage: 200%Requires Level 12Damages enemies in an area, applying a debuff for a short duration. If a non-unique enemy dies while affected by the debuff, the corpse will be consumed to summon a Sentinel of Absolution for a secondary duration, or to refresh the duration and life of an existing one instead if you have the maximum number of them.Deals (21-873) to (31-1310) Physical Damage
Base duration is 1.00 seconds
Base secondary duration is 10.00 seconds
+(0-0.6) metres to radius
25% chance to Summon a Sentinel of Absolution on Hitting a Rare or Unique Enemy
This Spell and Minions Convert 50% of Physical Damage to Lightning Damage
Maximum 3 Summoned Sentinels of Absolution
Additional Effects From 1-20% Quality:
Minions have (2-40)% increased Cooldown Recovery RatePlace into an item socket of the right colour to gain this skill. Right click to remove from a socket.![]()
![]() , Module Error: No results found for item using search term "item_name = Wintertide Brand",
, Module Error: No results found for item using search term "item_name = Wintertide Brand", ![]() ExsanguinateExsanguinateSpell, Chaining, Physical, Duration
ExsanguinateExsanguinateSpell, Chaining, Physical, Duration
Level: (1-20)
Cost: (16-46) Life
Cast Time: 0.80 sec
Critical Strike Chance: 6.00%
Effectiveness of Added Damage: 270%Requires Level 12Releases several tendrils of blood from your character, targeting enemies in a narrow angle in front of you. The beams deal physical damage and inflict a physical damage over time debuff to enemies, which can stack up to 3 times. Effects which allow skills to chain can apply to these tendrils.Deals (17-1193) to (25-1789) Physical Damage
Deals (23.4-1121) Base Physical Damage per second
Base duration is 1.00 seconds
Modifiers to Spell Damage apply to this Skill's Damage Over Time effect
Fires tendrils at up to (7-9) Targets
Additional Effects From 1-20% Quality:
Base duration is (0.075-1.5) secondsPlace into an item socket of the right colour to gain this skill. Right click to remove from a socket.![]()
![]() ,
, ![]() Corrupting FeverCorrupting FeverSpell, Duration, Physical
Corrupting FeverCorrupting FeverSpell, Duration, Physical
Level: (1-20)
Cost: (78-520) Life
Cooldown Time: 1.00 sec
Can Store 1 Use(s)
Cast Time: InstantRequires Level 16Draws out your own blood to power a buff for a duration, letting this skill inflict the Corrupting Blood debuff on enemies you hit, dealing physical damage over time for a short secondary duration. The buff's duration will be refreshed if you spend enough life before it expires.Deals (7.8-335.4) Base Physical Damage per second
Base duration is 6.00 seconds
Base secondary duration is 1.00 seconds
Buff Duration is refreshed after you spend a total of (26-205) Life
Additional Effects From 1-20% Quality:
(1-20)% increased Skill Effect DurationPlace into an item socket of the right colour to gain this skill. Right click to remove from a socket.![]()
![]() and others, the player should attempt to craft a wand, dagger or an INT-based shield of as low iLVL (You can view this by holding ALT while hovering over the item) as possible (recommended 1-11) by first using
and others, the player should attempt to craft a wand, dagger or an INT-based shield of as low iLVL (You can view this by holding ALT while hovering over the item) as possible (recommended 1-11) by first using ![]() Orb of TransmutationOrb of TransmutationStack Size: 40Upgrades a normal item to a magic itemRight click this item then left click a normal item to apply it.
Orb of TransmutationOrb of TransmutationStack Size: 40Upgrades a normal item to a magic itemRight click this item then left click a normal item to apply it.![]() and then using
and then using ![]() Orb of AlterationOrb of AlterationStack Size: 20Reforges a magic item with new random modifiersRight click this item then left click a magic item to apply it.
Orb of AlterationOrb of AlterationStack Size: 20Reforges a magic item with new random modifiersRight click this item then left click a magic item to apply it.![]() alongside of
alongside of ![]() Orb of AugmentationOrb of AugmentationStack Size: 30Augments a magic item with a new random modifierRight click this item then left click a magic item to apply it. Magic items can have up to two random modifiers.
Orb of AugmentationOrb of AugmentationStack Size: 30Augments a magic item with a new random modifierRight click this item then left click a magic item to apply it. Magic items can have up to two random modifiers.![]() to try and roll one of the following mods on these items:
to try and roll one of the following mods on these items:
- x to Level of all Physical Spell Skill Gems - wands, shields
- x to Level of all Fire Spell Skill Gems - wands, shields, daggers
- x to Level of all Cold Spell Skill Gems - wands, shields, daggers
- x to Level of all Lightning Spell Skill Gems - wands, shields, daggers
- x to Level of all Chaos Spell Skill Gems - wands, shields
Players should be aware that only ONE of these mods can roll on the item, as they all share the same mod group. Trying to gain, for example - x to Level of all Physical Spell Skill Gems and x to Level of all Cold Spell Skill Gems together is not possible, and the same is true for any other combination with the notable exception of x to Level of all Spell Skill Gems mod which is not available until iLVL 55 of the item, but at this stage it also becomes FAR less likely you will get both mods.
The average number of tries to hit one of the above mods is higher at lower iLVL and much lower at higher iLVL items. By crafting either one weapon and one shield or two weapons, you stand to have +2 to a specific gem, which is a massive boost to your power during any stage of the game, even in maps.
Terminology
- "WP" means Waypoint - use a Waypoint at a town to quickly navigate to the location
- "TP" means Teleport - use a Portal Scroll, the Portal skill or exit to character select to teleport straight to the last town you have been in
General racing tips to finish the campaign faster
Warning: This section is for people who wish to speed their way through to maps! Do NOT attempt this if you feel at all uncomfortable, as this can be more frustrating than efficient if you do not know how to do any of these mentioned tasks or feel uncomfortable in doing them.
For both experienced players and new one's alike, this section aims to provide a faster way to reach maps while employing a basic strategy which most racers tend to use. Note that you should only attempt this if you are confident in your abilities; Especially if you are playing on a Hardcore challenge league!
- Do not waste time killing regular monsters when you can help it. Focus on getting quest objectives and only stop to kill packs of blue/purple-tinted monsters. Very early into the campaign, rare (yellow) monsters are too hard to kill efficiently when you do not have good starting gear, so skip those too at least until the middle of Act 2.
- If this is not your first time, learn the layouts of each zone. Knowing where the exit will be based on the starting position of the zone entrance will save you tons of time.
- Only stop and do Trials of Ascendancy during the first time you start a league (they apply to all future characters so you only need to complete them once).
- Finish the side quests for skill points only if you're starved for points or aren't dealing enough damage or dying too fast. You should normally be able to skip all but the mandatory skill point quests until you're done with the campaign in order to save time.
- Don't bother crafting stuff - this consumes time. Instead - rely on what you find. This goes also for 3-4 linked items and above, items with resists and life, and other gear.
- Check the vendors every time you are back to town to turn in quests or enter a new town (do not backtrack to towns without good reason!). Look for movement speed boots, rings with life, items with resistances, items with more links than you have and items that have one of each socket colour sockets, all linked. For instance boots with 3 linked RGB, or 4 linked RGB[ANY] colours.
- Acquire your ascendancy at or before the level requirement to boost your build power. Try to do the Merciless Labyrinth run before you kill Kitava, as the resistance penalty is less harsh beforehand.
- Utilise quicksilver flasks to boost your speed, also use blink skills like
 DashDashSpell, Movement, Travel, Blink
Level: (1-20)
Cost: (4-16) Mana
Cooldown Time: 2.50 sec
Can Store 1 Use(s)
Cast Time: 0.15 secRequires Level 4Performs a series of quick teleports towards a targeted location. If using the "Attack in Place" option, the direction is reversed. Shares a cooldown with other Blink skills.(0-19)% increased Cooldown Recovery Rate
(0-57)% increased travel distance
This Spell's Cast Speed cannot be modified
Additional Effects From 1-20% Quality:
(0.5-10)% increased Cooldown Recovery RatePlace into an item socket of the right colour to gain this skill. Right click to remove from a socket.
 ,
,  Flame DashFlame DashSpell, Movement, Duration, Fire, Travel, Blink
Level: (1-20)
Cost: (8-23) Mana
Cooldown Time: 3.50 sec
Can Store 3 Use(s)
Cast Time: 0.80 sec
Critical Strike Chance: 6.00%
Effectiveness of Added Damage: 140%Requires Level 10Teleport to a location, damaging enemies and leaving a trail of burning ground. Shares a cooldown with other Blink skills.Deals (19.7-1738.6) Base Fire Damage per second
Base duration is 4.00 seconds
Deals (7-659) to (11-988) Fire Damage
Modifiers to Spell Damage apply to this Skill's Damage Over Time effect
(0-19)% increased Cooldown Recovery Rate
Additional Effects From 1-20% Quality:
(0.5-10)% increased Cooldown Recovery RatePlace into an item socket of the right colour to gain this skill. Right click to remove from a socket.
 or
or  FrostblinkFrostblinkSpell, Movement, Duration, Cold, Travel, Blink, AoE
Level: (1-20)
Cost: (12-22) Mana
Cooldown Time: (3.00 sec-2.60 sec)
Can Store 1 Use(s)
Cast Time: Instant
Critical Strike Chance: 5.00%
Effectiveness of Added Damage: 250%Requires Level 4Teleport to a location, damaging enemies and leaving Chilled ground in an area at both ends of the teleport. Shares a cooldown with other Blink skills.Deals (9-1144) to (14-1716) Cold Damage
Base duration is 3.00 seconds
+(0-0.3) metres to radius
(15-19)% increased Cooldown Recovery Rate for each Normal or Magic Enemy in Area
(80-99)% increased Cooldown Recovery Rate for each Rare or Unique Enemy in Area
(0-38)% increased maximum travel distance
Additional Effects From 1-20% Quality:
(0.5-10)% increased maximum travel distancePlace into an item socket of the right colour to gain this skill. Right click to remove from a socket.
 to pass obstacles or uneven ground faster. They also help you move out of dangerous situations quickly.
 - Utilise utility flasks - Module Error: No results found for item using search term "item_name = Topaz Flask",
 Sapphire FlaskSapphire FlaskLasts 8.00 Seconds
Consumes 20 of 50 Charges on use
+40% to Cold Resistance
+5% to maximum Cold ResistanceRequires Level 18Right click to drink. Can only hold charges while in belt. Refills as you kill monsters. ,
,  Ruby FlaskRuby FlaskLasts 8.00 Seconds
Consumes 20 of 50 Charges on use
+40% to Fire Resistance
+5% to maximum Fire ResistanceRequires Level 18Right click to drink. Can only hold charges while in belt. Refills as you kill monsters. ,
,  Quartz FlaskQuartz FlaskLasts 6.00 Seconds
Consumes 30 of 60 Charges on use
Phasing
+10% chance to Suppress Spell DamageRequires Level 27Right click to drink. Can only hold charges while in belt. Refills as you kill monsters. ,
,  Granite FlaskGranite FlaskLasts 6.00 Seconds
Consumes 30 of 60 Charges on use
+1500 to ArmourRequires Level 27Right click to drink. Can only hold charges while in belt. Refills as you kill monsters. and
and  Amethyst FlaskAmethyst FlaskLasts 6.50 Seconds
Consumes 35 of 65 Charges on use
+35% to Chaos ResistanceRequires Level 18Right click to drink. Can only hold charges while in belt. Refills as you kill monsters. to bolster your survivability during the campaign. You get these flasks as both drops during normal gameplay and as quest rewards during the campaign.
 - Learn to level up yourself and skill gems during zone transitions or just after a zone transition, this will reduce the time you stand around deciding what to do.
- Plan your build ahead of time, use Path Of Building and keep it open so you can quickly ALT+TAB out of the game, check your next steps and then allocate the passives while you play.
- Learn item mods and how they boost your build, look for items with those mods during your run and discard or sell items you do not find useful. Instead - focus on only what boosts your damage and survivability. As a general rule, you want Life, Resistances and Damage in that order. Once your resistances reach or exceed 75%, focus on Life then Damage.
Act 1

- Twilight Strand - Kill Hillock - Go to Town
- Town - Talk to NPCs - Go to Coast
- Coast - Tag WP - Go to Tidal Island
- Tidal Island - (Kill Hailrake for
 Quicksilver FlaskQuicksilver FlaskLasts 6.00 Seconds
Consumes 30 of 60 Charges on use
40% increased Movement SpeedRequires Level 4Right click to drink. Can only hold charges while in belt. Refills as you kill monsters. Reward - TP to town and claim reward) - WP/Go to Coast
 - Coast - Go to Mud Flats
- Mud Flats - Get
 Roseus GlyphRoseus GlyphIts pleasing sheen remains even in shadow,
as if it were somehow lit from within. ,
,  Ammonite GlyphAmmonite GlyphWhen put to the ear it whispers not of
the sea, but long dead incantations. and
and  Haliotis GlyphHaliotis GlyphIts corrugated surface brings a strange tingle
to the fingertips. This is no mere decoration. from Rhoa Nests - Activate Strange Glyph Wall - Go to Submerged Passage
 - Submerged Passage - Tag WP - Go to Flooded Depths
- The Flooded Depths - Kill Dweller of the Deep - TP to town
- Town - Talk to NPCs - WP to Submerged Passage
- Submerged Passage - Go to Ledge
- Ledge - Tag WP - Go to Climb
- The Climb - Kill Faun to unlock Navali - Go to Lower Prison
- Lower Prison - Once per league:Complete Trial - Go to Upper Prison
- Upper Prison - Go to Warden's Quarters
- Warden's Quarters - Follow Blood to Warden's Chambers
- Warden's Chambers - Kill Brutus - Go to Prisoner's Gate
- Prisoner's Gate - Tag WP - Go to Town
- Town - Talk to NPCs - WP to Prisoner's Gate
- Prisoner's Gate - Go to Ship Graveyard
- Ship Graveyard - Tag WP - Go to Ship Graveyard Cave
- Ship Graveyard Cave - Pick up
 AllflameAllflameDistilled from naked ambition and unfettered obsession,
the Allflame emanates a silvern warmth like no other,
and engulfs those moths fool enough to embrace it. - Exit Cave
 - Ship Graveyard - Kill Fairgraves - TP to Town
- Town - Talk to NPCs - WP to Ship Graveyard
- Ship Graveyard - Go to Cavern of Wrath
- Cavern of Wrath - Tag WP - Go to Cavern of Anger
- Cavern of Anger - Go to Merveil's Lair
- Merveil's Lair - Kill Merveil and Merveil, the Twisted - Go to Act II
Act 2

- Southern Forest - Go to Town
- Town - Go to Old Fields (top-right exit from town)
- Old Fields - (Enter the Den and kill the Great White Beast for Quicksilver Reward) - Go to Crossroads
- Crossroads - Tag WP (follow road) - Go up/left to Chamber of Sins
- Chamber of Sins Level 1 - Tag WP (center) - Go to Chamber of Sins Level 2 (direction of WP)
- Chamber of Sins Level 2 - Once per league:Solve Trail - Kill Fidelitas - Take
 Baleful GemBaleful GemThe withering glare of corruption, made
corporeal and pellucid in crystal. - TP to Town
 - Town - Talk to NPCs (for Heralds) - WP to Crossroads
- Crossroads - Go up/right to Broken Bridge
- Broken Bridge - Tag WP (follow road) - Kill Kraityn - Take
 Kraityn's AmuletKraityn's AmuletWhile this artefact resonates with power,
it is simply a piece in a larger puzzle. - TP to town
 - Once per league:Town - WP to Crossroads - Go to Fellshrine Ruins (right/down) - Go to The Crypt Level 1 - Solve Trial - TP to Town
- Town - Go to Riverways (bottom-left exit from town)
- Riverways - Tag WP (follow broken road) - Go to Western Forest (down)
- Western Forest - Tag WP (follow road) - Kill or Save Alira (left/top from WP) - (Take
 Alira's AmuletAlira's AmuletSegregated by treachery, this artefact
longs to be reunited with her sisters. if you killed her)
 - Western Forest - Kill Captain Arteri (end of road) - Take Module Error: No results found for item using search term "item_name = Thaumetic Emblem" - Open Thaumetic Seal - Go to Weaver's Chamber (other side than Alira)
- The Weaver's Chambers - Go to Weaver's Nest
- Weaver's Nest - Kill Weaver - Take
 Maligaro's SpikeMaligaro's SpikeMaligaro loved his tools, and took great
pains to keep them excruciatingly sharp. - TP to Town
 - Town - Talk to NPCs - WP to Act I town (Lioneye’s Watch) - Talk to Bestel for skill point - WP to Riverways
- Riverways - Go to Wetlands (up/left)
- Wetlands - Kill Oak (middle) - Take
 Oak's AmuletOak's AmuletA relic of a sundered relationship,
it awaits reconciliation with its kin. - Remove Tree Roots - Go to Vaal Ruins
 - Vaal Ruins - Activate Ancient Seal - Go to Northern Forest
- Northern Forest - Tag WP (top) - TP to Town - Talk to Eremir or Alira for Module Error: No results found for item using search term "item_name = The Apex" - WP to Northern Forest - Go to Caverns (top)
- Caverns - Tag WP - Go to Ancient Pyramid
- Ancient Pyramid - Go to Pyramid Apex
- The Apex - Activate Dark Altar - Kill Vaal Oversoul - Go to Act III
Act 3

- The City of Sarn - Tag WP - Kill Guard Captain - Talk to Clarissa - Go to Town
- Town - Go to Slums
- Slums - Go to Crematorium
- Crematorium - Tag WP - Once per league:Solve Trial - Kill Piety - Get Module Error: No results found for item using search term "item_name = Tolman's Bracelet" - TP to Town
- Town - Get
 Sewer KeysSewer KeysTo enter a city's bowels is to be
privy to its best-kept secrets. from Clarissa - Go to Slums
 - Slums - Open Sewer Grating (top) - Go to Sewers
- The Sewers - Take
 Bust of Gaius SentariBust of Gaius SentariThe Emperor honours Gaius Sentari as Supreme Servant.
"A man's thoughts are his shackles. A man's thoughts are his wings." - Tag WP - Take
  Bust of Hector TituciusBust of Hector TituciusThe Emperor honours Hector Titucius as Supreme Servant.
"Strength in purpose is strength in deed." and
and  Bust of Marceus LioneyeBust of Marceus LioneyeThe Emperor honours Marceus Lioneye as Supreme Servant.
"The road to Glory is paved with Sacrifice." - Go to Marketplace (top)
 - Marketplace - Tag WP - Once per league:Go to Catacombs (near WP) - Solve Trial - TP to Town
- Town - Talk to NPCs - WP to Marketplace - Go to Battlefront (up/left)
- Battlefront - Tag WP - Kill Aurelianus - Take
 Ribbon SpoolRibbon SpoolMachinery makes the minions.
Minions make the master. - Go to Docks (left)
 - Docks - Tag WP (near Fairgraves) - Take Module Error: No results found for item using search term "item_name = Thaumetic Sulphite" (near WP) - TP to Town - WP to Battlefront
- Battlefront - Go to Solaris Temple (up)
- Solaris Temple Level 1 - Tag WP - Go to Solaris Temple Level 2
- Solaris Temple Level 2 - Tag WP - Talk to Dialla for
 Infernal TalcInfernal Talc"A Virtue Gem is a raging thunderstorm imprisoned within a single raindrop.
Infernal Talc simply lets the storm out." - Malachai the Soulless - WP to Sewers
 - Sewers - Open Undying Blockage - Go to Ebony Barracks
- Ebony Barracks - Tag WP - Kill General Gravicius (up) - Go to Lunaris Temple (up)
- Lunaris Temple Level 1 - Tag WP - Go to Lunaris Temple Level 2
- Lunaris Temple Level 2 - Kill Piety - Take Module Error: No results found for item using search term "item_name = Tower Key" - TP to Town
- Town - Talk to NPCs - WP to Ebony Barracks
- Ebony Barracks - Go to Imperial Gardens (right/top right)
- Imperial Gardens - Tag WP - Once per league:Solve Trial (top) - Open Locked Room (top/right) - Go to Sceptre of God
- Sceptre of God - Go to Upper Sceptre of God
- Upper Sceptre of God - Go to Tower Rooftop
- Tower Rooftop - Kill Dominus and Dominus, Ascendant - Go to Act IV
All Skill Gems
If players require skill gems for their build, they can purchase it from Siosa at The Library:
- TP to Imperial Gardens - Go to Library (top-left)
- The Library - Tag WP (near Siosa) - Talk to Siosa - Activate Loose Candle (top-left/bottom-left of area) - Go to Archives
- The Archives - Find 4 Golden Pages - Go to Library
- Library - Talk to Siosa - Purchase Skill Gems
- If certain skill gems are unavailable at Siosa, then players must wait for Act 7 after which Lilly Roth offers all gems in the game
Act 4

- Aqueduct - Go to Town
- Town - Go to Dried Lake (bottom-left exit of Town)
- Dried Lake - Kill Voll - Take
 Deshret's BannerDeshret's BannerWhen the sun sets, the plains should be red.
 - TP to Town
 - Town - Open Deshret's Seal (near Niko) - Go to Mines
- The Mines Level 1 - Go to Mines Level 2
- The Mines Level 2 - Tag Deshret's Spirit - Go to Crystal Veins
- Crystal Veins - Tag WP - Go to Kaom's Dream
- Kaom's Dream - Go to Kaom's Stronghold
- Kaom's Stronghold - Tag WP - Kill King Kaom - Take Module Error: No results found for item using search term "item_name = The Eye of Fury" - TP to Town - WP to Crystal Veins
- Crystal Veins - Talk to Dialla - Go to Daresso's Dream
- Daresso's Dream - Kill Barkhul - Go to Grand Arena
- Grand Arena - Tag WP - Kill Unique Trio - Go to Ring of Blades - Kill Daresso - Take Module Error: No results found for item using search term "item_name = The Eye of Desire" - TP to Town
- Town - Talk to NPCs - WP to Crystal Veins
- Crystal Veins - Talk to Dialla - Go to Belly of the Beast
- The Belly of the Beast Level 1 - Go to Belly of the Beast Level 2
- The Belly of the Beast Level 2 - Kill Piety - Go to Harvest
- Harvest - Tag WP - Talk to Piety - Click Black Core - Run to the 3 Arenas:
- Kill Shavronne - Take
 Malachai's EntrailsMalachai's EntrailsMy organs tether me to mortality
like a chain. This chain holds me
from my true potential.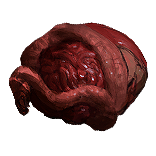
- Kill Maligaro - Take
 Malachai's HeartMalachai's HeartMy heart forces blood through my veins.
But one who may bleed may die, and
death is no fitting end to genius.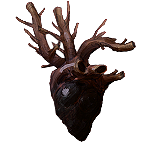
- Kill Doedre - Take
 Malachai's LungsMalachai's LungsMy lungs breathe the same air as
the foolish and the weak. May I be
yet another step removed from them.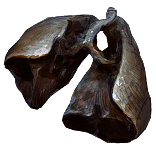
- Kill Shavronne - Take
- Harvest - Talk to Piety - Go to Black Core - Kill Piety and Malachai - Go to Black Heart
- Black Heart - Kill Malachai and all 3 Heart of the Beast - TP to Town
- Town - Talk to NPCs - Go to Ascent
- The Ascent - Walk to the summit - Activate Lever - Go to Act V
Act 5
.png)
- The Slave Pens - Tag WP - Kill Overseer Krow - Go to Town
- Town - Talk to NPCs - Go to Control Blocks
- Control Blocks - Pick up
 MiasmeterMiasmeter"We shall peer at these cosmic wonderments as they
wake and writhe within that deep and nameless dark."
- Vilenta, 'Miasmeter: A Thesis' (down/left) - Kill Justicar Casticus (top/right) - Take
  Eyes of ZealEyes of ZealEyes blazing with holy flame, the Pilgrim saw
a great palace descend from the burgeoning sky,
its gates barred against the unfaithful. - Go to Oriath Square
 - Oriath Square - Tag WP - Open Templar Courts Entrance (top right) - Go to Templar Courts
- The Templar Courts - Tag WP - Go to Chamber of Innocence
- The Chamber of Innocence - Tag WP - Go to Sanctum of Innocence (go leftmost, then right)
- The Sanctum of Innocence - Kill High Templar Avarius and Innocence - Go to Chamber of Innocence
- Chamber of Innocence - Go to Torched Courts
- Torched Courts - Go to Ruined Square
- Ruined Square - Tag WP (top left) - Go to Ossuary (near WP)
- Ossuary - Pick up
 Sign of PuritySign of PurityWrought from blood and gold, Innocence fashioned a weapon of tempered purity,
capable of banishing darkness, and bringing order to the chaos in men's hearts. - TP to Town
 - Town - Talk to NPCs - WP to Ruined Square
- Ruined Square - Go to Reliquary (down)
- Reliquary - Tag WP - Collect Module Error: No results found for item using search term "item_name = Tukohama's Tooth",
 Hinekora's HairHinekora's Hair"What we steal in life we repay in death."
- Karui Proverb and Module Error: No results found for item using search term "item_name = Valako's Jaw" (corners of zone) - TP to Town
 - Town - Talk to NPCs - WP to Ruined Square
- Ruined Square - Go to Cathedral Rooftop (left)
- Cathedral Rooftop - Go to Cathedral Apex
- Cathedral Apex - Activate Cradle of Purity - Kill Kitava and Kitava's Heart - Get teleported to Town
- Town - Sail to Act VI
Act 6

- Town - Go to Twilight Strand
- Twilight Strand - Kill all Monsters (for all skill gems from Lilly Roth) - TP to Town
- Town - Talk to NPCs - Go to Coast
- Coast - Go to Mudflats
- Mud Flats - Kill Dishonoured Queen - Take
 Eye of ConquestEye of Conquest"Weakness must be purged lest it
poison the blood of all Karui."
- Prayer to Tukohama - Go to Karui Fortress (top/left)
 - The Karui Fortress - Kill Tukohama (right) - Go to Ridge (outside of Arena and right)
- The Ridge - Tag WP - Go to Lower Prison
- Lower Prison - Tag WP - Once per league:Solve Trial - Go to Shavronne's Tower
- Shavronne's Tower - Go to Prison Rooftop
- Prison Rooftop - Kill Brutus and Shavronne - Go to Warden's Chambers
- Warden's Chambers - Go to Prisoner's Gate
- Prisoner's Gate - Tag WP - Go to Valley of the Fire Drinker
- Valley of the Fire Drinker - Kill Abberath - Go back to Prisoner's Gate
- Prisoner's Gate - Go to Western Forest
- Western Forest - Tag WP (follow road) - Go to Riverways (follow road)
- Riverways - Tag WP - Go to Wetlands (up/left)
- Wetlands - Go to Spawning Ground
- Spawning Ground - Destroy 3 Ryslatha's Nests - Kill Ryslatha - TP to Town
- Town - Talk to NPCs - WP to Riverways
- Riverways - Go to Southern Forest (follow road, then down/right)
- Southern Forest - Tag WP (end of area) - Go to Cavern of Anger (near WP)
- Cavern of Anger - Take Module Error: No results found for item using search term "item_name = The Black Flag" - Go to Beacon
- Beacon - Tag WP - Refuel the Beacon - Light the Beacon - Talk to Weylam Roth - Sail to Brine King's Reef
- The Brine King's Reef - Tag WP - Go to The Brine King's Throne - Kill Tsoagoth - Sail to Act VII
Act 7

- Town - Go to Broken Bridge
- Broken Bridge - Go to Crossroads (follow road/left)
- Crossroads - Tag WP (follow road) - Go to Fellshrine Ruins (down/right)
- Fellshrine Ruins - Go to Crypt (follow road then right)
- The Crypt Level 1 - Tag WP - Once per league:Solve Trial - Open Sarcophagus - Go to Crypt Level 2
- The Crypt Level 2 - Take
 Maligaro's MapMaligaro's Map"Certain maps can only be rendered in the most vivid of viscera."
- Inquisitor Maligaro - TP to Town
 - Town - WP to Crossroads
- Crossroads - Go to Chamber of Sins (left)
- Chamber of Sins Level 1 - Place Maligaro's Map into the Map Device - Start Map - Go to Maligaro's Sanctum
- Maligaro's Sanctum - Kill Maligaro, Black Death and Fidelitas - Take
 Black VenomBlack Venom"The spider is not defined by how
it lives, but by how it kills."
- Inquisitor Maligaro - TP to Chamber of Sins
 - Chamber of Sins Level 1 - Talk to Silk for
 Obsidian KeyObsidian Key"The cool blanket of shadows preserves our treasures."
- Inquisitor Maligaro - Go to Chamber of Sins Level 2 (direction of WP)
 - Chamber of Sins Level 2 - Once per league:Solve Trial - Open Secret Passage (top/right) - Go to Den
- Den - Tag WP - Go to Ashen Fields (top/right)
- The Ashen Fields - Tag WP - Go to Fortress Encampment (follow road to the left/down)
- The Fortress Encampment - Kill Greust - Go to Northern Forest
- Northern Forest - Tag WP - Go to Dread Thicket (left/down)
- Dread Thicket - Collect 7 Fireflies - Go to Den of Despair (center) - Kill Gruthkul - TP to Town
- Town - Talk to NPCs - WP to Northern Forest
- Northern Forest - Go to Causeway (top right/top left)
- The Causeway - Tag WP (end of area) - Take
 Kishara's StarKishara's StarTo the wily Kishara's eye, a star brighter than the sun.
 - Go to Vaal City
 - Vaal City - Tag WP (middle of zone) - Talk to Yeena - Go to The Temple of Decay Level 1
- The Temple of Decay Level 1 - Go to The Temple of Decay Level 2
- The Temple of Decay Level 2 - Kill Arakaali - Go to Act VIII
- TP to Act 7 Town - Talk to Weylam for reward
Act 8

- The Sarn Ramparts - Go to Sarn Encampment
- Sarn Encampment - Go to Toxic Conduits
- The Toxic Conduits - Open Loose Gate (end of area) - Go to Doedre's Cesspool
- Doedre's Cesspool - Go to Cauldron - Activate Valve - Kill Deodre - Tag WP - Go to Grand Promenade (down/left from WP)
- The Grand Promenade - Go to Bath House (follow right-hand fence)
- The Bath House - Tag WP - Kill Hector Titucius - Take Module Error: No results found for item using search term "item_name = Wings of Vastiri" - Once per league:Solve Trial (top or left) - Go to High Gardens (top or left)
- High Gardens – Go to Pools of Terror (right) - Kill Yugul - TP to Town
- Town - Talk to NPCs - WP to Bath House
- Bath House - Go to Lunaris Concourse (right)
- The Lunaris Concourse - Tag WP - Go to Lunaris Temple (top)
- Lunaris Temple Level 1 – Tag WP - Go to Lunaris Temple Level 2
- Lunaris Temple Level 2 - Kill Dusk - Take
 Moon OrbMoon Orb"Moonlight is a wise mother. The moon which bathes us in soft,
cooling light, does so with the intent of illuminating our paths.
Moonlight is wisdom. Moonlight is life."
- The Lunar Verses - TP to Town
 - Town - Talk to NPCs - WP to Toxic Conduits
- Toxic Conduits - Go to Quay (up/right from WP)
- The Quay - Take
 Ankh of EternityAnkh of Eternity"The amulet, it... whispers to me. Horrible things..."
 (down) - Go to Resurrection Site (down/left) - Kill Tolman - Talk to Clarissa (nearby) – Go to Grain Gate (up/right)
 - The Grain Gate - Tag WP - Kill Gemling Legion - Go to Imperial Fields
- The Imperial Fields - Tag WP (follow road up) - Go to Solaris Temple (follow road then further up)
- Solaris Temple Level 1 - Tag WP - Go to Solaris Temple Level 2 (up from WP)
- Solaris Temple Level 2 - Kill Dawn - Take Module Error: No results found for item using search term "item_name = Sun Orb" - TP to Town
- Town - Talk to NPCs - WP to Lunaris Concourse
- Lunaris Concourse - Go to Harbour Bridge (down/right)
- Harbour Bridge - Go to Sky Shrine (middle of bridge) - Activate Statue of the Sisters - Kill Lunaris and Solaris - Go to Act IX
Act 9

- The Blood Aqueduct - Tag WP - Go to Highgate
- Highgate - Go to Descent (top-right exit of Town)
- Descent - Go to Supply Hoist (twice) - Go to Vastiri Desert
- The Vastiri Desert - Tag WP - Open Storm-Weathered Chest - Kill Monsters - Pick up Module Error: No results found for item using search term "item_name = Storm Blade" - TP to Town
- Town - Talk to NPCs for
 Bottled StormBottled Storm"One should not entice the storm; one cannot invite the storm, or give warrant
to its tyrant-soul. We survive only by appeasing the storm, with gifts and
offerings of adoration. We hope that, in its mercy, it shall pass us by."
- Tempestology of the Maraketh, Repudion IV - TP to Vastiri Dessert
 - Vastiri Dessert - Go to Oasis (up/right)
- Oasis - Go to The Sand Pit - Kill Shakari - TP to Town - WP to Vastiri Dessert
- Vastiri Dessert - Go to Foothills (up/left)
- The Foothills - Tag WP (up) - Go to Boiling Lake (up/right from WP)
- The Boiling Lake - Kill Basilisk - Take
 Basilisk AcidBasilisk AcidNobility once thought to capture the Basilisks and keep them as exotic pets.
This only served to fatten the vileness of their hearts, and with a hateful
acid that festered inside, the creatures became soured to their very bones. - TP to Town
 - Town - WP to Foothills
- Foothills - Go to Tunnel (top/left)
- Tunnel - Tag WP - Once per league:Solve Trial (before the WP) - Go to Quarry
- Quarry - Tag WP - Go to Shrine of the Winds (top right/top left) - Kill Garukhan and Kira - Take
 Sekhema FeatherSekhema Feather"And how shall we know a sekhema worthy of rule?
By the anointing of the Great Roc, under whose wings we grow and soar."
- Maraketh Coronation Ritual - Go to Refinery (top right/top left)
 - The Refinery - Kill General Adus - Take Module Error: No results found for item using search term "item_name = Trarthan Powder" - TP to Town
- Town - Talk to NPCs - WP to Quarry
- Quarry - Talk to Sin - Go to Belly of the Beast
- Belly of the Beast - Go to Rotting Core
- The Rotting Core - Go to Black Heart
- Black Heart - Enter the Portals and kill Deodre, Maligaro and Shavronne - Kill Depraved Trinity - Sail to Act X
Act 10
Warning: After you kill Kitava, you will have -60% to all resistances, making all combat harder if you don't have gear with sufficient resistances. Therefore you might want to level up at The Blood Aqueduct in Act 9, or The Ravaged Square in Act 10, till you reach around level 70, and then kill Kitava. You may also want to complete the Merciless Labyrinth at this stage as it is much easier to complete with the -30% resistance penalty instead of the -60% one Kitava gives upon death.

- Oriath Docks - Go to Cathedral Rooftop
- Cathedral Rooftop - Go to Cathedral Apex (left) - Kill Plaguewing - Talk to Bannon - Go to Ravaged Square (top/right)
- The Ravaged Square - Tag WP (right/up) - Go to Torched Courts (right from WP)
- Torched Courts - Go to Desecrated Chambers
- The Desecrated Chambers - Tag WP – Go to Sanctum of Innocence (go leftmost, then right)
- Sanctum of Innocence - Kill Avarius – Take Module Error: No results found for item using search term "item_name = The Staff of Purity" - TP to Town
- Town - Talk to NPCs - WP to Ravaged Square
- Ravaged Square - Go to Ossuary (near WP) - Solve Trial - TP to Town
- Ravaged Square - Go to Control Blocks (down)
- Control Blocks - Tag WP (left of entrance) - Kill Vilenta (follow right-hand wall) - TP to Town
- Town - Talk to NPCs - WP to Ravaged Square
- Once per league:Ravaged Square - Go to Ossuary (next to WP) - Go to Bone Pits - Solve Trial - TP to Town - WP to Ravaged Square
- Ravaged Square - Talk to Innocence (right from WP) - Go to Canals
- The Canals - Go to Feeding Trough (follow canal)
- The Feeding Trough – Go to Altar of Hunger (top)
- Altar of Hunger - Kill Kitava - Go to Oriath - Talk to Lani for skill point
Next Steps
Once per league
These steps only need to be done with the first character you create in a league. It can be skipped for the second character onwards.
- Complete all the Trials of Ascendancy
- Oriath - Talk to NPCs - Go to Templar Laboratory (top right)
- The Templar Laboratory - Use Stairs - Wait till Map Device explodes - Talk to Officer Kirac - Exit to Oriath
- Oriath - Go to Fallen Courts (near lab entrance) - Go to The Fallen Courts (top right)
- The Fallen Courts - Take Module Error: No results found for item using search term "item_name = Vault Key" from Desk - TP to Oriath
- Oriath - Go to Haunted Reliquary (bottom left) - Go to The Haunted Reliquary
- The Haunted Reliquary - Open both Vault Keys - Stand on Flower tile - Use Stairs - Talk to Kirac - TP to Hideout
- Hideout - Talk to Kirac - Add reward map in Map Device - Enter Map - Complete Map - Talk to Kirac to unlock Atlas
Once per character
These steps are required for every new character you create in a league.
- Ascend your character in The Lord's Labyrinth
- Complete your Pantheon by upgrading your chosen gods
Passive Skill Points
In order to ensure that you have all the skill points from the Act quests & sidequests, do the following:
- Open the game chat window
- Type '/passives' and press Enter
- The game will display a list of the quests that award passive skill points
- All of the quests must display '1' or higher
- If any of the quests display '0', then ensure you have completed the quest and collected the reward from the town NPC
Incomplete Quests
Follow this quick guide to finish up any incomplete quests that grant passive skillpoints. You only need to do this if any of these quests display a "0" before it.
- The Dweller of the Deep - WP to The Submerged Passage, Go to Flooded Depths, Kill The Dweller of the Deep in Act 1, and talk to Tarkleigh in Act 1 Town
- The Marooned Mariner - WP to The Ship Graveyard in Act 1, find the AllflameAllflameDistilled from naked ambition and unfettered obsession,
the Allflame emanates a silvern warmth like no other,
and engulfs those moths fool enough to embrace it. in the Cave, Talk to and Kill Fairgraves, then talk to Bestel in Act 1 Town - The Way Forward - TP to Western Forest in Act 2, Kill Captain Arteri (end of road), take Module Error: No results found for item using search term "item_name = Thaumetic Emblem" and click Thaumetic Seal, then talk to Bestel in the Act 1 Town.
- Deal with the Bandits - Kill all 3 Bandits in Act 2, or save 1 Bandit and kill the other 2 (based on your build guide)
- Victario's Secrets - Find the 3 Platinum Busts in the Sewers and deliver it to Hargan in Act 3 Town.
- Piety's Pets - Kill Piety in Act 3, and talk to Grigor in Act 3 Town.
- An Indomitable Spirit - Find the Spirit of Deshret in the Mines accessible from Act 4 Town.
- In Service to Science - Find Vilenta's MiasmeterMiasmeter"We shall peer at these cosmic wonderments as they
wake and writhe within that deep and nameless dark."
- Vilenta, 'Miasmeter: A Thesis' in The Control Blocks in Act 5 (not the The Control Blocks in Act 10), and return it to her at the Act 5 Town. - Kitava's Torments - Collect 3 Kitava's Torments from the The Reliquary in Act 5 (not the The Reliquary in Act 10), and deliver it to Lani at the Overseer's Tower (Act 3 town)
- The Father of War - WP to The Ridge (Act 6), go to The Karui Fortress, Kill Tukohama, Karui God of War, find the Karui Fortress Exit
- The Puppet Mistress - WP to The Riverways in Act 6 (not The Riverways in Act 2) go to The Wetlands, and then to Spawning Grounds, kill Ryslatha, the Puppet Mistress, and talk to Tarkleigh in Act 6 Town
- Queen of Despair - WP to the Northern Forest in Act 7 (not the Northern Forest in Act 2) and go to Dread Thicket, Kill Gruthkul, Mother of Despair in Act 7
- The Cloven One - WP to Prisoner's Gate in Act 6 (not the Prisoner's Gate in Act 1), go to Valley of the Fire Drinker (right), Kill Abberath, the Cloven One, and talk to Bestel in Act 6 Town
- The Master of a Million Faces - Kill Greust and Ralakesh, Master of a Million Faces in Act 7
- Kishara's Star - WP to The Causeway in Act 7, find Kishara's StarKishara's StarTo the wily Kishara's eye, a star brighter than the sun. close to the Waypoint, and deliver it to Weylam in Act 7 Town
- Love is Dead - WP to The Grain Gate in Act 8, find The Quay entrance close to the Waypoint, find Ankh of Eternity, go to Resurrection Site, Kill Tolman, talk to Clarissa in Act 8 Town
- Reflection of Terror - WP to The Bath House, Kill Yugul, Reflection of Terror in Act 8, and talk to Hargan in Act 8 Town
- The Gemling Legion - Kill The Gemling Legion in Act 8 The Grain Gate, and talk to Maramoa in Act 8 Town
- Queen of the Sands - WP to The Vastiri Desert in Act 9, get the Module Error: No results found for item using search term "item_name = Storm Blade", talk to Petarus and Vanja, go to The Vastiri Desert, go to The Oasis, Kill Shakari, talk to Irasha in Act 9 Town
- The Ruler of Highgate - WP to The Quarry in Act 9, go to Shrine of the Winds, Kill Garukhan, Queen of the Winds, and talk to Irasha or Oyun in Act 9 Town
- Vilenta's Vengeance - Kill Vilenta in The Control Blocks in Act 10 (not the The Control Blocks in Act 5) and talk to Lani at Oriath Docks or Karui Shores
- An End to Hunger - Kill Kitava in Act 10, and talk to Lani at Oriath (in Epilogue) or Karui Shores