The Forbidden Sanctum
This article needs to be updated.
Reason: Mechanics related to Sanctum league were removed due to not going core in Version 3.21.0. Sanctum will be returning in version 3.22.0.
Please update this article to reflect newly available information. Relevant discussion may be found on the talk page.
The Forbidden Sanctum is an area first introduced in Sanctum league. It became a core mechanic in version 3.22.0. Players must explore a randomized dungeon, collecting Aureus coins and trying to reach the end before their Resolve runs out.
Overview
To enter the Forbidden Sanctum, players must place ![]() The Mortinomicon Exitio ImmortalisThe Mortinomicon Exitio ImmortalisArea Level: 68Hoc sciendo scribo ut verba mea perdant animam
The Mortinomicon Exitio ImmortalisThe Mortinomicon Exitio ImmortalisArea Level: 68Hoc sciendo scribo ut verba mea perdant animam
meam eternam. Mihi credendum est quod novus
deus meus non sit tam divinus quam ipse petit...![]() or a
or a ![]() Forbidden TomeForbidden TomeArea Level: (68-83)Mundus noster cecidit. Daemones ubique sunt. Librum
Forbidden TomeForbidden TomeArea Level: (68-83)Mundus noster cecidit. Daemones ubique sunt. Librum
hunc in sacrarium conicio, ut forte alius viam inveniat...Take this item to the Relic Altar in the Forbidden Sanctum to enter.![]() into the Relic Altar in the Forbidden Sanctum area. Doing so will grant access to the entire first floor of the Sanctum. Successfully completing a floor will unlock the next floor in the form of a Sanctum Research item. This can be traded, stashed, or placed in the Relic Altar to continue the Sanctum run. All of your progress, including Resolve, Inspiration, Aureus, Boons, Afflictions, etc. are carried over between floors. A Sanctum run contains 4 floors, each containing 8 rooms. The 8th room of each floor always contains a Boss.[1][2] Each floor after the first also adds +1 to area level from the initial Forbidden Tome (up to +3 on the last floor), up to a maximum of area level 83.
into the Relic Altar in the Forbidden Sanctum area. Doing so will grant access to the entire first floor of the Sanctum. Successfully completing a floor will unlock the next floor in the form of a Sanctum Research item. This can be traded, stashed, or placed in the Relic Altar to continue the Sanctum run. All of your progress, including Resolve, Inspiration, Aureus, Boons, Afflictions, etc. are carried over between floors. A Sanctum run contains 4 floors, each containing 8 rooms. The 8th room of each floor always contains a Boss.[1][2] Each floor after the first also adds +1 to area level from the initial Forbidden Tome (up to +3 on the last floor), up to a maximum of area level 83.
Crashing during a Sanctum room will reset the room's progress, as long as the player did not fail the room due to resolve loss. However, any changes to your resolve and inspiration during the room's progress will be retained. Aureus and rewards are locked in upon successful completion of a room[2]. It is possible to return back into the room from the reward room to kill any remaining enemies or open aureus chests.
Each Sanctum run is independent between characters on the same account.[2]
Relic Altar
- The Relic Altar is unlocked in Act 10 after unlocking the Forbidden Sanctum through the quest Aiding an Archivist.
- Each character has its own Relic Altar and uses separate Relics. However, the Relic Locker is shared between all of your characters in the same league.[2]
- Relics placed in the Relic Altar are locked in for the entire Sanctum run as soon as they are confirmed and cannot be added or removed in the middle of a run. The current run must be completed, failed, or forfeited to add or remove Relics.[2]
- The Relic Altar contains 18 inventory spaces, but 12 are initially locked and can be obtained by defeating specific minibosses or floor bosses.
-
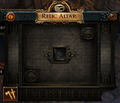
Empty Relic Altar before putting in a Forbidden Tome
-
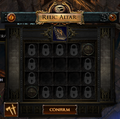
The Relic Altar in its initial state
-
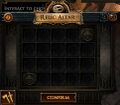
Fully unlocked Relic Altar


Unlocking
Locked inventory spaces for the Relic Altar can be unlocked by completing various rooms or floors in the Forbidden Sanctum.
| Row | Column | Unlocking Requirement |
|---|---|---|
| 1 | 1 | Complete the Sanctum Bellum room in the Sanctum Cathedral |
| 1 | 2 | Complete the Sanctum Archives |
| 1 | 3 | Complete the Sanctum Archives |
| 1 | 4 | Complete the Sanctum Vaults |
| 2 | 1 | Complete the Sanctum Vaults |
| 2 | 5 | Complete the Sanctum Cathedral |
| 3 | 1 | Complete the Sanctum Cathedral |
| 3 | 5 | Complete the Sanctum Necropolis |
| 4 | 2 | Complete the Sanctum Necropolis |
| 4 | 3 | Complete the Scriptorium room in the Sanctum Archives |
| 4 | 4 | Complete the Reliquary room in the Sanctum Vaults |
| 4 | 5 | Complete the Mausoleum room in the Sanctum Necropolis |
Mechanics
Resolve
- Resolve is an additional stat player characters have while exploring the Sanctum, somewhat similar to Ruin from Ultimatum league.
- The default maximum Resolve is 300. Resolve is maintained between rooms, and the player is ejected from the Sanctum if it hits 0, resetting all floors and rooms. Being ejected does not count as a death, nor does it remove experience.
- Resolve is lost from hits from monsters or traps in the Sanctum. Closer proximity to monsters reduces the Resolve lost on hit.[2]
- Minions and non-party allies do not cause Resolve to be lost if hit.
- A fixed amount of Resolve can be restored in Fountain rooms.
- Gaining additional Maximum Resolve will also cause the character to gain current Resolve of the same amount. Losing Maximum Resolve will not further affect the current Resolve.
- Accursed Pacts that cause you to Lose #% Maximum Resolve and the Minor Affliction "Spiked Exit" can be safely taken even with only 1 Maximum Resolve, and will have no effect (they cannot fail a run by itself).
- Maximum Resolve is soft capped at 1000; however, it is possible to exceed these values from sources that modify maximum Resolve at the start of a room/floor.
Resolve defences


Regular sources of defences such as evasion rating, damage reduction, and avoidance do not directly affect the loss of Resolve. However, the primary defence stats scale certain Resolve-specific defences found exclusively in the Sanctum:
- Resolve Mitigation: Mitigation prevents a portion of Resolve loss and scales with your Armour. #% Resolve Mitigation from Enemy Hits
- Resolve mitigation scales approximately logarithmically, up to 40% at ~3 million armour.
- Resolve Avoidance: This scales with your Evasion Rating. #% chance to Avoid Resolve loss from Enemy Hits
- Resolve avoidance scales approximately logarithmically, up to 40% at ~3 million evasion rating.
- Resolve Aegis: Up to 50% of Resolve loss from Enemy Hits is removed from the Aegis before Resolve or Inspiration. Aegis is broken when any Resolve is lost from Enemy hits. Aegis is instantly restored after 4 seconds of no Resolve being lost. Resolve Aegis scales with your maximum Energy Shield. # Resolve Aegis
- Resolve avoidance scales approximately logarithmically, up to ~65% at ~160 thousand energy shield.
Aureus
- Aureus is a type of non-tradeable currency similar to Azurite which can be found in the Sanctum from chests or from killed enemies. Aureus is collected automatically when the player is near it.
- Aureus can be traded to the merchant for a small amount of Resolve recovery, various Boons, or relics.
- Aureus is maintained between rooms and floors, and is reset when the Sanctum run ends.
- Aureus drops from Templar Stash chests, as well as from Guards and Bosses when killed.
Inspiration
- Inspiration acts as a buffer over your maximum Resolve, somewhat similar to Energy Shield in comparison to life.
- Inspiration cannot be recovered like Resolve.
- Inspiration is soft capped at 1000; however, it is possible to exceed these values from sources that modify Inspiration at the start of a room/floor.
Boon
- Above your inspiration bar, major boons are grouped in a symbol with a very thick and bright yellow bordered boon symbol, while all minor boons are grouped in a plain yellow bordered boon symbol. Boons are shown when hovering the according symbol.
- Boons grant various benefits to your Sanctum run and can help recover or mitigate damage to your Resolve, increase your Aureus and rewards, debuff monsters, grant Inspiration, or provide other helpful buffs.
| Boon Type | Image | Boon Name | Description |
|---|---|---|---|
| Major Boons | All-Seeing Eye | The Sanctum Map is fully revealed editor's note: overrides all afflictions and modifiers that hide parts of the Sanctum map, including Processional RelicRequires Level 64The Herald of the Scourge drops Sandstorm Visage Rooms are unknown on the Sanctum Map Cannot be used with Forbidden Tomes below level 75 This item is destroyed when applied to a SanctumUnmodifiable"The mysterious traveller saw the vilified brother chained to a cliff, where all could point and shout and deride him. In one fell swing, she cracked the mountainside, freeing him." - Lycia, the HereticPlace this item on the Relic Altar at the start of each Sanctum run | |
| Major Boons | Bronze Coin | Picking up Aureus coins recovers Resolve editor's note: recovers the same amount of Resolve as Aureus obtained; scaled by modifiers to Resolve recovery | |
| Major Boons | Bronze Descry | Ignore Resolve lost for 1 second after losing Resolve from a Hit | |
| Major Boons | Crystal Chalice | You cannot receive any more Minor Afflictions editor's note: Crystal Shard's Affliction to Boon transformation can still occur with this Boon | |
| Major Boons | Crystal Shard | The next Affliction you gain is converted into a random Minor Boon editor's note: This Boon's Affliction to Boon transformation can still occur with Crystal Chalice | |
| Major Boons | Gold Coin | Aureus coins found are doubled | |
| Major Boons | Golden Descry | Recover +15 Resolve on room completion | |
| Major Boons | Holy Descry | Upon reaching 0 Resolve, revive with full Resolve, lose 50% of your current Maximum Resolve, and remove a random Boon editor's note: this is the only Boon that can save a run with "Cannot Recover Resolve" or "Maximum Resolve is 1" modifiers, as long as the player has Boons to remove | |
| Major Boons | Holy Water | Gain a random Minor Boon when you use a Fountain | |
| Major Boons | Imperial Seal | Traps are Disabled | |
| Major Boons | Musty Wine | At the start of each room, a random Shrine effect is applied to you | |
| Major Boons | Priest's Descry | Upon reaching 0 Resolve, revive with 75% of Maximum Resolve once editor's note: does not work on no-hit runs | |
| Major Boons | Sacred Mirror | Duplicate up to 3 random Offer Rewards editor's note: only applies to rewards deferred to end of Floor/Sanctum; can apply to same reward more than once; applies immediately once obtained to your current rewards | |
| Major Boons | Silver Coin | Gain 20 Aureus coins when you lose Resolve from a Hit | |
| Major Boons | Silver Descry | Ignore the first Resolve lost from Hits in each room | |
| Minor Boons | Adrenaline Vial | Recover 50% of your Maximum Resolve on entering Boss Room | |
| Minor Boons | Arcane Aegis | Trigger Arcane Buffer when your Inspiration reaches 0 | |
| Minor Boons | Assassin's Blade | The next 10 Guards you Hit are killed Instantly | |
| Minor Boons | Assassin's Blade | The next 9 Guards you Hit are killed Instantly | |
| Minor Boons | Assassin's Blade | The next 8 Guards you Hit are killed Instantly | |
| Minor Boons | Assassin's Blade | The next 7 Guards you Hit are killed Instantly | |
| Minor Boons | Assassin's Blade | The next 6 Guards you Hit are killed Instantly | |
| Minor Boons | Assassin's Blade | The next 5 Guards you Hit are killed Instantly | |
| Minor Boons | Assassin's Blade | The next 4 Guards you Hit are killed Instantly | |
| Minor Boons | Assassin's Blade | The next 3 Guards you Hit are killed Instantly | |
| Minor Boons | Assassin's Blade | The next 2 Guards you Hit are killed Instantly | |
| Minor Boons | Assassin's Blade | The next Guard you Hit is killed Instantly | |
| Minor Boons | Black Pearl | Traps impact 50% reduced Resolve editor's note: affects both Resolve and Inspiration loss | |
| Minor Boons | Chipped Dice | The Merchant's Shop can be Rerolled | |
| Minor Boons | Divinia's Gift | Your next purchase from the Merchant has no cost | |
| Minor Boons | Enchanted Urn | 30% increased Effect of your non-Unique Relics | |
| Minor Boons | Engraved Orb | 100% increased Resolve recovered while Resolve is below 50% | |
| Minor Boons | Fountain of Youth | Gain +40 Maximum Resolve each time you use a Fountain | |
| Minor Boons | Fright Mask | Monsters deal 40% less Damage | |
| Minor Boons | Gilded Lyre | Gain +100 Inspiration at the start of each floor | |
| Minor Boons | Glowing Orb | The next time you go below 20% Resolve, heal for 50% Resolve | |
| Minor Boons | Gold Magnet | 50% more Aureus coins found | |
| Minor Boons | Gold Mine | Aureus coins found on this floor are doubled | |
| Minor Boons | Gold Trophy | Your aureus coins are increased by 10% on room completion (removed when you purchase something from the Merchant) | |
| Minor Boons | Hare Foot | 60% increased Movement Speed | |
| Minor Boons | Lilting Melody | Gain 150 Inspiration if you complete the next 2 rooms without losing Resolve or Inspiration | |
| Minor Boons | Lilting Melody | Gain 150 Inspiration if you complete the next room without losing Resolve or Inspiration | |
| Minor Boons | Lustrous Pearl | Traps are slower editor's note: can have negative effects - slows down the fog in Lycia's hallway sequence | |
| Minor Boons | Mellifluous Chorus | 40% less Resolve lost while you have Inspiration editor's note: affects both Resolve and Inspiration loss | |
| Minor Boons | Mirror of Fortune | Duplicate a random Offer Reward editor's note: only applies to rewards deferred to end of Floor/Sanctum; applies immediately once obtained to your current rewards | |
| Minor Boons | Ornate Dagger | You and your minions deal 50% more Damage | |
| Minor Boons | Prayer Beads | Cannot lose Resolve until you complete the next room editor's note: does not affect Inspiration loss | |
| Minor Boons | Rusted Chimes | Gain +30 Inspiration when you gain an Affliction | |
| Minor Boons | Rusted Descry | 50% increased Resolve recovered | |
| Minor Boons | Sanguine Vial | Monsters have 30% less Maximum Life | |
| Minor Boons | Scrying Crystal | You can see an additional room ahead on the Sanctum Map | |
| Minor Boons | Silver Chalice | The next Minor Boon you gain is converted into a random Major Boon | |
| Minor Boons | Silver Tongue | 50% reduced Merchant prices editor's note: stacks additively with Austerity Pact to make all Merchant items free | |
| Minor Boons | Tarnished Coin | 100% increased Aureus coins gained while Resolve is below 50% | |
| Minor Boons | Tarnished Descry | +150 to Maximum Resolve | |
| Minor Boons | Untuned Lute | +100 to Inspiration | |
| Minor Boons | Viscous Ichor | Monsters have 20% reduced Action Speed editor's note: can affect bosses' arena effect/despawn time | |
| Minor Boons | Wooden Effigy | Monsters impact 25% less Resolve editor's note: affects both Resolve and Inspiration loss | |
| Minor Boons | File:BoonLustrousLacquerIcon.png | Lustrous Lacquer | 50% more Defences editor's note: affects Resolve Mitigation, Resolve Avoidance, and Resolve Aegis |
Affliction
- Above your inspiration bar, major afflictions are grouped in a symbol with a very thick and bright purple bordered boon symbol, while all minor afflictions are grouped in a plain purple bordered affliction symbol. Afflictions are shown when hovering according symbol.
- Afflictions grant various downsides to your Sanctum run and can reduce or prevent Resolve recovery, spawn additional traps, buff monsters, affect your Aureus generation, or hide rooms or rewards on the Sanctum Map.
| Affliction Type | Icon | Affliction Name | Description |
|---|---|---|---|
| Major Afflictions | Anomaly Attractor | Rooms spawn Volatile Anomalies | |
| Major Afflictions | Chiselled Stone | Monsters Petrify on Hit editor's note: free for Trickster/Juggernauts with minimum Action Speed | |
| Major Afflictions | Cutpurse | You cannot gain Aureus coins | |
| Major Afflictions | Deadly Snare | Traps impact infinite Resolve editor's note: some persistent skills from Sanctum monsters (e.g. Undying Archmage's floating balls' projectiles and explosion) count as traps and will end the run immediately on hit | |
| Major Afflictions | Death Toll | Lose 250 Resolve after completing 8 rooms editor's note: this Resolve loss is considered similar to taking a hit, and will remove Inspiration before Resolve | |
| Major Afflictions | Demonic Skull | Cannot recover Resolve | |
| Major Afflictions | Ghastly Scythe | Losing Resolve ends your Sanctum (removed after 3 rooms) | |
| Major Afflictions | Ghastly Scythe | Losing Resolve ends your Sanctum (removed after 2 rooms) | |
| Major Afflictions | Ghastly Scythe | Losing Resolve ends your Sanctum (removed after 1 room) | |
| Major Afflictions | Glass Shard | The next Boon you gain is converted into a random Minor Affliction editor's note: This Affliction's Boon to Affliction transformation can still occur with Unassuming Brick | |
| Major Afflictions | Orb of Negation | Non-Unique Relics have no Effect | |
| Major Afflictions | Unassuming Brick | You cannot gain any more Boons editor's note: Glass Shard's Boon to Affliction transformation can still occur with this Affliction | |
| Major Afflictions | Veiled Sight | Rooms are unknown on the Sanctum Map editor's note: superseded by All-Seeing Eye | |
| Major Afflictions | File:CurseCorrosiveConcoctionIcon.png | Corrosive Concoction | No Resolve Mitigation, chance to Avoid Resolve loss or Resolve Aegis |
| Minor Afflictions | Accursed Prism | When you gain an Affliction, gain an additional random Minor Affliction | |
| Minor Afflictions | Black Smoke | You can see one fewer room ahead on the Sanctum Map editor's note: superseded by All-Seeing Eye | |
| Minor Afflictions | Blunt Sword | You and your Minions deal 25% less Damage | |
| Minor Afflictions | Chains of Binding | Monsters inflict Binding Chains on Hit (Binding Chains: You are slowed by Binding Chains. Move to break the chains) editor's note: 20% reduced Movement Speed per stack | |
| Minor Afflictions | Charred Coin | 50% less Aureus coins found | |
| Minor Afflictions | Concealed Anomaly | Guards release a Volatile Anomaly on Death | |
| Minor Afflictions | Corrupted Lockpick | Chests in rooms explode when opened | |
| Minor Afflictions | Dark Pit | Traps impact 100% increased Resolve editor's note: affects both Resolve and Inspiration loss | |
| Minor Afflictions | Deceptive Mirror | You are not always taken to the room you select editor's note: can randomly take player to a different connected room in the same column | |
| Minor Afflictions | Door Tax | Lose 30 Aureus coins on room completion | |
| Minor Afflictions | Empty Trove | Chests no longer drop Aureus coins editor's note: includes Reward Chests | |
| Minor Afflictions | Fiendish Wings | Monsters' Action Speed cannot be slowed below base Monsters have 30% increased Attack, Cast and Movement Speed | |
| Minor Afflictions | Floor Tax | Lose all Aureus on floor completion | |
| Minor Afflictions | Gargoyle Totem | Guards are accompanied by a Gargoyle | |
| Minor Afflictions | Golden Smoke | Rewards are unknown on the Sanctum Map editor's note: superseded by All-Seeing Eye | |
| Minor Afflictions | Haemorrhage | You cannot recover Resolve (removed after killing the next Floor Boss) | |
| Minor Afflictions | Honed Claws | Monsters deal 25% more Damage | |
| Minor Afflictions | Hungry Fangs | Monsters impact 25% more Resolve editor's note: affects both Resolve and Inspiration loss | |
| Minor Afflictions | Liquid Cowardice | Lose 10 Resolve when you use a Flask editor's note: removes Inspiration before Resolve; bricks a run with Ghastly Scythe; can also brick during Lycia's second form if flasks unless flasks are unequipped | |
| Minor Afflictions | Mark of Terror | Monsters inflict Resolve Weakness on Hit (Resolve Weakness: Hits against you impact 50% more Resolve) editor's note: affects both Resolve and Inspiration loss | |
| Minor Afflictions | Phantom Illusion | Every room grants a random Minor Affliction (Afflictions granted this way are removed on room completion) | |
| Minor Afflictions | Poisoned Water | Gain a random Minor Affliction when you use a Fountain | |
| Minor Afflictions | Purple Smoke | Afflictions are unknown on the Sanctum Map editor's note: superseded by All-Seeing Eye | |
| Minor Afflictions | Rapid Quicksand | Traps are faster also affects Skull traps and Lycia's hallway fog | |
| Minor Afflictions | Red Smoke | Room types are unknown on the Sanctum Map editor's note: superseded by All-Seeing Eye | |
| Minor Afflictions | Rusted Coin | The Merchant only offers one choice supersedes additional option Relic modifiers | |
| Minor Afflictions | Spiked Exit | Lose 5% of current Resolve on room completion editor's note: ignores Inspiration. Bricks a run with Ghastly Scythe. Cannot reduce Resolve below 1 | |
| Minor Afflictions | Spiked Shell | Monsters have 30% more Maximum Life | |
| Minor Afflictions | Spilt Purse | Lose 20 Aureus coins when you lose Resolve from a Hit editor's note: does not apply when losing Inspiration | |
| Minor Afflictions | Tattered Blindfold | 90% reduced Light Radius Minimap is hidden | |
| Minor Afflictions | Tight Choker | You can have a maximum of 5 Boons | |
| Minor Afflictions | Unhallowed Amulet | The Merchant offers 50% fewer choices | |
| Minor Afflictions | Unhallowed Ring | 50% increased Merchant prices | |
| Minor Afflictions | Unholy Urn | 50% reduced Effect of your non-Unique Relics | |
| Minor Afflictions | Unquenched Thirst | 50% reduced Resolve recovered | |
| Minor Afflictions | Voodoo Doll | 100% more Resolve lost while Resolve is below 50% editor's note: affects both Resolve and Inspiration loss | |
| Minor Afflictions | Weakened Flesh | -100 to Maximum Resolve editor's note: cannot reduce Resolve below 1 | |
| Minor Afflictions | Worn Sandals | 40% reduced Movement Speed | |
| Minor Afflictions | File:CurseShatteredShieldIcon.png | Shattered Shield | Cannot have Resolve Aegis |
Room Layouts
See the above link for annotated minimaps of each room type, including enemy locations and shortcuts. Each room other than the miniboss room contains several Guard unique monsters, as well as one of three tasks to complete the room:
- Find the Exit (locate the exit door)
- Linear: The exit door is located at the the end of a series of traps.
- Four corners: The exit door is located randomly in one of four directions on the map.
- Defeat all the Guards (defeat every rare monster and Unique Guard)
- Arena: Guards will spawn in waves in a small arena with traps.
- Linear: Guards are located in packs along a set path.
- Defeat the Boss (defeat minibosses based on map bosses)
| Room Goal | Defeat all the Guards (Linear) |
Defeat all the Guards (Arena) |
Find the Exit (Four corners) |
Find the Exit (Linear) |
Defeat the Boss (Miniboss) |
|---|---|---|---|---|---|
| Floor 1: Sanctum Archives |
Chambers of Inscription | Templar Annals 1 central Skull, walls and "2 lasers" |
Abandoned Library Ice Traps |
Holy Trials Mana Rune Squares |
Scriptorium Crimson Archbishop |
| Floor 2: Sanctum Vaults |
Derelict Caverns | Battlegrounds 1 central Skull, no walls, "lasers, donut", and "meteors, no walls" |
Decrepit Cellar Ice Traps |
Gauntlet Fireballs |
Reliquary Greater Wraith |
| Floor 3: Sanctum Cathedral |
Unholy Lair | Infernum 2 Skulls, dividing wall, "4 lasers, dividing wall", and "meteors, ∞ arena" |
Halls of Worship Ice Traps |
Crucible Mana Rune Squares and Skull |
Sanctum Bellum Aureate Guardian |
| Floor 4: Sanctum Necropolis |
Lost Catacombs | Desecrated Crypt 1 Skull, 90 degree arc, "4 lasers", and "meteors" |
Undercroft Ice Traps and Skull |
Entombment Fireballs or Mana Rune Squares + Lasers |
Mausoleum Colossal Lithomancer |
Note: most "Find the Exit" rooms have shortcuts that require movement skills.
Room Reward Types
Note: All room types other than boss rooms can become Afflicted. Afflicted rooms are indicated by a purple border and cause the character to gain an Affliction on entry.
Item Reward Room
![]() When players are offered rewards, they have three options:
When players are offered rewards, they have three options:
- Receive #x <item1> now
- Receive #x <item2> at end of the Floor ("at end of the next Floor" if on room 8)
- Receive #x <item3> on completing the Sanctum
The quantity and/or types of items improve based on the area level of the zone, the current floor, and how long you defer the reward, at the cost of risking the reward entirely if the player fails the run. Item chests have a 5 Aureus fee to open.
Rarer items like ![]() Mirror of KalandraMirror of KalandraStack Size: 10Creates a mirrored copy of an itemRight click this item then left click an equipable non-unique item to apply it. Mirrored copies cannot be modified.
Mirror of KalandraMirror of KalandraStack Size: 10Creates a mirrored copy of an itemRight click this item then left click an equipable non-unique item to apply it. Mirrored copies cannot be modified.![]() ,
, ![]() Divine OrbDivine OrbStack Size: 20Randomises the values of the random modifiers on an itemRight click this item then left click a magic, rare or unique item to apply it.
Divine OrbDivine OrbStack Size: 20Randomises the values of the random modifiers on an itemRight click this item then left click a magic, rare or unique item to apply it.![]() ,
, ![]() Exalted OrbExalted OrbStack Size: 20Augments a rare item with a new random modifierRight click this item then left click a rare item to apply it. Rare items can have up to six random modifiers.
Exalted OrbExalted OrbStack Size: 20Augments a rare item with a new random modifierRight click this item then left click a rare item to apply it. Rare items can have up to six random modifiers.![]() , and
, and ![]() Sacred OrbSacred OrbStack Size: 10Randomises the numeric values of base defences on an armourRight click this item then left click an armour to apply it.
Sacred OrbSacred OrbStack Size: 10Randomises the numeric values of base defences on an armourRight click this item then left click an armour to apply it.![]() become available on Floor 3 and 4.
become available on Floor 3 and 4.
Treasure Reward Room
![]()
![]() Contains chests of Aureus; comes in 2 types: Minor Treasure Reward (2 chests) or Major Treasure Reward (5 chests).
Contains chests of Aureus; comes in 2 types: Minor Treasure Reward (2 chests) or Major Treasure Reward (5 chests).
Fountain
![]() Fountain rooms contain an interactable Fountain which grants Recover 25% of Maximum Resolve for a 5 Aureus fee.
Fountain rooms contain an interactable Fountain which grants Recover 25% of Maximum Resolve for a 5 Aureus fee.
Benevolent Fountain
![]() Benevolent Fountain rooms contain an interactable Benevolent Fountain which grants Gain a Random Boon for a 150 Aureus fee.
Benevolent Fountain rooms contain an interactable Benevolent Fountain which grants Gain a Random Boon for a 150 Aureus fee.
Afflicted Fountain
![]() Afflicted Fountain rooms contain an interactable Afflicted Fountain which grants Recover 50% of Maximum Resolve, but also inflicts a random minor Affliction on you, for a 5 Aureus fee.
Afflicted Fountain rooms contain an interactable Afflicted Fountain which grants Recover 50% of Maximum Resolve, but also inflicts a random minor Affliction on you, for a 5 Aureus fee.
Radiant Fountain
![]() Radiant Fountain rooms contain an interactable Radiant Fountain which grants a random Boon, removes a random Affliction, and grants 200 Inspiration for a 5 Aureus fee. Rerolls Afflictions on Afflicted Rooms on the current floor if an Affliction was removed.
Radiant Fountain rooms contain an interactable Radiant Fountain which grants a random Boon, removes a random Affliction, and grants 200 Inspiration for a 5 Aureus fee. Rerolls Afflictions on Afflicted Rooms on the current floor if an Affliction was removed.
Merchant
![]() Merchant rooms contain the NPC Sister Divinia who sells you Boons or relics in exchange for Aureus. She can also recover 50 Resolve once per encounter for a 200 Aureus fee.
Merchant rooms contain the NPC Sister Divinia who sells you Boons or relics in exchange for Aureus. She can also recover 50 Resolve once per encounter for a 200 Aureus fee.
Accursed Pact
![]() Accursed Pact rooms allow you to accept any of three random Accursed Pacts which grants both an upside and downside, as well as an item reward upon accepting at least 1 Accursed Pact.
Accursed Pact rooms allow you to accept any of three random Accursed Pacts which grants both an upside and downside, as well as an item reward upon accepting at least 1 Accursed Pact.
| Icon | Upside | Downside |
|---|---|---|
 |
Gain a specific Minor Boon | Lose 25% Maximum Resolve |
 |
Gain a random Major Boon | Lose 50% Maximum Resolve |
 |
Gain 2 random Minor Boons | Lose 50% Maximum Resolve |
 |
Gain a specific Minor Boon | Gain a specific Minor Affliction |
 |
Gain a specific Minor Boon | Gain a random Minor Affliction |
 |
Lose a specific Minor Affliction | Gain a random Minor Affliction |
 |
Gain a random Minor Boon | Gain a random Minor Affliction |
 |
Lose a random Minor Affliction | Lose a random Minor Boon |
 |
Gain 3 random Minor Boons | Gain a specific Major Affliction |
 |
Lose 3 random Minor Afflictions | Gain a random Major Affliction |
 |
Gain a random Major Boon | Lose 3 random Minor Boons |
 |
Gain 100 Inspiration | Lose 200 Resolve |
 |
All but 1 Maximum Resolve is converted to Inspiration | Maximum Resolve is 1 |
 |
Gain Aureus coins equal to the amount of Inspiration removed | Remove all Inspiration |
 |
Gain 50% of current Resolve as Aureus coins | Lose 50% of current Resolve |
 Apex Pact |
50% less Resolve lost in Boss Rooms | 100% more Resolve lost in non-Boss Rooms |
 Austerity Pact |
Merchant prices are reduced by 50% | Monsters do not drop Aureus coins |
 Doubling Pact |
Guards are Twinned | Guards are Twinned |
 Indomitable Pact |
Gain 30 Inspiration at the start of every room | Inspiration resets every room |
 Pyrrhic Pact |
Resolve recovered is doubled | Maximum Resolve is lowered by 50% of recovered Resolve |
 Dauntless Pact |
50% more Rare Monsters | Rare Monsters have an additional Modifier |
The options that state "Lose #% Maximum Resolve" will not fail the run if Maximum Resolve is 1.
Attempting to use the Gain 200 Inspiration, Lose 200 Resolve Pact when you have less than 200 Resolve will cause an error, stating "Not enough Resolve".
Boss Room
![]()
![]()
![]()
![]() Always the 8th room of any floor.
Always the 8th room of any floor.
Enemies
Each room in the Sanctum contains a number of normal and rare enemies. All rare enemies must be killed before being able to complete the room.
Sanctum Guards
Each room contains several unique Sanctum Guards. All Guards must be killed before being able to complete the room.
| Guard type | Identifying features | Skills |
|---|---|---|
| Entombing Warden | Ice Level: (1-20) Cost: (4-5) Mana Cost & Reservation Multiplier: 50% Cooldown Time: 0.05 sec Can Store 1 Use(s) Attack Speed: 180% of baseRequires Level 34Channel to charge up your bow, gaining stages. Release to trigger one supported bow skill for each stage gained. If there are no supported skills, but at least one stage was gained, this skill will fire its own arrow instead. Cannot be used by Totems.Maximum 6 Stages This Skill's Arrows deal (50-80)% more Damage with Ailments per Stage This Skill's Arrows deal (70-108)% more Damage with Hits per Stage Supported Skills deal 40% less Damage Supported Skills deal (70-108)% more Damage with Hits per Snipe Stage Supported Skills deal (50-80)% more Damage with Ailments per Snipe Stage Additional Effects From 1-20% Quality: +(0.05-1) Maximum StagesPlace into an item socket of the right colour to gain this skill. Right click to remove from a socket. Level: (1-20) Cost: (7-11) Mana Attack Damage: (48-60)% of base Effectiveness of Added Damage: (48-60)% AoE Radius: 24Requires Level 12Fires multiple arrows into the air, to land in sequence after a delay, starting at the targeted location and spreading outwards in all directions. Each arrow deals damage in an area around it. Half of the arrows will land directly on targets if there are targets in their range.Fires (18-22) Arrows Additional Effects From 1-20% Quality: Fires +(0.2-4) ArrowsPlace into an item socket of the right colour to gain this skill. Right click to remove from a socket. | |
| Masked Combatant | Gray hood | Proximity Bomb, Level: (1-20) Cost: (6-13) Mana Reservation: (6-13) Mana Cooldown Time: 5.00 sec Can Store 3 Use(s) Cast Time: 0.50 secRequires Level 10Throws a mine that will teleport you to it when detonated. It covers both your escape and arrival with a cloud of smoke that blinds enemies, and gives you a temporary buff to movement speed. Shares a cooldown with other Blink skills.Mine lasts 8 seconds Base duration is (4.00-5.00) seconds Base secondary duration is 1.00 seconds Increases and Reductions to Mine Duration also apply to this Skill's Buff Duration Only one Mine of this type can Detonate in each Detonation Sequence Buff grants (20-29)% increased Movement Speed Mines cannot be Re-armed Mine Detonation is Instant Additional Effects From 1-20% Quality: Buff grants (1-20)% increased Movement SpeedPlace into an item socket of the right colour to gain this skill. Right click to remove from a socket. |
| Azure Assassin | Decelerating Projectile into Lightning Level: (1-20) Cost: (13-25) Mana Cast Time: 0.75 sec Critical Strike Chance: 6.00% Effectiveness of Added Damage: 270% AoE Radius: 2Requires Level 28An icy blast explodes around the caster, dealing cold damage to enemies, and leaving behind a whirling vortex which deals cold damage over time and chills enemies caught in it.Deals (49-779) to (73-1169) Cold Damage Base duration is 3.00 seconds Deals (116-2316.1) Base Cold Damage per second Modifiers to Spell Damage apply to this Skill's Damage Over Time effect Base radius is 2 metres Base secondary radius is 2 metres Additional Effects From 1-20% Quality: +(0.01-0.2) metres to radiusPlace into an item socket of the right colour to gain this skill. Right click to remove from a socket. Level: (1-20) Cost: (6-10) Mana Attack Damage: (80-99)% of base Effectiveness of Added Damage: (80-99)% Projectile Speed: 3260Fire a trio of electrical arrows that quickly dissipate, vanishing shortly after being loosed. The arrows are fired with such force that they create a burst of lightning, damaging enemies in a cone in front of you.50% of Physical Damage Converted to Lightning Damage (1-9) to (5-179) Added Lightning Damage Fires 3 Arrows +(0-0.5) metres to radius Increases and Reductions to Projectile Speed also apply to this Skill's Area of Effect Additional Effects From 1-20% Quality: (2-40)% increased Projectile SpeedPlace into an item socket of the right colour to gain this skill. Right click to remove from a socket. | |
| Templar Marksman | Dodge Roll, Flare Arrow, Level: (1-20) Cost: (8-10) Mana Attack Damage: (30-35)% of base Effectiveness of Added Damage: (30-36)%Requires Level 28Fires arrows up in the air, to rain down in an area. Each arrow deals area damage around where it lands, and they will all overlap on the targeted location.Fires 6 Arrows 100% of Physical Damage Converted to Fire Damage Penetrates (20-30)% Fire Resistance Additional Effects From 1-20% Quality: Fires +(0.05-1) ArrowsPlace into an item socket of the right colour to gain this skill. Right click to remove from a socket. | |
| Infernal Sentinel | Colossal Tower ShieldChance to Block: (43-48)% Armour: (1305-2103) Movement Speed: -3%Requires Level 67, 159 Str+(10-20) to maximum Life(150-250)% increased Armour +(20-25)% Chance to Block -1% Chance to Block Attack Damage for every 200 Fire Damage taken from Hits Recently (10-20)% of Cold Damage taken as Fire Damage (10-20)% of Lightning Damage taken as Fire Damage (10-20)% of Physical Damage taken as Fire Damage Scorch Enemies in Close Range when you Block"The newcomers warn of doom and death beyond mortal ken. I ask, why should we fear the fire when we serve the Lord of Light?" - Maxarius, the first High Templar |
Slash, Fire Thrust, Projectile Level: (1-20) Cost: 6 Mana Attack Speed: 80% of base Attack Damage: (125-237)% of base Effectiveness of Added Damage: (125-237)% AoE Radius: 20The character swings their weapon (or both weapons if dual wielding) in an arc, damaging monsters in an area in front of them. Only works with Axes and Swords.When Dual Wielding, Deals 60% Damage from each Weapon combined (2-75) to (3-113) Added Attack Physical Damage +(0-1) metre to radius Additional Effects From 1-20% Quality: +0.1 metres to radius per Nearby Enemy, up to a maximum of +1 metrePlace into an item socket of the right colour to gain this skill. Right click to remove from a socket. Level: (1-20) Cost: 10 Mana Attack Time: 0.50 sec Critical Strike Chance: 5.00% AoE Radius: 8 / 16Requires Level 10Charges at a targeted location or enemy, pushing away enemies in your path and repeatedly dealing off-hand damage in a small area in front of you. You deal damage in a larger area when you reach the target. The further you travel, the more damage you deal, and the greater your chance of stunning enemies. Cannot be supported by Multistrike.(12-134) to (18-200) Base Off Hand Physical Damage (3-5) to (4-7) Added Physical Damage per 15 Armour or Evasion Rating on Shield 75% increased Stun Threshold reduction on enemies at Maximum charge distance 100% more Damage with Hits at Maximum Charge Distance (90-109)% increased Movement Speed Additional Effects From 1-20% Quality: (1-20)% increased Movement SpeedPlace into an item socket of the right colour to gain this skill. Right click to remove from a socket. |
| Obsidian Sentinel | Terror MaulTwo Hand Mace Physical Damage: (144-157) to (467-537) Critical Strike Chance: (7.80-8.40)% Attacks per Second: 1.15 Weapon Range: 1.3 metresRequires Level 67, 212 Str25% chance to double Stun DurationAdds (43-56) to (330-400) Physical Damage (30-40)% increased Critical Strike Chance +(15-20)% to all Elemental Resistances Hits can't be Evaded Your Critical Strikes do not deal extra Damage You gain Onslaught for 4 seconds on Critical StrikeCommand like a king and nothing will stand in your way. |
Level: (1-20) Cost: 8 Mana Attack Speed: 80% of base Attack Damage: (150-230)% of base Effectiveness of Added Damage: (150-230)%Requires Level 28Slams the ground at a targeted location. If an enemy is near where you target, you'll teleport to it from a short distance away, slam, and create an area of consecrated ground. Can't be supported by Multistrike, and requires a Sword, Axe, Mace, Sceptre, Staff or Unarmed.Base duration is 4.00 seconds 50% of Physical Damage Converted to Fire Damage Deals up to 20% more Damage with Hits to closer targets Additional Effects From 1-20% Quality: Deals up to +(0.5-10)% more Damage with Hits to closer targetsPlace into an item socket of the right colour to gain this skill. Right click to remove from a socket. Level: (1-20) Cost: (11-28) Mana Cooldown Time: 2.00 sec Can Store 1 Use(s) Cast Time: 1.00 secRequires Level 4Summon a Holy Relic that stays near you. When you hit an enemy with an attack, the Holy Relic triggers a nova spell with a short cooldown, that deals physical damage to enemies and grants life regeneration to allies in an area around it. This life regeneration is higher when applied to minions.Maximum 1 Summoned Holy Relic (0-76)% more Minion Movement Speed Holy Relic's Nova Skill grants (5.2-154.6) Life regenerated per second to Allies Holy Relic's Nova Skill grants (9-464) Life regenerated per second to Minions Minions cannot Taunt Enemies Additional Effects From 1-20% Quality: (2-40)% increased Buff EffectPlace into an item socket of the right colour to gain this skill. Right click to remove from a socket. |
| Crimson Archmage | Highborn StaffStaff Physical Damage: 48-145 Critical Strike Chance: 8.25% Attacks per Second: 1.15 Weapon Range: 1.3 metresRequires Level 68, 89 Str, 89 Int+22% Chance to Block Spell Damage while wielding a StaffGrants Level 20 Brandsurge Skill Brand Skills have (50-100)% increased DurationThe pyre is never wasted on just one heretic. |
Level: (1-20) Cost: (4-7) Mana Cast Time: 0.20 sec Critical Strike Chance: 5.00% Effectiveness of Added Damage: 90%Requires Level 28Channels to build up a large explosion, which is released when you stop using the skill. The longer you channel, the larger the area of effect and damage of the explosion.Deals (31-405) to (46-608) Fire Damage 50% chance to Ignite enemies 165% more Spell Damage for each stage 60% more Damage with Ailments for each stage 10 maximum Stages +0.3 metres to radius per Stage Additional Effects From 1-20% Quality: +(0.05-1) to maximum StagesPlace into an item socket of the right colour to gain this skill. Right click to remove from a socket. Level: (1-20) Cost: (6-25) Mana Cast Time: 0.75 sec Critical Strike Chance: 6.00% Effectiveness of Added Damage: 370% Projectile Speed: 1040 AoE Radius: 9Unleashes a ball of fire towards a target which explodes, damaging nearby foes.Deals (9-1640) to (14-2460) Fire Damage 25% chance to Ignite enemies Base radius is (0.9-1.4) metres Additional Effects From 1-20% Quality: Base radius is (0.01-0.2) metresPlace into an item socket of the right colour to gain this skill. Right click to remove from a socket. |
| Deathly Archmage | Skull head | Level: (1-20) Cost: (8-23) Mana Cast Time: 0.70 sec Critical Strike Chance: 7.00% Effectiveness of Added Damage: 130% Projectile Speed: 1000Requires Level 12Launches shards of ice in rapid succession. After travelling a short distance they change to a second form, which moves much faster and pierces through enemies.Deals (22-568) to (33-852) Cold Damage Fires 2 Projectiles Second form has 600% increased Critical Strike Chance Second form has +(30-49)% to Critical Strike Multiplier Second form has 300% more Projectile Speed Additional Effects From 1-20% Quality: Second form has +(2-40)% to Critical Strike MultiplierPlace into an item socket of the right colour to gain this skill. Right click to remove from a socket. Level: (1-20) Cost: 8 Mana Attack Speed: 70% of base Attack Damage: (230-350)% of base Effectiveness of Added Damage: (230-350)% AoE Radius: 26Requires Level 28Slam the ground, damaging enemies in an area around the impact in three stages of increasing size. Enemies take slightly less damage on the second and third stage, and can only be hit by one stage. Works with Swords, Maces, Sceptres, Axes, Staves and Unarmed.100% of Physical Damage Converted to Cold Damage Second Stage deals 15% less Damage Third Stage deals 30% less Damage Base radius is 1.1 metres Base secondary radius is 2.1 metres Base tertiary radius is 3.1 metres Additional Effects From 1-20% Quality: Gain (0.75-15)% of Physical Damage as Extra Cold DamagePlace into an item socket of the right colour to gain this skill. Right click to remove from a socket. |
| Undying Archmage | Projectile Bolt, Vorana orbs, Level: (1-20) Cost: (2-5) Mana Cast Time: 0.25 sec Critical Strike Chance: 6.00% Effectiveness of Added Damage: 35%Requires Level 12Unleash orbs of energy while you channel that repeatedly jump towards the targeted location until their duration expires, dealing damage in small area after each jump. When you stop channelling, all remaining orbs explode, dealing higher damage in a larger area.Deals (6-168) to (8-252) Physical Damage 50% of Physical Damage Converted to Lightning Damage Base duration is 1.20 seconds +(0-0.4) metres to radius Orbs jump every 0.4 seconds Exploding Orbs deal 75% of Skill Damage for each 0.4 seconds of remaining Duration Additional Effects From 1-20% Quality: Base duration is (0.02-0.4) secondsPlace into an item socket of the right colour to gain this skill. Right click to remove from a socket. | |
| Deadly Bladedancer | Sweep Level: (1-20) Cost: 6 Mana Attack Speed: 80% of base Attack Damage: (125-237)% of base Effectiveness of Added Damage: (125-237)% AoE Radius: 20The character swings their weapon (or both weapons if dual wielding) in an arc, damaging monsters in an area in front of them. Only works with Axes and Swords.When Dual Wielding, Deals 60% Damage from each Weapon combined (2-75) to (3-113) Added Attack Physical Damage +(0-1) metre to radius Additional Effects From 1-20% Quality: +0.1 metres to radius per Nearby Enemy, up to a maximum of +1 metrePlace into an item socket of the right colour to gain this skill. Right click to remove from a socket. Level: (1-20) Cost: 10 Mana Cooldown Time: 2.00 sec Can Store 1 Use(s) Attack Speed: 120% of base Attack Damage: (142-210)% of base Effectiveness of Added Damage: (142-210)%Requires Level 10Teleports the character to a nearby monster and attacks with a melee weapon. If no specific monster is targeted, one is picked at random. Grants a buff that increases movement speed for a duration. The cooldown can be bypassed by expending a Frenzy Charge.Base duration is 3.00 seconds 10% increased Attack Speed per Frenzy Charge 15% chance to gain a Frenzy Charge on Hit Buff grants 20% increased Movement Speed Additional Effects From 1-20% Quality: (0.5-10)% chance to gain a Frenzy Charge on HitPlace into an item socket of the right colour to gain this skill. Right click to remove from a socket. |
Minibosses
| Boss name | Boss room name | Based on: |
|---|---|---|
| Crimson Archbishop | Sanctum Archives: Scriptorium | Kadaris, Crimson Mayor; cannot be hurt directly - defeat all the Crimson Priest clones while avoiding his spells. The spells' coverage increases as more clones are defeated. |
| Greater Wraith | Sanctum Vaults: Reliquary | The Restless Shade; creates several rows of coffins and uses Level: (1-20) Cost: (14-26) Mana Cast Time: 0.80 sec Critical Strike Chance: 5.00% Effectiveness of Added Damage: 170%Requires Level 28Fires a projectile that turns towards enemies in front of it, damaging and piercing through those it hits, and leeching some of that damage as energy shield. As the projectile travels, it repeatedly applies a short but powerful chaos damage over time debuff to each enemy in an area around it.Deals (21-885) to (31-1327) Chaos Damage Projectiles Pierce all Targets Deals (180.8-2642.5) Base Chaos Damage per second Base duration is 0.60 seconds Modifiers to Spell Damage apply to this Skill's Damage Over Time effect 4% of Spell Damage Leeched as Energy Shield Additional Effects From 1-20% Quality: Base duration is (0.01-0.2) secondsPlace into an item socket of the right colour to gain this skill. Right click to remove from a socket. |
| Aureate Guardian | Sanctum Cathedral: Sanctum Bellum | The Purifier; uses Divine Flare and rune slams. |
| Colossal Lithomancer | Sanctum Necropolis: Mausoleum | High Lithomancer; can create a small ring or cover a quarter or the entire arena in floating rocks that explode in an area after a delay. |
Floor Bosses
| Icon | Boss Name | Boss Room | Description |
|---|---|---|---|
| Varakath, the Waxen | Sanctum Archives: Candlelit Chapel | Based on Candlemass (POE2); also uses Level: (1-20) Cost: (8-23) Mana Cast Time: 0.70 sec Critical Strike Chance: 6.00% Effectiveness of Added Damage: 60%Requires Level 12Fires projectiles which fly in an arc, dealing area damage on impact with either enemies or the ground near where you target. Targeting farther away causes the projectiles to spread out and land over a wider area.Deals (7-270) to (10-405) Fire Damage Fires (5-7) Projectiles Additional Effects From 1-20% Quality: +(0.01-0.2) metres to radiusPlace into an item socket of the right colour to gain this skill. Right click to remove from a socket. | |
| Braom, the First Experiment Uzar, the Second Experiment |
Sanctum Vaults: Experimentation Chamber | Slow moving statues that use slams. Changes size based on the other's lost health. Both bosses enrage and heal to full when the other dies. Enraged Braom can use a multidirectional Enraged Uzar can also create a homing Blood Orb leaving Enervating Ground, or use a | |
| Xenathar, Templar Reaper | Sanctum Cathedral: Hall of Mirrors | Base on Vorana, Last to Fall; also uses wall-bouncing lasers, Divine Flare, and slow-moving Innocence projectile nova. | |
| Lycia, Unholy Heretic | Sanctum Necropolis: Sanctum Sanctorum | Form 1: Attacks with sword swings and lunges, circular sweep attacks, and a rotating red beam. Can summon Igneous Gargoyle adds and spawns a ring of DOT ground effect that drains Resolve and slowly moves through the arena. | |
| Lycia, Herald of the Scourge | The Beyond | Form 2: Uses a tornado beam, returning Level: (1-20) Cost: (6-25) Mana Cast Time: 0.75 sec Critical Strike Chance: 6.00% Effectiveness of Added Damage: 370% Projectile Speed: 1040 AoE Radius: 9Unleashes a ball of fire towards a target which explodes, damaging nearby foes.Deals (9-1640) to (14-2460) Fire Damage 25% chance to Ignite enemies Base radius is (0.9-1.4) metres Additional Effects From 1-20% Quality: Base radius is (0.01-0.2) metresPlace into an item socket of the right colour to gain this skill. Right click to remove from a socket. |
- Minibosses and bosses drop a large quantity of Aureus and have an increased chance to drop relics.
- Killing each miniboss and boss for the first time unlocks several tiles in the Relic Altar.
- Boss rooms contain a chest for any accumulated Item Rewards for the floor, as well as two additional Item Reward chests. Lycia's room only contains the accumulated Item Rewards chest.
Lycia
- After defeating Lycia's first form, the player can enter a portal to an arena called The Beyond to face her second form. Both forms must be defeated to access the reward chest
- Lycia's second form eliminates the Resolve bar and no longer uses Resolve mechanics. Dying during the second form will count as a failed run and prevent looting of the final reward chest.
Lycia, Herald of the Scourge in "The Beyond" will always drop a Unique Relic, as well as a chance to drop one of her exclusive items:
 Sandstorm VisageSandstorm Visage
Necromancer CircletEnergy Shield: (165-224)Requires Level 54, 112 Int(8-10)% increased Cast Speed
(200-250)% increased Energy Shield
Ignore Stuns while Casting
Base Spell Critical Strike Chance of Spells is equal to that of Main Hand Weapon
Cannot deal Critical Strikes with AttacksA fell wind brings death.
 The Balance of TerrorThe Balance of Terror
Cobalt JewelLimited to: 1+(10-15)% to all Elemental Resistances
<2 random curse modifiers>Fellshrine stood as a holy bastion opposite the
Chamber of Sins, and all that it represented.
For one to rise, the other must fall.Place into an allocated Jewel Socket on the Passive Skill Tree. Right click to remove from the Socket.
 Eternal DamnationEternal Damnation
Agate AmuletRequires Level 52+(16-24) to Strength and Intelligence+(40-70) to maximum Mana
+(-13-13)% to Chaos Resistance
-5% to all maximum Resistances
Gain additional Elemental Damage Reduction equal to half your Chaos Resistance
Maximum Endurance, Frenzy and Power Charges is 0The price of immortality is isolation.
 The Winds of FateThe Winds of Fate
Foul StaffWarstaff
Physical Damage: (520-585) to (968-1089)
Critical Strike Chance: 7.50%
Attacks per Second: 1.30
Weapon Range: 1.3 metresRequires Level 55, 94 Str, 94 Int+22% Chance to Block Attack Damage while wielding a Staff(700-800)% increased Physical Damage
+100% to Global Critical Strike Multiplier
75% of Physical Damage converted to a random Element
25% of Physical Damage Converted to Chaos Damage
Maximum Critical Strike Chance is 50%
Non-Critical Strikes deal no DamageLife... Death...
The whim of the cosmos.
Relics
Relics are a type of item that is exclusive to the Sanctum league. They can be placed in the Relic Altar to provide buffs to various mechanics related to the Forbidden Sanctum.
- Relics can be found in the Sanctum as rewards from guards, minibosses or bosses, or purchased from Sister Divinia for 300 Aureus.
- They can be stored in a special separate stash, which can also be placed as a hideout decoration.
- To equip a Relic, they must be placed in the Relic Altar on a 5x4 grid with some slots blocked off. Additional grid slots can be unlocked as you progress, up to a total of 18 slots.
- Relics are unmodifiable and are always Magic.
- Relics can be vendored 5 to 1 to obtain a new one with random modifiers.
| Item | Drop Level |
|---|---|
| Censer Relic | 1 |
| Processional Relic | 1 |
| Tome Relic | 1 |
| Urn Relic | 1 |
| Candlestick Relic | 75 |
| Papyrus Relic | 75 |
| Coffer Relic | 82 |
Party mechanics
- The Sanctum's choices are made by the map's instance owner.
- All party members share the Resolve bar.
Ruthless mode
In Ruthless mode, Item Rewards do not offer immediate rewards, and instead only offer either end-of-floor rewards or end-of-Sanctum rewards.
Version history
| Version | Changes |
|---|---|
| 3.24.0 |
|
| 3.23.1 |
|
| 3.22.1d |
|
| 3.22.1 |
|
| 3.22.0 |
|
| 3.20.2d |
|
| 3.20.2 |
|
| 3.20.1b |
|
| 3.20.1 |
|
| 3.20.0b |
|
| 3.20.0 |
|
References
- ↑ https://twitter.com/pathofexile/status/1598434028398706688
- ↑ 2.0 2.1 2.2 2.3 2.4 2.5 Community_Team (December 04, 2022). "Recently Asked Questions". Official Path of Exile Forums. Retrieved December 05, 2022.