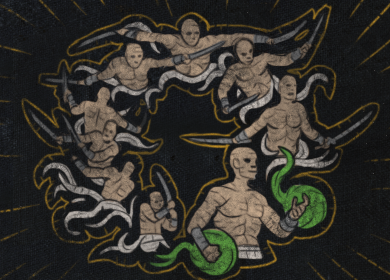
The map has a very consistent 'X' shaped layout, entrance is in the central platform. At each corner is a lever; which once activated, a portal returning to the central platform and pack of Void Remnants will appear. Upon activating all 4 levers, a fifth lever at the center becomes usable.
The fifth lever spawns 3 (1+2) waves consisting a Vortex and a pack of Void Remnants. Upon defeating these enemies, a portal to the boss arena will appear.
At 80/60/40/20% health opens a portal, goes to the other platform and forces players to follow (via portal similar to arena portal) with an ever-expanding Vortex
Azyran's RewardAzyran's Reward9Prismatic Jewel CorruptedMethod transcends shape and size. Do something in parallel long enough, and you will always find another way.
68
Her MaskHer Mask4Sacrifice FragmentTo her beauty you submit, lest your neck the great Queen slit.
23
HopeHope5Prismatic Ring CorruptedThe others succumbed to madness and depravity, but Lori fought on. Alone in the darkness, she could still see the dull light of hope's distant dawn.
The Lord of CelebrationThe Lord of Celebration4Sceptre of Celebration Shaper ItemThough they were a pack of elite combatants, the Emperor's royal guards were not ready to face one of his notorious parties.
80
The OpulentThe Opulent5Ring Item Level:100Wealth can, in fact, buy happiness.
23
The ProfessorThe Professor4The Putrid CloisterThe academic route to knowledge is wide and well-trodden; but it is the untaught one who scales the mountain.
68
The ThaumaturgistThe Thaumaturgist8Shavronne's Revelation Corrupted"Mastery of thaumaturgy is like any other pursuit; it requires dedication and sacrifice. Sometimes several sacrifices." - Shavronne of Umbra
23
The Tinkerer's TableThe Tinkerer's Table55x FossilTrying to bring your vision to life is enough to drive you mad.
33
The TrialThe Trial7Map Map Tier:15 CorruptedYou cannot journey to new lands until you have the courage to leave the safety of home.
73
Further InventionFurther Invention4Helmet Double-Influenced Item Item Level:100Why not both?
There are currently no unique items for this base item type.
Map variants
Item
Map Tier
Map Level
Map Series
Laboratory MapLaboratory MapMap Level: 69 Map Tier: 2 Guild Character: ÄMy last waking moments looked very much like this place... I miss it. I miss her.Travel to this Map by using it in a personal Map Device. Maps can only be used once.
2
69
Affliction
Laboratory MapLaboratory MapMap Level: 71 Map Tier: 4 Guild Character: ÄMy last waking moments looked very much like this place... I miss it. I miss her.Travel to this Map by using it in a personal Map Device. Maps can only be used once.
4
71
Crucible
Laboratory MapLaboratory MapMap Level: 72 Map Tier: 5 Guild Character: ÄMy last waking moments looked very much like this place... I miss it. I miss her.Travel to this Map by using it in a personal Map Device. Maps can only be used once.
5
72
The Forbidden Sanctum
Laboratory MapLaboratory MapMap Level: 71 Map Tier: 4 Guild Character: ÄMy last waking moments looked very much like this place... I miss it. I miss her.Travel to this Map by using it in a personal Map Device. Maps can only be used once.
4
71
Kalandra
Laboratory MapLaboratory MapMap Level: 80 Map Tier: 13 Guild Character: ÄMy last waking moments looked very much like this place... I miss it. I miss her.Travel to this Map by using it in a personal Map Device. Maps can only be used once.
13
80
Sentinel
Laboratory MapLaboratory MapMap Level: 74 Map Tier: 7 Guild Character: ÄMy last waking moments looked very much like this place... I miss it. I miss her.Travel to this Map by using it in a personal Map Device. Maps can only be used once.
7
74
Archnemesis
Laboratory MapLaboratory MapMap Level: 69 Map Tier: 2 Guild Character: ÄMy last waking moments looked very much like this place... I miss it. I miss her.Travel to this Map by using it in a personal Map Device. Maps can only be used once.
2
69
Scourge
Laboratory MapLaboratory MapMap Level: 79 Map Tier: 12 Guild Character: ÄMy last waking moments looked very much like this place... I miss it. I miss her.Travel to this Map by using it in a personal Map Device. Maps can only be used once.
12
79
Expedition
Laboratory MapLaboratory MapMap Level: 70 Map Tier: 3 Guild Character: ÄMy last waking moments looked very much like this place... I miss it. I miss her.Travel to this Map by using it in a personal Map Device. Maps can only be used once.
3
70
Ritual
Laboratory MapLaboratory MapMap Level: 72 Map Tier: 5 Guild Character: ÄMy last waking moments looked very much like this place... I miss it. I miss her.Travel to this Map by using it in a personal Map Device. Maps can only be used once.
5
72
Heist
Laboratory MapLaboratory MapMap Level: 81 Map Tier: 14 Guild Character: ÄMy last waking moments looked very much like this place... I miss it. I miss her.Travel to this Map by using it in a personal Map Device. Maps can only be used once.
14
81
Harvest
Laboratory MapLaboratory MapMap Level: 69 Map Tier: 2 Guild Character: ÄMy last waking moments looked very much like this place... I miss it. I miss her.Travel to this Map by using it in a personal Map Device. Maps can only be used once.
2
69
Delirium
Laboratory MapLaboratory MapMap Level: 69 Map Tier: 2 Guild Character: ÄMy last waking moments looked very much like this place... I miss it. I miss her.Travel to this Map by using it in a personal Map Device. Maps can only be used once.
2
69
Metamorph
Laboratory MapLaboratory MapMap Level: 76 Map Tier: 9 Guild Character: ÄMy last waking moments looked very much like this place... I miss it. I miss her.Travel to this Map by using it in a personal Map Device. Maps can only be used once.
9
76
Blight
Laboratory MapLaboratory MapMap Level: 74 Map Tier: 7 Guild Character: ÄMy last waking moments looked very much like this place... I miss it. I miss her.Travel to this Map by using it in the Templar Laboratory or a personal Map Device. Maps can only be used once.
7
74
Legion
Laboratory MapLaboratory MapMap Level: 76 Map Tier: 9 Guild Character: ÄMy last waking moments looked very much like this place... I miss it. I miss her.Travel to this Map by using it in the Templar Laboratory or a personal Map Device. Maps can only be used once.
9
76
Synthesis
Laboratory MapLaboratory MapMap Level: 75 Map Tier: 8 Guild Character: ÄMy last waking moments looked very much like this place... I miss it. I miss her.Travel to this Map by using it in the Templar Laboratory or a personal Map Device. Maps can only be used once.
8
75
Betrayal
Laboratory MapLaboratory MapMap Level: 75 Map Tier: 8 Guild Character: ÄTravel to this Map by using it in the Templar Laboratory or a personal Map Device. Maps can only be used once.
The following Maps have been removed from the Atlas: Ancient City, Bazaar, Caldera, Carcass, Chateau, City Square, Colonnade, Colosseum, Core, Coves, Crater, Dark Forest, Desert, Dig, Ghetto, Infested Valley, Ivory Temple, Laboratory, Mesa, Mud Geyser, Overgrown Ruin, Precinct, Racecourse, Ramparts, Relic Chambers, Sepulchre, Spider Lair, and Summit.
The following Maps have been added back to the Atlas: Ancient City, Arid Lake, Ashen Wood, Bramble Valley, Burial Chambers, Canyon, Conservatory, Core, Crater, Crimson Township, Crystal Ore, Desert, Dig, Dry Sea, Fields, Foundry, Gardens, Ghetto, Grotto, Jungle Valley, Laboratory, Overgrown Ruin, Park, Plaza, Ramparts, Relic Chambers, Sepulchre, Spider Lair, and Waste Pool.
The entire Atlas has been reworked. Many map names have changed, as have their balance, tier and position on the Atlas. Many maps have also had their boss fights swapped or completely reworked.
The rules used to generate monsters in endgame maps have been significantly reworked and rebalanced around the rate at which we expect players to reliably clear out the map. In general, narrow, linear maps will contain fewer total monsters than maps with complex layouts. We will be closely monitoring and adjusting the balance of this change and expect to make further changes and improvements over time.
 Azyran's Reward
 9
9 Her Mask
 4Sacrifice FragmentTo her beauty you submit,
 Hope
Hope 5Prismatic Ring
 Lingering Remnants
 16
16 The Encroaching Darkness
 8Map
8Map The Fiend
 11
11 The Gambler
 5Divination Card"I don't believe in karma. If it were real, I would never win."
 The Lord of Celebration
 4Sceptre of Celebration
 The Opulent
 5Ring
5Ring The Professor
 4
4 The Thaumaturgist
 8
8 The Tinkerer's Table
 55x FossilTrying to bring your vision to life is enough to drive you mad.
 The Trial
 7Map
7Map Further Invention
 4Helmet