Ritual: Difference between revisions
>Chesse20 No edit summary |
m (→Types) |
||
| (296 intermediate revisions by 28 users not shown) | |||
| Line 1: | Line 1: | ||
Rituals are a | {{Redirect|Ritual Totem|the hideout decoration|Ritual Totem (hideout decoration)}} | ||
[[File:Ritual in progress.png|thumb|right|300px|A Ritual in progress with monsters attacking the player within the Ritual Circle]] | |||
'''Rituals''' are encounters that spawn from Ritual Altars. After activating the Altar, players must defeat the enemies enclosed within the Ritual Circle, gaining Tribute in the process. Players can then spend the earned Tribute to purchase various types of [[#Rewards|rewards]] including pre-identified rare items. This encounter is considered [[Extra Content]] and has a baseline greater than 8% chance to appear in any non-unique [[map]] area. | |||
{{ | == Ritual Altars == | ||
[[File:Ritual Altar.png|thumb|right|300px|A Bitter Ritual Altar encountered within the Acts]] | |||
Ritual Altars can be randomly encountered while playing through the storyline and have a baseline greater than 8% chance to spawn in any end-game [[map]]. The amount of Altars that appear in each instance is either three or four (it was 1 to 4 in the [[Ritual league]]). It cannot be found within [[Heist]]s or in [[Delve]]. | |||
# Players must first kill the monsters guarding a ritual altar before being allowed to activate the ritual. | |||
# Clicking the altar begins the ritual and encloses players in the area of the Ritual Circle. | |||
# Monsters will spawn in multiple waves, each wave harder than the last. Tribute is earned from each monster killed. | |||
# After killing all the monsters within the ritual, or if players die before this, the combat phase ends and players can loot the altar. | |||
# All altars share a single spawn pool; when an altar is activated, all dead monsters within that altar circle get added to the pool. Monsters that appear in earlier altars will reappear but give 40% reduced points per reappearance. | |||
#* The reward penalty is additive. That is to say, the first time a monster is summoned it gives 100% points, on the next ritual it gives 60%, then 20% on the third, and finally no tribute at all on its fourth ritual. | |||
# If a naturally generated unique monster, including the map boss, spawns and dies within the ritual altar's influence, it will spawn in subsequent rituals. (with less points rewarded each time) | |||
# Clicking the altar displays the Ritual Favors interface that allows players to select their [[#Rewards|rewards]]. Some rewards are hidden and will be revealed after more rituals on the same map are completed. | |||
# Players can then move to other areas of the Map and complete all the altars in order to unlock more rewards. | |||
Small, moving blood pools will appear under killed enemies that count towards the ritual when activated. Luring faraway monsters into the circle will not add to the ritual encounter. | |||
The amount of tribute earned from killing the monsters during the encounter depends on it the slain monster rarity. Unique map bosses give 400 tribute, Rare 135 tribute, Magic 25 and Normal 10. Unique monsters that are not a map boss (i.e. rogue exiles) give 75 points. However it is important to note that the rarity of monsters spawned is not the same as the rarity of monsters killed. I.e. even if you kill exclusively normal monsters before activating the ritual altar, you would still encounter magic and/or rare ones during the encounter. Likewise, the exact modifiers of the magic/rare monsters slain are not preserved upon resummonning. | |||
Summoned minions (e.g. [[Necromancer_(monster)|Necromancer's]] undead or adds spawned by various map unique bosses) do not get added to the monster pool, and killing them during the encounter gives no tribute. | |||
[[File:Ritual Rewards button icon.png|60px]] Players can use the Ritual Rewards button to view the number of rituals in the area, number of completed rituals and the reward pool. | |||
== Rewards == | |||
[[File:Ritual Favors interface.png|thumb|right|300px|Ritual Favors interface that allows players to select their rewards.]] | |||
After completing a ritual, players can click the Altar to display the Favours interface that allows players to select their own rewards, in exchange for Tribute points. | |||
* All items are identified and players can see the exact mods and rolls of the item before selecting the reward. (Veiled mods can only be unveiled after purchase) | |||
* After a reward is selected and withdrawn, it cannot be returned/refunded. | |||
* All of the altars in the area are part of the same set, and share the same pool of rewards. | |||
* Completing a single ritual will only reveal 1/2 or 1/3 of the possible rewards. | |||
* Completing '''all''' the ritual altars in the area/map reveals '''all''' possible rewards. | |||
* Rewards can be rerolled for 2,000 tribute points. You can get two additional rerolls with {{psl|Profitable Prayers}} allocated, and one reroll per {{il|Ritual Scarab of Selectiveness}} used (up to 2). [[Immutable Dogma]] prevent you from rerolling. | |||
* Using {{il|Blood-filled vessel}} in map device would make {{c|mod|Rituals have 20% improved Favour Rewards}}, although it is not yet precisely understood what "improved" means exactly. | |||
Tip: It makes sense to complete all altars before deciding what to spend tribute on. If you do this then you will have maximum knowledge before making your choices - you will know how many points you have and all visible options. | |||
===Types=== | |||
Default Ritual rewards include: | |||
* Ritual-exclusive rewards: | |||
** {{il|Ritual Splinter}}s | |||
** {{il|Qotra's Regulator}}, {{il|Hand of the Fervent}}, {{il|Blackflame}}, {{il|Survivor's Guilt}}, {{il|Rotblood Promise}} | |||
** [[Ritual base type]] items | |||
*** {{il|Sorrow Mask}}, {{il|Atonement Mask}}, {{il|Penitent Mask}} | |||
*** {{il|Imp Crown}}, {{il|Demon Crown}}, {{il|Archdemon Crown}} | |||
*** {{il|Gale Crown}}, {{il|Winter Crown}}, {{il|Blizzard Crown}} | |||
*** {{il|Taxing Gauntlets}}, {{il|Gruelling Gauntlets}}, {{il|Debilitation Gauntlets}} | |||
*** {{il|Gauche Gloves}}, {{il|Southswing Gloves}}, {{il|Sinistral Gloves}} | |||
*** {{il|Leyline Gloves}}, {{il|Aetherwind Gloves}}, {{il|Nexus Gloves}} | |||
*** {{il|Basemetal Treads}}, {{il|Darksteel Treads}}, {{il|Brimstone Treads}} | |||
*** {{il|Cloudwhisper Boots}}, {{il|Windbreak Boots}}, {{il|Stormrider Boots}} | |||
*** {{il|Duskwalk Slippers}}, {{il|Nightwind Slippers}}, {{il|Dreamquest Slippers}} | |||
** [[Omen]]s | |||
* Fully identified [[rare]] equipment including | |||
** [[Incursion modifier]] rares | |||
** [[Influence]]d items | |||
** [[Synthesised item]]s | |||
** [[Fractured item]]s | |||
** +30% quality weapons and armour | |||
** 5-linked or 6-linked weapons and armour | |||
** [[Veiled item]]s, including double-veiled | |||
* [[Unique item]]s | |||
* Quality [[skill gem]]s | |||
* Corrupted skill gems (Level 21 or 23% quality; CANNOT have 21/23 gem since [[version 3.15.0]]) | |||
* Quality [[flask]]s {{confirm|reason=never observed across 300+ ritual screens in 3.24. Bad luck?}} | |||
* All types of [[currency]] {{confirm|reason=perhaps not quite 'all'? E.g. tainted currency seems to be absent..}} | |||
** basic currency including {{il|Chaos Orb|Chaos Orbs}}, {{il|Exalted Shard|Exalted Shards}}, {{il|Exalted Orb|Exalted Orbs}} and {{il|Divine Orb|Divine Orbs}} | |||
** {{il|Simulacrum Splinter|name=Simulacrum Splinters}}, [[Timeless Splinter|Timeles Splinters]] and [[Breach Splinter|Breach Splinters]] | |||
* [[Delirium Orb]]s | |||
* [[Divination card]]s | |||
* {{il|Stacked Deck}}s {{confirm|reason=possibly removed in 3.24 with stacked deck overhaul}} | |||
* [[Essence]]s | |||
* [[Fossil]]s and [[Resonator]]s{{confirm|reason=resonators never observed across 300+ ritual screens in 3.24. Bad luck?}} | |||
* [[Map]]s, including 8-mod corrupted, [[Delirium#Delirious_map_modifier|delirious maps]], [[Elder Guardians|elder]] and [[Guardians of the Void|shaper]] guardian maps. | |||
* [[Map fragment]]s (including [[Sacrifice Fragment|Sacrifice Fragments]], [[Mortal Fragment|Mortal Fragments]] and {{il|Offering to the Goddess}}) | |||
* [[Scarab]]s | |||
* [[Jewel]]s and [[Abyss Jewel]], including [[fractured]] and [[synthesised]] versions | |||
* [[Cluster Jewel|Cluster Jewels]] | |||
* [[Heist]] [[Contract]]s and [[Blueprint]]s, {{il|Rogue's Marker}}s | |||
* [[Oil|Oils]] | |||
* [[Talisman|Talismans]] | |||
Special Reward Rituals (ones that resemble the {{il|Gore Portal Effect}} MTX) cause the entire window to only contain [[Divination Card]]s, [[Currency]], or [[Unique]] items. Rerolling in this scenario will always return a Special Reward window. | |||
===Deferring=== | |||
Deferring allows players to mark rare rewards that they cannot presently afford with the Tribute they have, and those same items will re-appear in a later ritual. | |||
*Players must pay 10% + a 5% fee (without any atlas modifiers) to defer that item. Both % are relative to the original cost, with some rounding applied. | |||
**The original cost is the initial cost of an item before it's defered once, not the current cost of the item. So deferring an item will always cost the same, even when it shows up again. | |||
*Deferred items reappear in a random later area,<ref name="RitualQ&A2"/> discounted by 10% of its original cost. | |||
*It is currently undetermined how long it takes for deferred items to show back up, however, more valuable items will take longer to reappear. | |||
*An item can be deferred 9-10 times (10 times sometimes with rounding) until the prices is under 10% of the original. At this point you get a message telling you that the item deffering failed, because the price is too low. | |||
**Sometimes deferring an item can be more costly than just buying it, when the item was deffered 9 times already, because of the deferral fee (the extra 5%). | |||
*An deferred item which shows back up, that is not deferred again, will increase in price by 10% of it's original cost (if you fail to defer it once), if the item reaches it's original price or is not deferred for multiple reoccurences, it has a red border and will not show up again, unless you defer it again.<ref name="RitualQ&A1"/> | |||
*You can infinitly ping pong an item by deferring it and then not deferring it, alternating times. While this is inefficient, it might be necessary to reserve another good item due to a lack of tribute | |||
*There is a maximum amount of items that can be in the deferred at the same time. (Not in a single ritual, but in total in the invisible defer pool or queue.) If you want to defer an item while the maximum defer amount is reached, you will have to buy an item from the previously defered items, that is showing in your current ritual rewards. | |||
*The pool of deferred items is not shared between different characters in the same account in the same league - each character gets their own deferred items pool. This is in mild contrast with Atlas tree and item Stash both being shared. | |||
===Video=== | |||
{{#ev:youtube|PXMLgXRdWjM}} | |||
==Types== | |||
All of the Altars in the area are part of the same set, and share the same pool of rewards. Each successive Ritual in an area is harder and offers better rewards. Rituals spawn in various types, giving a different set of buffs to enemies and environmental effects. | |||
Ritual Altars can have various modifiers, listed below. Each modifiers gives the ritual a different set of buffs to enemies and environmental damage. Altars surrounded by a fence have all Ritual rewards of the same type, either all [[Unique]] items, or [[Currency]] items, or [[Divination Card]]s. | |||
{| class="wikitable" | |||
|+ | |||
!Category | |||
!Type | |||
!Image | |||
!Affixes | |||
|- | |||
| rowspan="6" |Elemental | |||
|Infernal | |||
|[[File:Infernal Ritual Altar.png|200px]] | |||
| | |||
*{{c|mod|Monsters deal extra Fire Damage and can Ignite.}} | |||
*{{c|mod|Meteors hit the ground that shoot out smaller fireballs that do damage randomly.}} | |||
|- | |||
|Apocalyptic | |||
|[[File:Apocalyptic Ritual Altar.png|200px]] | |||
| | |||
* {{c|mod|Monsters deal extra Fire Damage and can Ignite}} | |||
* {{c|mod|Meteors fall from the sky}} | |||
* {{c|mod|Hidden: All rewards are of the same type [Uniques/Currency/Divination Cards]}} | |||
|- | |||
|[[Bitter Ritual|Bitter]] | |||
|[[File:Bitter Ritual Altar.png|200px]] | |||
| | |||
*{{c|mod|Monsters deal extra Cold Damage and can Freeze.}} | |||
*{{c|mod|Icy beams rotate.}} | |||
|- | |||
|Glacial | |||
|[[File:Glacial Ritual Altar.png|200px]] | |||
| | |||
*{{c|mod|Monsters deal extra Cold Damage and can Freeze.}} | |||
*{{c|mod|Icy beams rotate.}} | |||
* {{c|mod|Hidden: All rewards are of the same type [Uniques/Currency/Divination Cards]}} | |||
|- | |||
|[[Fluctuant Ritual|Fluctuant]] | |||
|[[File:Fluctuant Ritual Altar.png|200px]] | |||
| | |||
*{{c|mod|Monsters deal extra Lightning Damage and can Shock.}} | |||
*{{c|mod|Skull Spires fire lightning orbs at each other.}} | |||
|- | |||
|Volatile | |||
|[[File:Volatile Ritual Altar.png|200px]] | |||
| | |||
*{{c|mod|Monsters deal extra Lightning Damage and can Shock.}} | |||
*{{c|mod|Skull Spires fire lightning orbs at each other.}} | |||
* {{c|mod|Hidden: All rewards are of the same type [Uniques/Currency/Divination Cards]}} | |||
|- | |||
| rowspan="3" |Chaos | |||
|Malevolent | |||
|[[File:Malevolent Ritual Altar.png|200px]] | |||
| | |||
*{{c|mod|Monsters deal extra chaos damage and can wither}} | |||
*{{c|mod|Anomalies Fire Chaos Projectiles}} | |||
|- | |||
|Dreaded | |||
|[[File:Dreaded Ritual Altar.png|200px]] | |||
| | |||
*{{c|mod|Monsters deal extra chaos damage and can wither}} | |||
*{{c|mod|Anomalies Fire Chaos Damage}} | |||
|- | |||
|Foul | |||
|[[File:Foul Ritual Altar.png|200px]] | |||
| | |||
*{{c|mod|Monsters deal extra Chaos Damage and can Poison}} | |||
*{{c|mod|[[Toxic vines]] grasp you while stationary}} | |||
|- | |||
| rowspan="3" |Totem | |||
|Fortressed | |||
|[[File:Fortressed Ritual Altar.png|200px]] | |||
| | |||
*{{c|mod|Monsters take reduced damage}} | |||
*{{c|mod|Fortress totems further reduce damage monsters take}} | |||
|- | |||
|Violent | |||
|[[File:Violent Ritual Altar.png|200px]] | |||
| | |||
*{{c|mod|Monsters deal extra Physical Damage and can inflect Bleeding.}} | |||
*{{c|mod|Pain Totems pulse damaging waves.}} | |||
|- | |||
|Sanguine | |||
|[[File:Sanguine Ritual Altar.png|200px]] | |||
| | |||
* {{c|mod|Monsters do increased physical damage and can cause bleeding.}} | |||
* {{c|mod|Pain totems pulse damaging waves.}} | |||
|- | |||
| rowspan="5" |Empower Enemies | |||
|Ensconced | |||
|[[File:Ensconced Ritual Altar.png|200px]] | |||
| | |||
*{{c|mod|Monsters gain extra energy shield based on life.}} | |||
*{{c|mod|Altar restores monster energy shield.}} | |||
|- | |||
|[[Smothering Mist|Suppressive]] | |||
|[[File:Suppressive Ritual Altar.png|200px]] | |||
| | |||
*{{c|mod|Monsters regenerate life.}} | |||
*{{c|mod|[[Smothering Mist]] reduces health regeneration.}} | |||
|- | |||
|Charged | |||
|[[File:Charged Ritual Altar.png|200px]] | |||
| | |||
*{{c|mod|Monsters gain endure, frenzy, or power charges on hit}} | |||
*{{c|mod|Altar Charges Up and discharges monsters}} | |||
|- | |||
|Emboldening | |||
|[[File:Emboldening Ritual Altar.png|200px]] | |||
| | |||
*{{c|mod|Monsters are massive}} | |||
*{{c|mod|Altar causes monsters to grow even larger}} | |||
|- | |||
|[[Invigorating Ritual|Invigorating]] | |||
|[[File:Invigorating Ritual Altar.png|200px]] | |||
| | |||
*{{c|mod|Monsters are fast}} | |||
*{{c|mod|[[Gales]] further accelerate you and monsters}} | |||
|- | |||
| rowspan="3" |Uncategorized | |||
|Haunted | |||
|[[File:Haunted Ritual Altar.png|200px]] | |||
| | |||
*{{c|mod|Tormented Spirits haunt the ritual}} | |||
|- | |||
|Vaal | |||
|[[File:Vaal Ritual Altar.png|200px]] | |||
| | |||
*{{c|mod|Items dropped by slain monsters are corrupted.}} | |||
*{{c|mod|Favours may cost less Tribute on average.}} | |||
*{{c|mod|[[Atziri]]'s apparition protects the altar.}} | |||
|- | |||
|[[Gambler's Greed|Opulent]] | |||
|[[File:Opulent Ritual Altar.png|200px]] | |||
| | |||
*{{c|mod|Monsters have greatly increased item rarity and quantity.}} | |||
*{{c|mod|Contains cursed coin showers.}} | |||
* {{c|mod|Hidden: All rewards are of the same type [Uniques/Currency/Divination Cards]}} | |||
|} | |||
<br /> | |||
==Related items== | |||
{{Drop enabled base item table | |||
|tables=item_stats | |||
|join=items._pageID=item_stats._pageID | |||
|where=((items.class_id="MapFragment" AND items.name LIKE "%Ritual%") | |||
OR items.name LIKE "%Blood-filled Vessel%" | |||
OR items.name LIKE "%Ritual Vessel%" | |||
) | |||
AND items.name NOT LIKE "%Leaguestone%" | |||
|large=1 | |||
|level=1 | |||
|stat=1 | |||
}} | |||
==Related Atlas passive skills== | |||
{{Query base passive skills | |||
|q_where= | |||
passive_skills.ID LIKE "%Atlas%" AND | |||
passive_skills.ID LIKE "%Ritual%" AND | |||
passive_skills.ID NOT LIKE "%mastery%" | |||
}} | |||
==Related Scarabs== | |||
{{Drop enabled base item table | |||
|where= | |||
items.class_id="MapFragment" | |||
AND items.name LIKE "Ritual Scarab%" | |||
|large=1 | |||
|description=1 | |||
}} | |||
==Version history== | |||
{{Version history table header}} | |||
{{Version history table row|3.24.0| | |||
* Omens are now offered as Ritual Rewards. | |||
}} | |||
{{Version history table row|3.23.0| | |||
* Catalysts are no longer offered as [[Ritual]] Rewards, or a reward type for [[Delirium]] Rewards. | |||
}} | |||
{{Version history table row|3.20.0| | |||
* We want to improve on the concept that the Atlas Tree allows players to invest into leagues that they enjoy, and have added new clusters to the passive tree for league content that can be blocked through Atlas Passive Skills. We've also increased the chances for such league content to appear. | |||
}} | |||
{{Version history table row|3.19.0| | |||
* The Ritual Tribute from sacrificing Rare Monsters has been increased, to compensate for the reduced number of Rare Monsters now spawned. | |||
}} | |||
{{Version history table row|3.15.0| | |||
* You can no longer obtain Level 21, 23% Quality Gems outside of the Incursion Temple and specific Divination Cards. | |||
* Chests/rewards that previously would have given a Level 21, 23% Quality Gem now instead give a Level 21, 20% Quality Gem. | |||
}} | |||
{{Version history table row|3.14.0| | |||
*Ritual mechanic has been added into the core game. Every map has an 8% base chance to contain a ritual encounter. | |||
}} | |||
{{Version history table row|3.13.1c| | |||
* Ritual rewards that have been revealed can now be linked in chat. | |||
* The Monstrous Treasure prophecy can no longer activate in maps where Blood-filled Vessels are used. | |||
* Foul Ritual encounters will now only apply Toxic Vines if you stop moving during the Ritual encounter. | |||
* The Obtain Ritual Base Types challenge now requires you to exchange Tribute for 9 out of 27 Ritual Base Types. | |||
}} | |||
{{Version history table row|3.13.1| | |||
* The Ritual Tribute counter is now displayed at a greater radius around Ritual Altars. | |||
* The Ritual Favours screen now displays a more appropriate message if a party member who is not the instance owner attempts to purchase Favours. | |||
* Legion monsters are no longer revived in Ritual encounters. | |||
* Monsters that spawn from Bitter and Glacial Rituals are now further spread out. | |||
* Some Rituals can't be completed because of invisible enemies. An issue that prevents influenced monsters from displaying when they're revived in a Ritual. This is fixed internally. {{Undocumented}} | |||
}} | |||
{{Version history table row|3.13.0b| | |||
* The number of Rituals remaining is now shown near the Ritual Button. | |||
* The special Vaal Rituals used to offer items with a high variance of Tribute costs (from very low to very high). This has now been capped to never be higher than other rituals. | |||
}} | |||
{{Version history table row|3.13.0| | |||
* Introduced to the game. | |||
}} | |||
{{Version history table end}} | |||
==References== | |||
{{reflist|refs=<ref name="RitualQ&A1">{{cite web|url=https://www.pathofexile.com/forum/view-thread/3008270|title=Path of Exile: Echoes of the Atlas FAQ and Q&A Summary|date=January 9, 2021|accessdate=April 14, 2021|publisher=Path of Exile Forums|author=Bex_GGG}}</ref> | |||
<ref name="RitualQ&A2">{{cite web|url=https://www.pathofexile.com/forum/view-thread/3016530|title=Echoes of the Atlas Week One Report|date=January 19, 2021|accessdate=April 14, 2021|publisher=Path of Exile Forums|author=Community_Team}}</ref> | |||
}} | |||
[[Category: Game mechanics]] | |||
[[ru:Ритуал]] | |||
Latest revision as of 20:52, 19 June 2024

Rituals are encounters that spawn from Ritual Altars. After activating the Altar, players must defeat the enemies enclosed within the Ritual Circle, gaining Tribute in the process. Players can then spend the earned Tribute to purchase various types of rewards including pre-identified rare items. This encounter is considered Extra Content and has a baseline greater than 8% chance to appear in any non-unique map area.
Ritual Altars

Ritual Altars can be randomly encountered while playing through the storyline and have a baseline greater than 8% chance to spawn in any end-game map. The amount of Altars that appear in each instance is either three or four (it was 1 to 4 in the Ritual league). It cannot be found within Heists or in Delve.
- Players must first kill the monsters guarding a ritual altar before being allowed to activate the ritual.
- Clicking the altar begins the ritual and encloses players in the area of the Ritual Circle.
- Monsters will spawn in multiple waves, each wave harder than the last. Tribute is earned from each monster killed.
- After killing all the monsters within the ritual, or if players die before this, the combat phase ends and players can loot the altar.
- All altars share a single spawn pool; when an altar is activated, all dead monsters within that altar circle get added to the pool. Monsters that appear in earlier altars will reappear but give 40% reduced points per reappearance.
- The reward penalty is additive. That is to say, the first time a monster is summoned it gives 100% points, on the next ritual it gives 60%, then 20% on the third, and finally no tribute at all on its fourth ritual.
- If a naturally generated unique monster, including the map boss, spawns and dies within the ritual altar's influence, it will spawn in subsequent rituals. (with less points rewarded each time)
- Clicking the altar displays the Ritual Favors interface that allows players to select their rewards. Some rewards are hidden and will be revealed after more rituals on the same map are completed.
- Players can then move to other areas of the Map and complete all the altars in order to unlock more rewards.
Small, moving blood pools will appear under killed enemies that count towards the ritual when activated. Luring faraway monsters into the circle will not add to the ritual encounter.
The amount of tribute earned from killing the monsters during the encounter depends on it the slain monster rarity. Unique map bosses give 400 tribute, Rare 135 tribute, Magic 25 and Normal 10. Unique monsters that are not a map boss (i.e. rogue exiles) give 75 points. However it is important to note that the rarity of monsters spawned is not the same as the rarity of monsters killed. I.e. even if you kill exclusively normal monsters before activating the ritual altar, you would still encounter magic and/or rare ones during the encounter. Likewise, the exact modifiers of the magic/rare monsters slain are not preserved upon resummonning.
Summoned minions (e.g. Necromancer's undead or adds spawned by various map unique bosses) do not get added to the monster pool, and killing them during the encounter gives no tribute.
![]() Players can use the Ritual Rewards button to view the number of rituals in the area, number of completed rituals and the reward pool.
Players can use the Ritual Rewards button to view the number of rituals in the area, number of completed rituals and the reward pool.
Rewards

After completing a ritual, players can click the Altar to display the Favours interface that allows players to select their own rewards, in exchange for Tribute points.
- All items are identified and players can see the exact mods and rolls of the item before selecting the reward. (Veiled mods can only be unveiled after purchase)
- After a reward is selected and withdrawn, it cannot be returned/refunded.
- All of the altars in the area are part of the same set, and share the same pool of rewards.
- Completing a single ritual will only reveal 1/2 or 1/3 of the possible rewards.
- Completing all the ritual altars in the area/map reveals all possible rewards.
- Rewards can be rerolled for 2,000 tribute points. You can get two additional rerolls with
 Profitable Prayers allocated, and one reroll per
  Ritual Scarab of SelectivenessRitual Scarab of SelectivenessStack Size: 20Rerolling Favours at Ritual Altars in Area has no cost the first 2 times
Ritual Altars in Area allow rerolling Favours 1 additional timePick and choose which sacred tenets you prefer...Can be used in a personal Map Device to add modifiers to a Map. used (up to 2). Immutable Dogma prevent you from rerolling.
 - Using
 Blood-filled VesselBlood-filled VesselCan be used in a personal Map Device alongside a Map to add the monsters stored from a previous Ritual Altar to a Ritual Altar in that Map.
 in map device would make Rituals have 20% improved Favour Rewards, although it is not yet precisely understood what "improved" means exactly.
Tip: It makes sense to complete all altars before deciding what to spend tribute on. If you do this then you will have maximum knowledge before making your choices - you will know how many points you have and all visible options.
Types
Default Ritual rewards include:
- Ritual-exclusive rewards:
 Ritual SplinterRitual SplinterStack Size: 100Combine 100 Splinters to create a Ritual Vessel.
 s
s Qotra's RegulatorQotra's Regulator
Sovereign Spiked ShieldChance to Block: 24%
Evasion: (507-697)
Energy Shield: (104-144)
Movement Speed: -3%Requires Level 54, 70 Dex, 70 Int+5% chance to Suppress Spell Damage(160-220)% increased Evasion and Energy Shield
+(40-60)% to Damage over Time Multiplier if you've dealt a Critical Strike in the past 8 seconds
(2-2.5)% of Life Regenerated per Second if you've dealt a Critical Strike in the past 8 seconds
Lose (10-15)% of Energy Shield when you deal a Critical Strike
Lose (10-15)% of Life when you deal a Critical StrikeHorrific experiments with corrupted flesh require careful management.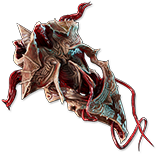 ,
,  Hand of the FerventHand of the Fervent
Zealot GlovesArmour: (132-211)
Energy Shield: (27-43)Requires Level 43, 34 Str, 34 Int(70-130)% increased Armour and Energy Shield
+(50-70) to maximum Life
Gain Sacrificial Zeal when you use a Skill, dealing you 150% of the Skill's Mana Cost as Physical Damage per Second
Hits Overwhelm (10-15)% of Physical Damage Reduction while you have Sacrificial ZealA sacrifice of blood calls forth His vengeance.
Let the righteous become the Hand of God.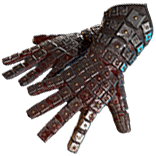 ,
,  BlackflameBlackflame
Amethyst RingRequires Level 49+(17-23)% to Chaos Resistance+(8-12)% to Fire Damage over Time Multiplier
50% reduced Ignite Duration on Enemies
(10-15)% chance to Ignite
Enemies Ignited by you take Chaos Damage instead of Fire Damage from Ignite
Withered does not expire on Enemies Ignited by you
+(20-25)% to Fire and Chaos ResistancesBeyond the veil of death, there burns a fire
by whose light night is borne. ,
,  Survivor's GuiltSurvivor's Guilt
Heavy BeltRequires Level 52+(25-35) to Strength+(800-1200) to Armour
Regenerate (50-70) Life per second
20% increased Stun Threshold
10% reduced Armour per 50 Strength
Imbalanced GuardThe burden falls heaviest not on those that died,
but on those that did not.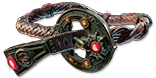 ,
,  Rotblood PromiseRotblood Promise
Unset RingRequires Level 56Has 1 SocketSocketed Gems are Supported by Level 20 Blasphemy
Curse Auras from Socketed Skills also affect you
Socketed Curse Gems have 80% increased Reservation Efficiency
+(20-30) to Intelligence
20% reduced Effect of Curses on you
(15-25)% increased Damage with Hits and Ailments against Cursed EnemiesAccept the infection, let it take hold.
Then carry it far and wide.
- Ritual base type items
 Sorrow MaskSorrow MaskArmour: (42-49)
Evasion: (42-49)Requires Level 15, 20 Str, 20 Dex+(2-3) to maximum Fortification
You are Crushed ,
,  Atonement MaskAtonement MaskArmour: (122-140)
Evasion: (122-140)Requires Level 45, 51 Str, 51 Dex+(2-3) to maximum Fortification
You are Crushed ,
,  Penitent MaskPenitent MaskArmour: (185-212)
Evasion: (185-212)Requires Level 75, 79 Str, 79 Dex+(2-3) to maximum Fortification
You are Crushed
 Imp CrownImp CrownArmour: (42-49)
Energy Shield: (10-12)Requires Level 15, 20 Str, 20 Int-10% to all Elemental Resistances
Socketed Skills apply Fire, Cold and Lightning Exposure on Hit ,
,  Demon CrownDemon CrownArmour: (122-140)
Energy Shield: (25-29)Requires Level 45, 51 Str, 51 Int-10% to all Elemental Resistances
Socketed Skills apply Fire, Cold and Lightning Exposure on Hit ,
,  Archdemon CrownArchdemon CrownArmour: (185-212)
Energy Shield: (38-43)Requires Level 75, 79 Str, 79 Int-10% to all Elemental Resistances
Socketed Skills apply Fire, Cold and Lightning Exposure on Hit
 Gale CrownGale CrownEvasion: (42-49)
Energy Shield: (10-12)Requires Level 15, 20 Dex, 20 IntAdds (3-4) to (5-6) Cold Damage
Your Hits treat Cold Resistance as 10% higher than actual value ,
,  Winter CrownWinter CrownEvasion: (122-140)
Energy Shield: (25-29)Requires Level 45, 51 Dex, 51 IntAdds (15-20) to (28-35) Cold Damage
Your Hits treat Cold Resistance as 10% higher than actual value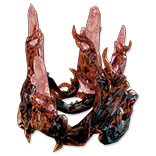 ,
,  Blizzard CrownBlizzard CrownEvasion: (185-212)
Energy Shield: (38-43)Requires Level 75, 79 Dex, 79 IntAdds (75-85) to (115-128) Cold Damage
Your Hits treat Cold Resistance as 10% higher than actual value
 Taxing GauntletsTaxing GauntletsArmour: (35-41)Requires Level 10, 18 StrExerted Attacks deal (25-30)% increased Damage
Warcry Skills have +2 seconds to Cooldown ,
,  Gruelling GauntletsGruelling GauntletsArmour: (132-152)Requires Level 40, 59 StrExerted Attacks deal (30-40)% increased Damage
Warcry Skills have +2 seconds to Cooldown ,
,  Debilitation GauntletsDebilitation GauntletsArmour: (236-271)Requires Level 70, 101 StrExerted Attacks deal (40-50)% increased Damage
Warcry Skills have +2 seconds to Cooldown
 Gauche GlovesGauche GlovesEvasion: (35-41)Requires Level 10, 18 Dex25% reduced Attack Damage with Main Hand
(40-50)% increased Attack Damage with Off Hand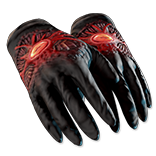 ,
,  Southswing GlovesSouthswing GlovesEvasion: (132-152)Requires Level 40, 59 Dex25% reduced Attack Damage with Main Hand
(40-50)% increased Attack Damage with Off Hand ,
,  Sinistral GlovesSinistral GlovesEvasion: (236-271)Requires Level 70, 101 Dex25% reduced Attack Damage with Main Hand
(40-50)% increased Attack Damage with Off Hand
 Leyline GlovesLeyline GlovesEnergy Shield: (9-10)Requires Level 10, 18 Int(25-30)% chance when you pay a Skill's Cost to gain that much Mana
30% reduced maximum Mana ,
,  Aetherwind GlovesAetherwind GlovesEnergy Shield: (28-32)Requires Level 40, 59 Int(25-30)% chance when you pay a Skill's Cost to gain that much Mana
30% reduced maximum Mana ,
,  Nexus GlovesNexus GlovesEnergy Shield: (47-54)Requires Level 70, 101 Int(25-30)% chance when you pay a Skill's Cost to gain that much Mana
30% reduced maximum Mana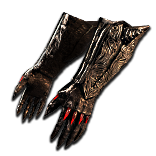
 Basemetal TreadsBasemetal TreadsArmour: (68-78)Requires Level 20, 39 Str+(4-5)% Chance to Block Attack Damage
You take 20% of Damage from Blocked Hits ,
,  Darksteel TreadsDarksteel TreadsArmour: (164-189)Requires Level 50, 89 Str+(4-5)% Chance to Block Attack Damage
You take 20% of Damage from Blocked Hits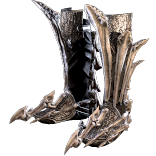 ,
,  Brimstone TreadsBrimstone TreadsArmour: (236-271)Requires Level 80, 124 Str+(4-5)% Chance to Block Attack Damage
You take 20% of Damage from Blocked Hits
 Cloudwhisper BootsCloudwhisper BootsEvasion: (68-78)Requires Level 20, 39 Dex25% less Accuracy Rating
1 to (5-6) Added Attack Lightning Damage per 200 Accuracy Rating ,
,  Windbreak BootsWindbreak BootsEvasion: (164-189)Requires Level 50, 89 Dex25% less Accuracy Rating
1 to (5-6) Added Attack Lightning Damage per 200 Accuracy Rating ,
,  Stormrider BootsStormrider BootsEvasion: (236-271)Requires Level 80, 124 Dex25% less Accuracy Rating
1 to (5-6) Added Attack Lightning Damage per 200 Accuracy Rating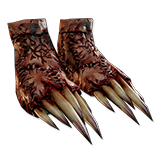
 Duskwalk SlippersDuskwalk SlippersEnergy Shield: (15-18)Requires Level 20, 39 Int(30-40)% increased Cooldown Recovery Rate of Movement Skills
10% reduced Movement Speed ,
,  Nightwind SlippersNightwind SlippersEnergy Shield: (34-39)Requires Level 50, 89 Int(30-40)% increased Cooldown Recovery Rate of Movement Skills
10% reduced Movement Speed ,
,  Dreamquest SlippersDreamquest SlippersEnergy Shield: (50-57)Requires Level 80, 124 Int(30-40)% increased Cooldown Recovery Rate of Movement Skills
10% reduced Movement Speed
- Omens
- Fully identified rare equipment including
- Incursion modifier rares
- Influenced items
- Synthesised items
- Fractured items
- +30% quality weapons and armour
- 5-linked or 6-linked weapons and armour
- Veiled items, including double-veiled
- Unique items
- Quality skill gems
- Corrupted skill gems (Level 21 or 23% quality; CANNOT have 21/23 gem since version 3.15.0)
- Quality flasks [confirmation needed]
- All types of currency [confirmation needed]
- basic currency including
 Chaos OrbsChaos OrbStack Size: 20Reforges a rare item with new random modifiersRight click this item then left click a rare item to apply it.
 ,
,  Exalted ShardsExalted ShardStack Size: 20A stack of 20 shards becomes an Exalted Orb.
 ,
,  Exalted OrbsExalted OrbStack Size: 20Augments a rare item with a new random modifierRight click this item then left click a rare item to apply it. Rare items can have up to six random modifiers.
 and
and  Divine OrbsDivine OrbStack Size: 20Randomises the values of the random modifiers on an itemRight click this item then left click a magic, rare or unique item to apply it.
 Simulacrum SplintersSimulacrum SplinterStack Size: 300Combine 300 Splinters to create a Simulacrum.
 , Timeles Splinters and Breach Splinters
- basic currency including
- Delirium Orbs
- Divination cards
 Stacked DeckStacked DeckStack Size: 20A stack of unknown divination cardsRight click to take a divination card out of the deck.
 s [confirmation needed]
- Essences
- Fossils and Resonators[confirmation needed]
- Maps, including 8-mod corrupted, delirious maps, elder and shaper guardian maps.
- Map fragments (including Sacrifice Fragments, Mortal Fragments and
 Offering to the GoddessOffering to the GoddessIt is time for the Goddess to give her final verdict.
Your fate rests in her even hands.Travel to the Aspirants' Plaza and spend this item to open the Eternal Labyrinth. )
) - Scarabs
- Jewels and Abyss Jewel, including fractured and synthesised versions
- Cluster Jewels
- Heist Contracts and Blueprints,
 Rogue's MarkerRogue's MarkerStack Size: 50000Creates a portal to the Rogue Harbour from a Town or Hideout
Used as Currency for services in the Rogue HarbourRight click on this item while in a Town or Hideout to use it. s
s - Oils
- Talismans
Special Reward Rituals (ones that resemble the ![]() Gore Portal EffectGore Portal EffectPortalThis character's portals use the Gore effect.
Gore Portal EffectGore Portal EffectPortalThis character's portals use the Gore effect.![]() MTX) cause the entire window to only contain Divination Cards, Currency, or Unique items. Rerolling in this scenario will always return a Special Reward window.
MTX) cause the entire window to only contain Divination Cards, Currency, or Unique items. Rerolling in this scenario will always return a Special Reward window.
Deferring
Deferring allows players to mark rare rewards that they cannot presently afford with the Tribute they have, and those same items will re-appear in a later ritual.
- Players must pay 10% + a 5% fee (without any atlas modifiers) to defer that item. Both % are relative to the original cost, with some rounding applied.
- The original cost is the initial cost of an item before it's defered once, not the current cost of the item. So deferring an item will always cost the same, even when it shows up again.
- Deferred items reappear in a random later area,[1] discounted by 10% of its original cost.
- It is currently undetermined how long it takes for deferred items to show back up, however, more valuable items will take longer to reappear.
- An item can be deferred 9-10 times (10 times sometimes with rounding) until the prices is under 10% of the original. At this point you get a message telling you that the item deffering failed, because the price is too low.
- Sometimes deferring an item can be more costly than just buying it, when the item was deffered 9 times already, because of the deferral fee (the extra 5%).
- An deferred item which shows back up, that is not deferred again, will increase in price by 10% of it's original cost (if you fail to defer it once), if the item reaches it's original price or is not deferred for multiple reoccurences, it has a red border and will not show up again, unless you defer it again.[2]
- You can infinitly ping pong an item by deferring it and then not deferring it, alternating times. While this is inefficient, it might be necessary to reserve another good item due to a lack of tribute
- There is a maximum amount of items that can be in the deferred at the same time. (Not in a single ritual, but in total in the invisible defer pool or queue.) If you want to defer an item while the maximum defer amount is reached, you will have to buy an item from the previously defered items, that is showing in your current ritual rewards.
- The pool of deferred items is not shared between different characters in the same account in the same league - each character gets their own deferred items pool. This is in mild contrast with Atlas tree and item Stash both being shared.
Video
Types
All of the Altars in the area are part of the same set, and share the same pool of rewards. Each successive Ritual in an area is harder and offers better rewards. Rituals spawn in various types, giving a different set of buffs to enemies and environmental effects.
Ritual Altars can have various modifiers, listed below. Each modifiers gives the ritual a different set of buffs to enemies and environmental damage. Altars surrounded by a fence have all Ritual rewards of the same type, either all Unique items, or Currency items, or Divination Cards.
| Category | Type | Image | Affixes
|
|---|---|---|---|
| Elemental | Infernal | 
|
|
| Apocalyptic | 
|
| |
| Bitter | 
|
| |
| Glacial | 
|
| |
| Fluctuant | 
|
| |
| Volatile | 
|
| |
| Chaos | Malevolent | 
|
|
| Dreaded | 
|
| |
| Foul | 
|
| |
| Totem | Fortressed | 
|
|
| Violent | 
|
| |
| Sanguine | 
|
| |
| Empower Enemies | Ensconced | 
|
|
| Suppressive | 
|
| |
| Charged | 
|
| |
| Emboldening | 
|
| |
| Invigorating | 
|
| |
| Uncategorized | Haunted | 
|
|
| Vaal | 
|
| |
| Opulent | 
|
|
Related items
| Item | Stats | |
|---|---|---|
| Blood-filled Vessel | 1 | N/A |
| Ritual Scarab of Abundance | 1 | N/A |
| Ritual Scarab of Recognition | 1 | N/A |
| Ritual Scarab of Selectiveness Ritual Altars in Area allow rerolling Favours 1 additional timePick and choose which sacred tenets you prefer...Can be used in a personal Map Device to add modifiers to a Map. | 1 | N/A |
| Ritual Vessel | 1 | N/A |
Related Atlas passive skills
| Name | Stats |
|---|---|
| Arbitrary Tenets | Favours at Ritual Altars in your Maps randomly cost between 90% less and 80% more [1] |
| Free Rewards After Reroll Chance | Favours Rerolled at Ritual Altars in your Maps have 0.5% chance to cost no Tribute [1] [2] |
| Immutable Dogma | Cannot Reroll Favours at Ritual Altars in your Maps Monsters Sacrificed at Ritual Altars in your Maps grant 100% more Tribute [1] |
| Increased Ritual Intensity | Ritual Altars in your Maps spawn Monsters 8% faster Ritual Altars in your Maps can have 20% increased number of Spawned Monsters at once [1] [2] |
| Increased Ritual Reroll Cost and Free Rewards After Reroll Chance | Rerolling Favours at Ritual Altars in your Maps costs 3% reduced Tribute Favours Rerolled at Ritual Altars in your Maps have 0.25% chance to cost no Tribute [1] |
| Increased Ritual Splinters | Ritual Splinters offered at Ritual Altars in your Maps have 10% increased Stack Size [1] [2] |
| Reduced Ritual Deferral Cost | Deferring Favours at Ritual Altars in your Maps costs 5% reduced Tribute [1] [2] |
| Reduced Ritual Deferral Time | Favours Deferred at Ritual Altars in your Maps reappear 20% sooner [1] [2] |
| Ritual Chance | Your Maps have +5% chance to contain Ritual Altars [1] [2] [3] [4] [5] [6] [7] [8] [9] [10] [11] Your Maps have +10% chance to contain Ritual Altars [8] [9] [10] [11] [12] [13] [14] |
| Ritual Reroll Cost | Rerolling Favours at Ritual Altars in your Maps costs 6% reduced Tribute [1] [2] |
| Ritual Special Reward Chance | 25% increased chance of Ritual Altars with Special Rewards [1] [2] |
| Ritual Tribute Quantity | Monsters Sacrificed at Ritual Altars in your Maps grant 5% increased Tribute [1] [2] |
| Answered Appeals | Deferring Favours at Ritual Altars in your Maps costs 15% reduced Tribute Favours Deferred at Ritual Altars in your Maps reappear 50% sooner [1] |
| Flexible Dogma | Rerolling Favours at Ritual Altars in your Maps costs 18% reduced Tribute [1] |
| Occult Devotion | Your Maps with Ritual Altars always have four Ritual Altars [1] |
| Profitable Prayers | Ritual Altars in your Maps allow rerolling Favours 2 additional times [1] |
| Sacred Lands | Your Maps have +30% chance to contain Ritual Altars [1] |
| Sacrificial Due | Completing the final Ritual Altar in your Maps has 15% chance to drop a Blood-filled Vessel [1] |
Related Scarabs
| Item | Effect(s) |
|---|---|
| Ritual Scarab of Abundance | Rituals in Area offer 100% increased Favours |
| Ritual Scarab of Recognition | Unique enemies slain at Ritual Altars in Area grant 200% more Tribute |
| Ritual Scarab of Selectiveness Ritual Altars in Area allow rerolling Favours 1 additional timePick and choose which sacred tenets you prefer...Can be used in a personal Map Device to add modifiers to a Map. | Rerolling Favours at Ritual Altars in Area has no cost the first 2 times Ritual Altars in Area allow rerolling Favours 1 additional time |
Version history
| Version | Changes |
|---|---|
| 3.24.0 |
|
| 3.23.0 | |
| 3.20.0 |
|
| 3.19.0 |
|
| 3.15.0 |
|
| 3.14.0 |
|
| 3.13.1c |
|
| 3.13.1 |
|
| 3.13.0b |
|
| 3.13.0 |
|
References
- ↑ Community_Team (January 19, 2021). "Echoes of the Atlas Week One Report". Path of Exile Forums. Retrieved April 14, 2021.
- ↑ Bex_GGG (January 9, 2021). "Path of Exile: Echoes of the Atlas FAQ and Q&A Summary". Path of Exile Forums. Retrieved April 14, 2021.