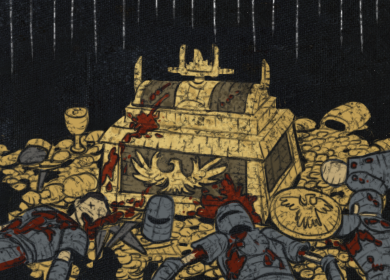
The Apex of Sacrifice
Lua error in Module:Item2/core at line 546: attempt to index field '?' (a nil value).
The Apex of Sacrifice is an end-game area where the battle with Atziri, Queen of the Vaal takes place.
Lua error in Module:Item_acquisition at line 423: Item search result unexpectedly has no name.
Bosses
- first side-boss room
- second side-boss room
- final boss room
Items found from this monster
There are currently no items that have a drop table specific to this monster.
Items found in this area
The following drop-restricted items can drop in this area.
| Item | Drop Level |
|---|---|
 Alluring Bounty Alluring Bounty 710x Module Error: No results found for item using search term "item_name = Exalted Orb"A treasure worth killing for 710x Module Error: No results found for item using search term "item_name = Exalted Orb"A treasure worth killing for is a treasure worth dying for. | 68 |
 Audacity Audacity 5Module Error: No results found for item using search term "item_name = Doryani's Fist" 5Module Error: No results found for item using search term "item_name = Doryani's Fist"CorruptedA jolt, and it moves. Or smolders. A current, and it lives. Or dies. A surge, and it transcends. Or... not. Only one way to find out. | 52 |
Layout
The map is partitioned into 7 areas:
- The safe starting area where players begin.
- A network of vaal chambers filled with magic-type Constructs and Totems.
- A large empty room containing two altars that activate independently once a player approaches it. Each altar spawns Vessel of the Vaal.
- A second network of vaal chambers filled with magic-type Constructs and Totems.
- A large room containing Q'ura, Y'ara'az, and A'alai. They cannot be damaged and will not retaliate until the fight is triggered by approaching to a close distance.
- A third network of vaal chambers filled with magic-type Constructs and Totems.
- A large room containing Atziri. She will become aggressive as soon as the player moves closer from the entrance.
Preparation
There are no definitive minimum requirements for completing this map, but there are common benchmarks for a character if they plan to succeed:
- A large enough effective health pool to clear tier 9 to tier 12 maps without any deaths. (More than 4000 combined energy shield and life is strongly recommended)
- Enough Area Damage to kill a white pack in tier 9 to tier 12 maps under 2 seconds. This could be any number between 8,000 to 14,000 effective dps depending on the skill. (Note: This is not equivalent to the tooltip dps)
- A mobility skill that relocates your character in less than 1 second. (Module Error: No results found for item using search term "item_name = Lightning Warp" must be linked with Module Error: No results found for item using search term "item_name = Less Duration Support"). Alternatively, +60% or higher movement speed will also suffice.
- At least 75% Fire and Lightning Resistance, and a recommended minimum of -40% - 0% Chaos Resistance.
- A bleed removal/avoidance mechanic (such as a flask with the of Staunchingof Staunching
Suffix
Grants Immunity to Bleeding for 4 seconds if used while Bleeding
Grants Immunity to Corrupted Blood for 4 seconds if used while affected by Corrupted Blood suffix), and a Module Error: No results found for item using search term "item_name = Ruby Flask" or Module Error: No results found for item using search term "item_name = Topaz Flask". - Physical-hit-damage avoidance or mitigation, such as Evasion, Block, Acrobatics or Module Error: No results found for item using search term "item_name = Immortal Call". (If defenses are absent, 5500 minimum effective health is recommended)
- Spell-damage avoidance: Phase Acrobatics, Spell Block. (If defenses are absent, 5500 minimum effective health is recommended)
With approx. 50,000 effective dps or higher (accounting for curse/skill delay, projectile speed, elemental resists, curse effects, and status ailments), you can kill the 5 guardians before they use all of their skills. (6s to kill each Vessel, 5s to kill each trio member) This is an alternative approach than building for a strong defense.
With approx. 85,000 effective dps or higher, Atziri can be forced into the next clone-stage almost immediately; each time being unable to finish the first skill.
Progression
Each boss encounter introduces a different set of threats. It is common practice to carry multiple utilities in your inventory that you can equip for each challenge. Before each boss fight, a portal should be made just before entering the room. The player should fill their inventory with anything worth looting in case of an unexpected death or emergency escape, so they do not use a portal empty handed. After each boss room is cleared, the player should swap any flasks or Vaal Skill Gem to fill with charges on the way to the next boss encounter.
Vessel of the Vaal's skill set consists of only lightning spells, cold spells and a melee physical smash. Effective flasks used are Module Error: No results found for item using search term "item_name = Topaz Flask", Module Error: No results found for item using search term "item_name = Quicksilver Flask", and any flasks that remove shock, chill, or grants movement speed. Resources that grant spell damage avoidance and maximum lightning resistance are helpful in this fight. The Vessels' skill set can be trivialized with Module Error: No results found for item using search term "item_name = Temporal Chains"; making them predictable and easy to avoid.
Q'ura, Y'ara'az, and A'alai collectively introduces physical attacks, physical spells, physical degeneration, chaos degeneration, fire damage and fire elemental reflect. Effective flasks are Module Error: No results found for item using search term "item_name = Ruby Flask", Module Error: No results found for item using search term "item_name = Granite Flask"/Module Error: No results found for item using search term "item_name = Jade Flask", Module Error: No results found for item using search term "item_name = Quicksilver Flask", and any flasks that remove bleed, ignite, or grants movement speed. Resources that grants eHP (effective HP in the form of Health, Energy Shield or Damage Conversions), physical damage reduction, chaos resist and life leech are helpful in this fight. Using Module Error: No results found for item using search term "item_name = Enduring Cry" and Module Error: No results found for item using search term "item_name = Immortal Call" with increased duration passives/supports can trivialize the difficulty of this fight. The usefulness of curses vary depending on the kill priority of the three bosses and the player's character. Consult their wiki page for details.
Atziri's skill set consists of lightning spells, fire spells, physical projectiles, reflect, and summoning/healing. Effective flasks used are Module Error: No results found for item using search term "item_name = Topaz Flask", Module Error: No results found for item using search term "item_name = Ruby Flask", Module Error: No results found for item using search term "item_name = Quicksilver Flask", and any flask that removes shock, ignite, bleed, curses, or grants movement speed. Resources that grant spell damage avoidance, maximum fire/lightning resistance, and eHP are helpful in this fight. Module Error: No results found for item using search term "item_name = Enfeeble", Module Error: No results found for item using search term "item_name = Temporal Chains" and Module Error: No results found for item using search term "item_name = Elemental Weakness" are common curses for this fight. But be warned that she has 100% curse reflection. During the summoning and healing phase of this encounter, the summons can be delayed from reaching Atziri with any form of chill, freeze, stun, knockback, Module Error: No results found for item using search term "item_name = Temporal Chains", or Module Error: No results found for item using search term "item_name = Frost Wall". Atziri herself remains a target (can be cursed but immune to damage) in this stage which may prevent Minions and Module Error: No results found for item using search term "item_name = Flicker Strike" from hitting her summons.
The Apex's areas can be back tracked after killing the final boss.
The Apex of Sacrifice is not mechanically suited for large party play. Each boss encounter contains a very limited source of replenishing flask charges which cannot sustain a full party. Atziri's Module Error: No results found for item using search term "item_name = Flameblast" increases in quantity and can cover the entire room with several players; making it impossible to play until several players are killed (lowering the difficulty).
Atziri service
"Atziri Service" is a community operated activity where one player opens The Apex of Sacrifice and waits while another player completes the area. This form of agreement is not regulated by the game, and is is operated on a trust basis.
Videos
See also
- Module Error: No results found for item using search term "item_name = The Alluring Abyss"
Version history
| Version | Changes |
|---|---|
| 3.2.0 |
|
| 3.1.2 |
|
| 3.1.1d |
|
| 1.1.0 |
|