>Wonderfl |
>Wonderfl |
| Line 157: |
Line 157: |
| |After running many maps, [[The Envoy]] will eventually make an appearance. This is totally random. | | |After running many maps, [[The Envoy]] will eventually make an appearance. This is totally random. |
|
| |
|
| After 4-5 appearances on various different maps, the Envoy will be highlighted and will mention that [[The Maven]] will be observing you. | | After 4-5 appearances on various different maps, the Envoy will be highlighted and will mention that [[The Maven]] will be observing you. (Some players report that The Maven only first appears on Tier 5+ maps, but this is unconfirmed) |
|
| |
|
| |- | | |- |
Revision as of 06:22, 23 January 2021
This guide will show you how to chase the Conquerors, how to find The Maven, and how to complete The Maven's Crucible in the Atlas of Worlds.
Unlocking Zana
Skip this section if you have Zana in your hideout.
| Step
|
Image
|
Mechanic
|
| 1
|

|
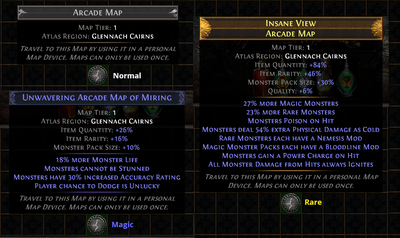
To start off, simply run any map that you own. The image shows the same map, in Normal, Magic and Rare rarities.
Using an  Orb of TransmutationStack Size: 40Upgrades a normal item to a magic itemRight click this item then left click a normal item to apply it. Orb of TransmutationStack Size: 40Upgrades a normal item to a magic itemRight click this item then left click a normal item to apply it. on the map will convert it into Magic variety, with harder fights but increased item quantity and rarity (if there is a mod that you cannot run, use an on the map will convert it into Magic variety, with harder fights but increased item quantity and rarity (if there is a mod that you cannot run, use an  Orb of AlterationStack Size: 20Reforges a magic item with new random modifiersRight click this item then left click a magic item to apply it. Orb of AlterationStack Size: 20Reforges a magic item with new random modifiersRight click this item then left click a magic item to apply it. to reroll the mods) to reroll the mods)
Using an  Orb of AlchemyStack Size: 20Upgrades a normal item to a rare itemRight click this item then left click a normal item to apply it. Orb of AlchemyStack Size: 20Upgrades a normal item to a rare itemRight click this item then left click a normal item to apply it. on the map will convert it into Rare variety, with hardest fights but maximum item quantity and rarity (if there is a mod that you cannot run, use an on the map will convert it into Rare variety, with hardest fights but maximum item quantity and rarity (if there is a mod that you cannot run, use an  Orb of ScouringStack Size: 30Removes all modifiers from an itemRight click this item then left click on a magic or rare item to apply it. Orb of ScouringStack Size: 30Removes all modifiers from an itemRight click this item then left click on a magic or rare item to apply it. to clear the mods and then "alch" it again) to clear the mods and then "alch" it again)
|
| 2
|

|
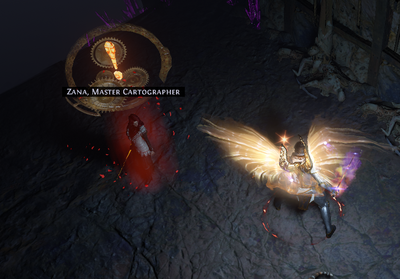
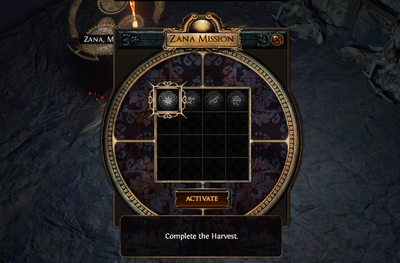
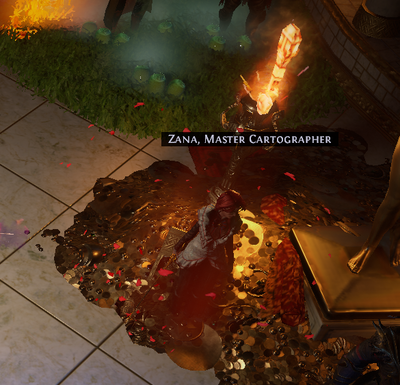
After running some maps at least as high as Tier 3, you will encounter Zana in a map after killing the map boss. Click her to open the Mission interface.
|
| 3
|

|
Within the Mission interface, select the highest tier map that you can run. These maps are free and do not spend the maps in your stash.
|
| 4
|

|
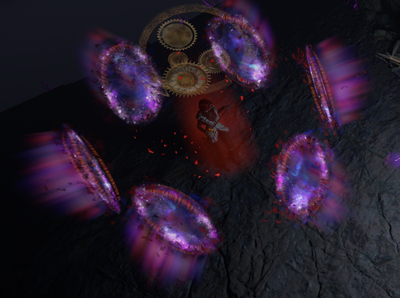
Enter Zana's map portals and complete the map, and slay the boss. Doing so for the first time unlocks Zana in your hideout.
|
| 5
|

|
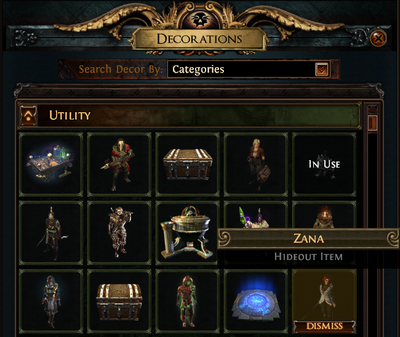
You can now return to your hideout and add Zana into your hideout.
|
Conquerors and Watchstones
Skip this section if you know how to find Conquerors and how to use Watchstones.
| Step
|
Image
|
Mechanic
|
| 1
|

|
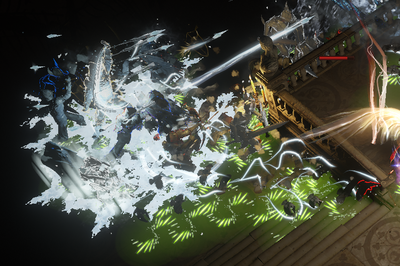
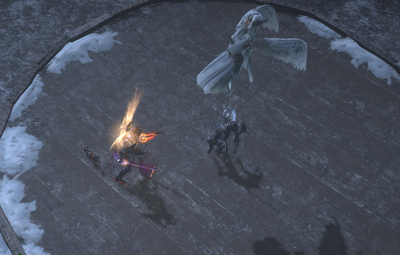
Keep running maps. Eventually you will encounter an influenced map, meaning that one of the Conquerors have arrived on the map and by completing the map you are one step closer to finding their citadel.
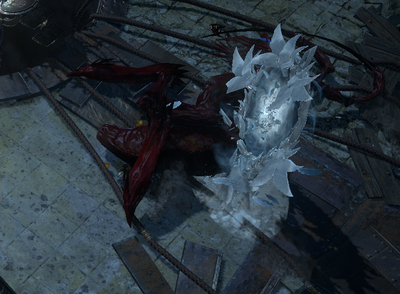
In this example map, we see icy effects and the appearance of ice golems and dinosaurs, indicating that the map is influenced by Veritania, the Redeemer, the "icy lady".
|
| 2
|

|
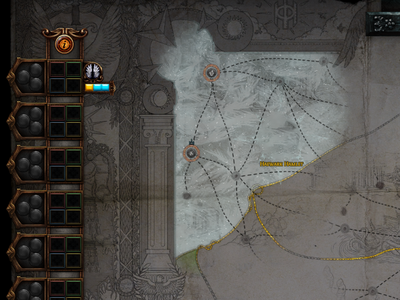
After completing a few maps in the same region, if you open the Atlas of Worlds you will see the Influenced region colored.
Since Veritania, the Redeemer has the light blue color representing ice, the region is colored light blue.
Also, the indicator bar (top left of image) shows that we have chased her in 1 map (1 yellow box), and 2 maps are yet to be done (2 blue boxes) to find her citadel.
|
| 3
|

|
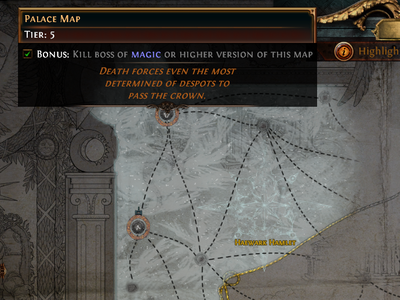
Complete more maps in the same region to chase Veritania.
In the image shown,  Palace MapMap Level: 79 Palace MapMap Level: 79
Map Tier: 12
Guild Character: \Death forces even the most
determined of despots to
pass the crown.Travel to this Map by using it in a personal Map Device. Maps can only be used once. is within the influenced region and thus by completing any map in that region you will be one step closer to finding her citadel. is within the influenced region and thus by completing any map in that region you will be one step closer to finding her citadel.
|
| 4
|

|
After completing the given amount of maps in the same region and chasing down the Conqueror, Zana will be highlighted in your hideout.
Talk to her and select "Travel to [Conqueror's] Citadel".
|
| 5
|

|
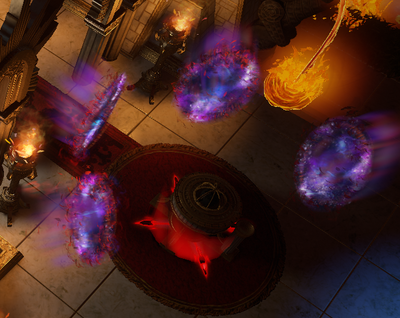
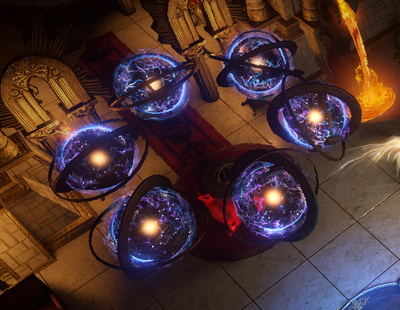
Your map device will open a special set of portals to the Conqueror's citadel. The portals are colored purple, as shown.
|
| 6
|

|
Complete the map as usual, and defeat the map boss.
|
| 7
|

|
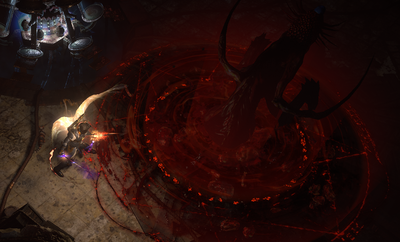
After defeating the map boss, a special portal will open to the Conqueror's arena, next to the carcass of the dead boss.
Enter the portal.
|
| 8
|

|
Face off against the Conqueror, in this case Veritania, the Redeemer.
You have 6 tries in total to kill her, after which all the portals to the citadel will close and you will have failed to kill the Conqueror. In this case you will have to repeat from step 1.
|
| 9
|

|
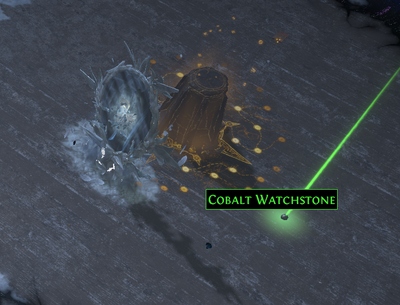
Once you slay the Conqueror, they will drop a Watchstone.
They will drop either one of these:
 Cobalt WatchstoneThe memories and emotions of countless victims of the Elder, Cobalt WatchstoneThe memories and emotions of countless victims of the Elder,
locked in stone for eternity.Socket this into a Citadel on your Atlas to increase the Tier of Maps and reveal hidden Maps in that Citadel's Region. You can only socket one Crimson, Viridian, Cobalt or Golden Watchstone into each Citadel.  Crimson WatchstoneThe memories and emotions of countless victims of the Elder, Crimson WatchstoneThe memories and emotions of countless victims of the Elder,
locked in stone for eternity.Socket this into a Citadel on your Atlas to increase the Tier of Maps and reveal hidden Maps in that Citadel's Region. You can only socket one Crimson, Viridian, Cobalt or Golden Watchstone into each Citadel.  Golden WatchstoneThe memories and emotions of countless victims of the Elder, Golden WatchstoneThe memories and emotions of countless victims of the Elder,
locked in stone for eternity.Socket this into a Citadel on your Atlas to increase the Tier of Maps and reveal hidden Maps in that Citadel's Region. You can only socket one Crimson, Viridian, Cobalt or Golden Watchstone into each Citadel.  Viridian WatchstoneThe memories and emotions of countless victims of the Elder, Viridian WatchstoneThe memories and emotions of countless victims of the Elder,
locked in stone for eternity.Socket this into a Citadel on your Atlas to increase the Tier of Maps and reveal hidden Maps in that Citadel's Region. You can only socket one Crimson, Viridian, Cobalt or Golden Watchstone into each Citadel.
|
| 10
|

|
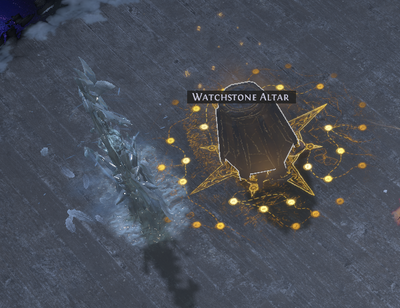
Pick up the Watchstone and click on the Watchstone Altar (shown in image).
|
| 11
|

|
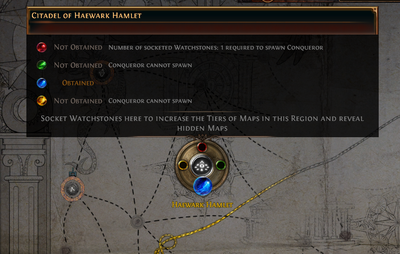
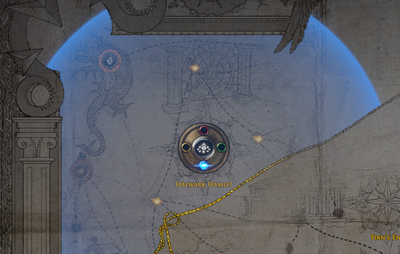
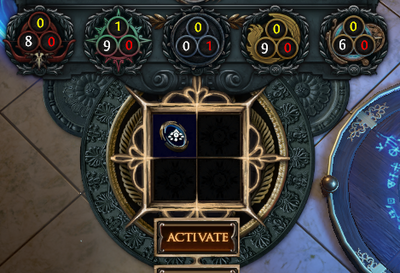
The Atlas will open, and if it is your first Conqueror in the region, a new citadel interface will be displayed in that region, that allows you to socket your watchstone in.
|
| 12
|

|
Place your watchstone into the socket of the matching color, as shown.
|
| 13
|

|
Socketing the watchstone allows you to discover more maps in the region, and increases the level of all map drops and even other item drops.
|
| 14
|

|
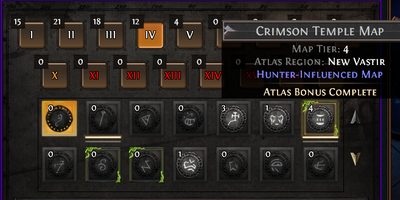
Now you can look in your Map tab, and you will see the influenced maps colored.
This example image shows the influence of Al-Hezmin, the Hunter (green box around maps).
Complete influenced maps to chase the Conquerors, as you have learnt, or simply complete maps at random to find a new Conqueror (step 1).
|
The Maven's Invitation
Skip this section if you already have a Maven's Invitation.
| Step
|
Image
|
Mechanic
|
| 1
|

|
After running many maps, The Envoy will eventually make an appearance. This is totally random.
After 4-5 appearances on various different maps, the Envoy will be highlighted and will mention that The Maven will be observing you. (Some players report that The Maven only first appears on Tier 5+ maps, but this is unconfirmed)
|
| 2
|

|
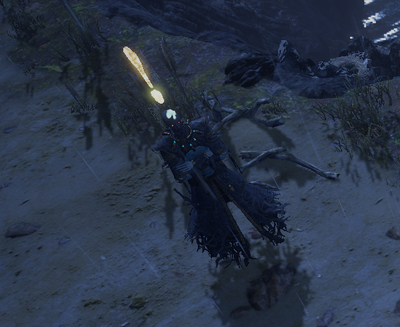
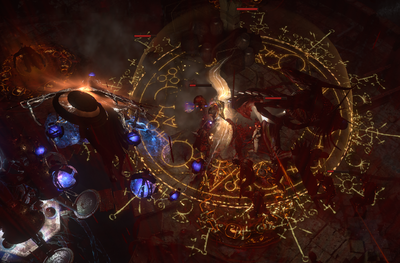
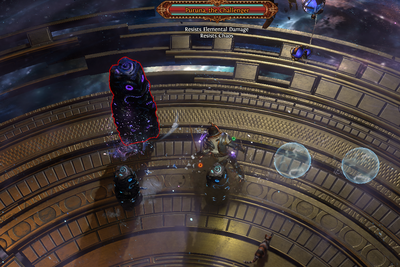
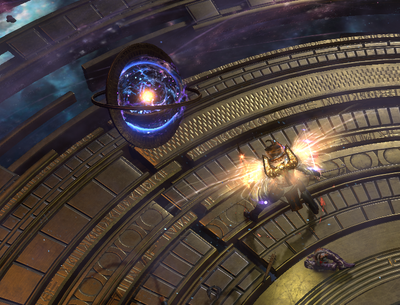
Kill the map boss, and as you can see The Maven is present in the boss arena and observing the battle.
|
| 3
|
|
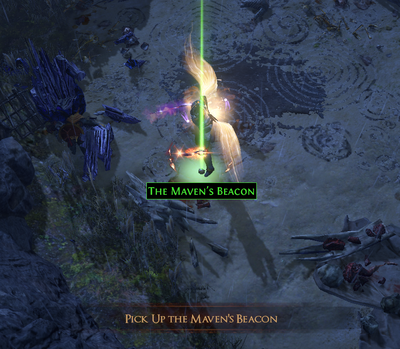
After slaying the boss, The Maven will drop The Maven's Beacon, which is an untradable quest item. Pick it up.
|
| 4
|

|
Return to your hideout and add the Maven's Beacon into your Map Device by right-clicking the Beacon and clicking your Map Device.
This permanently upgrades your Map Device, giving you the ability to summon The Maven on your maps.
|
| 5
|
|
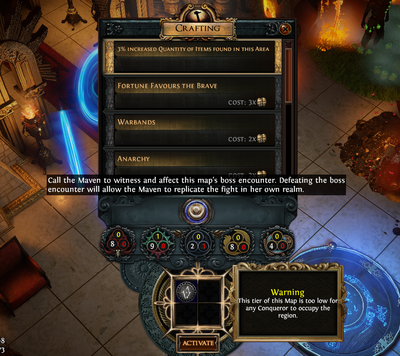
Run the highest tier map you own within the same region, so that the Maven can observe the battle.
Click on the  Call The Maven button which requests the The Maven to observe your battle. Call The Maven button which requests the The Maven to observe your battle.
|
| 6
|

|
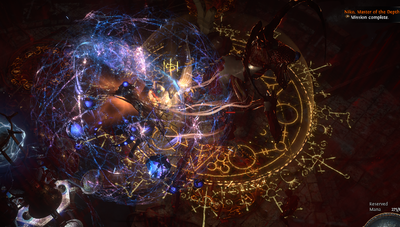
Complete the map and slay the boss again, you'll notice that The Maven pulsates to indicate that she is pleased.
|
| 7
|

|
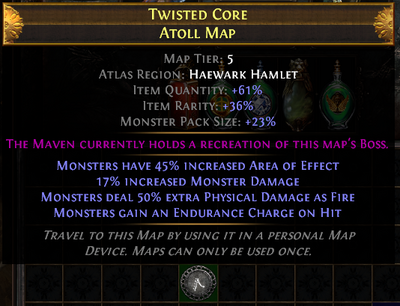
Once you have slain a map boss in The Maven's presence, it will show this message on the map:
The Maven currently holds a recreation of this Map's Boss
There is no point running this map as you cannot progress towards the The Maven's Challenge.
|
| 8
|

|
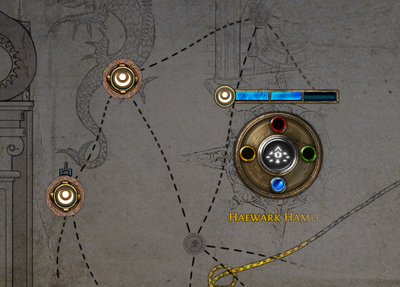
The Atlas will indicate the region in which you are working for the Maven.
Slay more bosses in the region to gain progress, as shown.
After you have slain all the required bosses (3 in this case) you will have to face The Maven's Challenge.
|
| 9
|

|
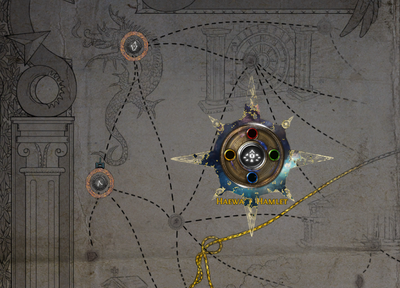
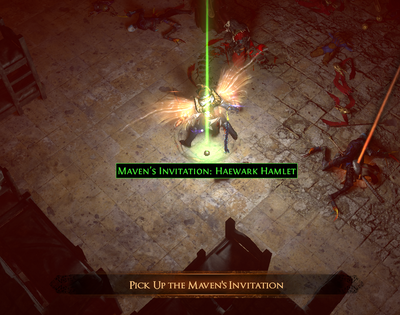
After killing the last boss in the region observed by The Maven, she will drop an invitation. Pick it up.
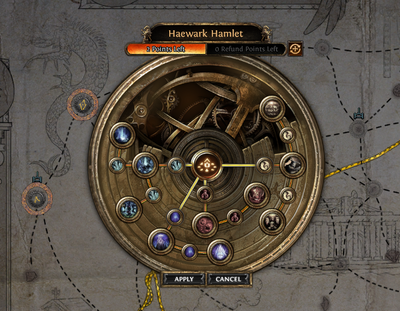
In this example she dropped the Maven's Invitation: Haewark Hamlet.
|
The Maven's Crucible
|
|---|
|
| Mechanics | |
|---|
|
| Characters | |
|---|
|
| Bosses | |
|---|
|
| Quests | |
|---|
|
| Atlas expansions | |
|---|
|
|---|
|
| Atlas | | Maven's Mechanics |
- The Envoy
- The Maven
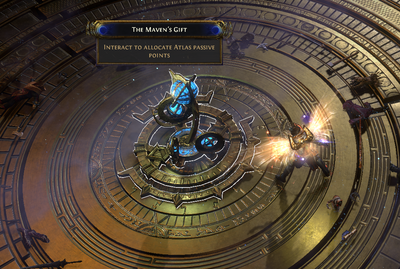
 The Maven's BeaconAllows you to call the Maven to a map from your Map Device.Right-click this item then left-click the Map Device in your Hideout to attach the Maven's Beacon. The Maven's BeaconAllows you to call the Maven to a map from your Map Device.Right-click this item then left-click the Map Device in your Hideout to attach the Maven's Beacon. - The Maven's Gift
- The Maven's Crucible
 The Maven's WritIt would be foolish to obey the Maven's demands. The Maven's WritIt would be foolish to obey the Maven's demands.
It would also be foolish not to.Open a portal to Absence of Mercy and Empathy by using this item in a personal Map Device. Can only be used once.  Crescent SplinterStack Size: 10Precious and perilous, Crescent SplinterStack Size: 10Precious and perilous,
Tantalising and terrible.Combine 10 Crescent Splinters to create The Maven's Writ.  Maven's OrbStack Size: 10Removes one Influenced Modifier from an item with at least two Influenced Maven's OrbStack Size: 10Removes one Influenced Modifier from an item with at least two Influenced
Modifiers and upgrades another Influenced Modifier
Upgrading a modifier of the highest tier transforms the
modifier into an Elevated Modifier
Attempting to upgrade an Elevated Modifier rerolls its values
Can be used on Body Armours, Boots, Gloves and HelmetsRight click this item then left click an item with at least two Influenced Modifiers to apply it. - Elevated modifier
- The Uncharted Realms
|
|---|
| | Craftable Maven's Invitations | |
|---|
| | Passives | |
|---|
| | New Maps | |
|---|
| | Watchstones | | Chromium |
 Haewark HamletOnly the souls trapped within can bear witness to the Maven's dark proclivities, and they dare not speak up.Socket this into a Citadel on your Atlas to increase the Tier of Maps and reveal hidden Maps in that Citadel's Region. You can only socket one Crimson, Viridian, Cobalt or Golden Watchstone into each Citadel. Haewark HamletOnly the souls trapped within can bear witness to the Maven's dark proclivities, and they dare not speak up.Socket this into a Citadel on your Atlas to increase the Tier of Maps and reveal hidden Maps in that Citadel's Region. You can only socket one Crimson, Viridian, Cobalt or Golden Watchstone into each Citadel.  Glennach CairnsOnly the souls trapped within can bear witness to the Maven's dark proclivities, and they dare not speak up.Socket this into a Citadel on your Atlas to increase the Tier of Maps and reveal hidden Maps in that Citadel's Region. You can only socket one Crimson, Viridian, Cobalt or Golden Watchstone into each Citadel. Glennach CairnsOnly the souls trapped within can bear witness to the Maven's dark proclivities, and they dare not speak up.Socket this into a Citadel on your Atlas to increase the Tier of Maps and reveal hidden Maps in that Citadel's Region. You can only socket one Crimson, Viridian, Cobalt or Golden Watchstone into each Citadel.  Valdo's RestOnly the souls trapped within can bear witness to the Maven's dark proclivities, and they dare not speak up.Socket this into a Citadel on your Atlas to increase the Tier of Maps and reveal hidden Maps in that Citadel's Region. You can only socket one Crimson, Viridian, Cobalt or Golden Watchstone into each Citadel. Valdo's RestOnly the souls trapped within can bear witness to the Maven's dark proclivities, and they dare not speak up.Socket this into a Citadel on your Atlas to increase the Tier of Maps and reveal hidden Maps in that Citadel's Region. You can only socket one Crimson, Viridian, Cobalt or Golden Watchstone into each Citadel.  Lira ArthainOnly the souls trapped within can bear witness to the Maven's dark proclivities, and they dare not speak up.Socket this into a Citadel on your Atlas to increase the Tier of Maps and reveal hidden Maps in that Citadel's Region. You can only socket one Crimson, Viridian, Cobalt or Golden Watchstone into each Citadel. Lira ArthainOnly the souls trapped within can bear witness to the Maven's dark proclivities, and they dare not speak up.Socket this into a Citadel on your Atlas to increase the Tier of Maps and reveal hidden Maps in that Citadel's Region. You can only socket one Crimson, Viridian, Cobalt or Golden Watchstone into each Citadel.
|
|---|
| | Platinum |
 Haewark HamletOnly the souls trapped within can bear witness to the Maven's dark proclivities, and they dare not speak up.Socket this into a Citadel on your Atlas to increase the Tier of Maps and reveal hidden Maps in that Citadel's Region. You can only socket one Crimson, Viridian, Cobalt or Golden Watchstone into each Citadel. Haewark HamletOnly the souls trapped within can bear witness to the Maven's dark proclivities, and they dare not speak up.Socket this into a Citadel on your Atlas to increase the Tier of Maps and reveal hidden Maps in that Citadel's Region. You can only socket one Crimson, Viridian, Cobalt or Golden Watchstone into each Citadel.  Glennach CairnsOnly the souls trapped within can bear witness to the Maven's dark proclivities, and they dare not speak up.Socket this into a Citadel on your Atlas to increase the Tier of Maps and reveal hidden Maps in that Citadel's Region. You can only socket one Crimson, Viridian, Cobalt or Golden Watchstone into each Citadel. Glennach CairnsOnly the souls trapped within can bear witness to the Maven's dark proclivities, and they dare not speak up.Socket this into a Citadel on your Atlas to increase the Tier of Maps and reveal hidden Maps in that Citadel's Region. You can only socket one Crimson, Viridian, Cobalt or Golden Watchstone into each Citadel.  Valdo's RestOnly the souls trapped within can bear witness to the Maven's dark proclivities, and they dare not speak up.Socket this into a Citadel on your Atlas to increase the Tier of Maps and reveal hidden Maps in that Citadel's Region. You can only socket one Crimson, Viridian, Cobalt or Golden Watchstone into each Citadel. Valdo's RestOnly the souls trapped within can bear witness to the Maven's dark proclivities, and they dare not speak up.Socket this into a Citadel on your Atlas to increase the Tier of Maps and reveal hidden Maps in that Citadel's Region. You can only socket one Crimson, Viridian, Cobalt or Golden Watchstone into each Citadel.  Lira ArthainOnly the souls trapped within can bear witness to the Maven's dark proclivities, and they dare not speak up.Socket this into a Citadel on your Atlas to increase the Tier of Maps and reveal hidden Maps in that Citadel's Region. You can only socket one Crimson, Viridian, Cobalt or Golden Watchstone into each Citadel. Lira ArthainOnly the souls trapped within can bear witness to the Maven's dark proclivities, and they dare not speak up.Socket this into a Citadel on your Atlas to increase the Tier of Maps and reveal hidden Maps in that Citadel's Region. You can only socket one Crimson, Viridian, Cobalt or Golden Watchstone into each Citadel.
|
|---|
| | Titanium |
 Haewark HamletOnly the souls trapped within can bear witness to the Maven's dark proclivities, and they dare not speak up.Socket this into a Citadel on your Atlas to increase the Tier of Maps and reveal hidden Maps in that Citadel's Region. You can only socket one Crimson, Viridian, Cobalt or Golden Watchstone into each Citadel. Haewark HamletOnly the souls trapped within can bear witness to the Maven's dark proclivities, and they dare not speak up.Socket this into a Citadel on your Atlas to increase the Tier of Maps and reveal hidden Maps in that Citadel's Region. You can only socket one Crimson, Viridian, Cobalt or Golden Watchstone into each Citadel.  Glennach CairnsOnly the souls trapped within can bear witness to the Maven's dark proclivities, and they dare not speak up.Socket this into a Citadel on your Atlas to increase the Tier of Maps and reveal hidden Maps in that Citadel's Region. You can only socket one Crimson, Viridian, Cobalt or Golden Watchstone into each Citadel. Glennach CairnsOnly the souls trapped within can bear witness to the Maven's dark proclivities, and they dare not speak up.Socket this into a Citadel on your Atlas to increase the Tier of Maps and reveal hidden Maps in that Citadel's Region. You can only socket one Crimson, Viridian, Cobalt or Golden Watchstone into each Citadel.  Valdo's RestOnly the souls trapped within can bear witness to the Maven's dark proclivities, and they dare not speak up.Socket this into a Citadel on your Atlas to increase the Tier of Maps and reveal hidden Maps in that Citadel's Region. You can only socket one Crimson, Viridian, Cobalt or Golden Watchstone into each Citadel. Valdo's RestOnly the souls trapped within can bear witness to the Maven's dark proclivities, and they dare not speak up.Socket this into a Citadel on your Atlas to increase the Tier of Maps and reveal hidden Maps in that Citadel's Region. You can only socket one Crimson, Viridian, Cobalt or Golden Watchstone into each Citadel.  Lira ArthainOnly the souls trapped within can bear witness to the Maven's dark proclivities, and they dare not speak up.Socket this into a Citadel on your Atlas to increase the Tier of Maps and reveal hidden Maps in that Citadel's Region. You can only socket one Crimson, Viridian, Cobalt or Golden Watchstone into each Citadel. Lira ArthainOnly the souls trapped within can bear witness to the Maven's dark proclivities, and they dare not speak up.Socket this into a Citadel on your Atlas to increase the Tier of Maps and reveal hidden Maps in that Citadel's Region. You can only socket one Crimson, Viridian, Cobalt or Golden Watchstone into each Citadel.
|
|---|
| | Unique | |
|---|
|
|---|
| | Misc |
 Elevated SextantStack Size: 10Adds or rerolls a modifier on a VoidstoneRight click this item then left click a Voidstone to apply it. Elevated SextantStack Size: 10Adds or rerolls a modifier on a VoidstoneRight click this item then left click a Voidstone to apply it.
|
|---|
|
|---|
|
| New Unique Items | |
|---|
|
| Ritual league | | Mechanics |
- Ritual
- Ritual Altar
- Tribute
- Defer
 Ritual SplinterStack Size: 100Combine 100 Splinters to create a Ritual Vessel. Ritual SplinterStack Size: 100Combine 100 Splinters to create a Ritual Vessel.  Ritual VesselStack Size: 10Stores the monsters slain for the first time from a completed Ritual Altar for future useRight-click this item then left-click a Ritual Altar to store the monsters from the completed Ritual in this item. Cannot be used on a Ritual in a map opened with a Blood-Filled Vessel. Ritual VesselStack Size: 10Stores the monsters slain for the first time from a completed Ritual Altar for future useRight-click this item then left-click a Ritual Altar to store the monsters from the completed Ritual in this item. Cannot be used on a Ritual in a map opened with a Blood-Filled Vessel.  Blood-filled VesselCan be used in a personal Map Device alongside a Map to add the monsters stored from a previous Ritual Altar to a Ritual Altar in that Map. Blood-filled VesselCan be used in a personal Map Device alongside a Map to add the monsters stored from a previous Ritual Altar to a Ritual Altar in that Map.
|
|---|
|
|---|
