Blight (game mechanic): Difference between revisions
(added note regarding burning ground vs. fire tower resilience) |
|||
| Line 29: | Line 29: | ||
For ring anointments, {{c|enchanted|Your Chilling Towers freeze enemies for 0.2 seconds while they are affected by chilling beams}} (Opalescent/Silver) is often considered to be one of the best in the game. Other generally good or budget ring anointments include: | For ring anointments, {{c|enchanted|Your Chilling Towers freeze enemies for 0.2 seconds while they are affected by chilling beams}} (Opalescent/Silver) is often considered to be one of the best in the game. Other generally good or budget ring anointments include: | ||
* {{c|enchanted|Your Meteor Towers create Burning Ground for 3 seconds on Hit}} (Indigo/Violet) | * {{c|enchanted|Your Meteor Towers create Burning Ground for 3 seconds on Hit}} (Indigo/Violet) (This burning ground ignores resilience to fire towers) | ||
* {{c|enchanted|Your Meteor Towers drop an additional Meteor}} (Verdant/Opalescent) | * {{c|enchanted|Your Meteor Towers drop an additional Meteor}} (Verdant/Opalescent) | ||
* {{c|enchanted|Your Freezebolt Tower deal full damage to Cold Enemies}} (Verdant/Crimson) | * {{c|enchanted|Your Freezebolt Tower deal full damage to Cold Enemies}} (Verdant/Crimson) | ||
Revision as of 23:38, 31 January 2024
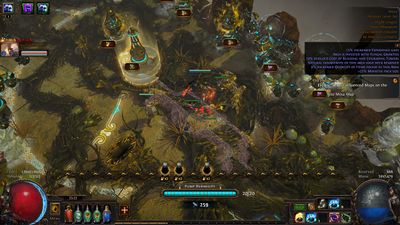
Blights are tower defense-like encounters that can spawn from Fungal Growths in any map area, which will always be accompanied by Sister Cassia. This encounter is considered Extra Content and has a baseline greater than 8% chance to appear in any non-unique map area.
Blight encounters are also found in Blighted maps, which are a modified version of existing maps, which contains no regular monsters and instead contains a single Blight encounter. Blights in Blighted maps are far larger, spawn a significantly increased amount of enemies and bosses, and provide a greater quantity and variety of rewards. Players can trade Blighted maps. Most Atlas passives that affect Blights in maps do not affect Blighted maps. There is also a pinnacle version of Blighted maps called Blight-ravaged maps.
Mechanics
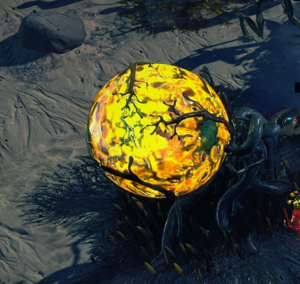
Once players interact with the Fungal Growth, Cassia will place a purification pump on the growth, causing it to spawn roots in random directions. At the end of each root is a portal that spawns enemies that slowly move towards the core, only stopping to attack units in its way. The Blight can spawn up to 8 roots, increasing with zone level. Players will be given a short preparation time before the Blight starts spawning monsters. Players can skip this by pressing a button that appears on the bottom right during this preparation period.
Some roots will spawn after a delay, and sometimes a root will have multiplied monster density (indicated by a multiplier) or contains a Blight boss (indicated by an icon on top). An icon corresponding to a tower can appear over each root, indicating which tower it is resistant to. Along the paths of the roots, players can construct a tower in specified areas. Towers cost resources to build or upgrade, which are given at the start and also acquired from killing blighted enemies. In a party, a tower belongs to the player who built or last upgraded it, using that player's ring anointments.[1]
When an enemy reaches the core, it will lower the pump's durability by a fixed amount and despawn. The pump has 10 durability in maps (20 in Blighted maps), and the amount of durability lowered is based on the monster's rarity (1 for normal, 2 for magic, 5 for rare, 10 for unique). When the pump's durability reaches 0, the Blight encounter fails and monsters will stop spawning.
Once all enemies from each portal/lane are defeated, reward chests will spawn at the location of each portal. These chests remain once spawned even if the pump is destroyed and the Blight encounter is failed. Blight encounters will have at least one lane that contains a Blight reward (Oils or Blighted map). Oil rewards chests have a baseline ~15% chance to drop a Blighted Map. Additionally, natural loot from killed monsters will drop at the pump's location. (Kills by towers are unaffected by any player's increases to item quantity or rarity.)
A maximum of one Blight can spawn per zone naturally; this maximum is shared between the random chance to spawn a Blight, and guaranteed Blight from Blight Scarabs, sextant mods, implicit map mods, or enchantments. However, it is possible to spawn up to two Blights:
- Random spawn chance, or guaranteed Blight from sextant, implicit, or enchantment
- From "Blight" or "Fortune Favours the Brave" map device craft, when Blight is available as a map crafting option, or while Mycelial Swarm is allocated on the Atlas Passive Tree
The Scarab cannot be used in combination with the map device craft.
Characters must complete least one map Blight encounter in a new league to complete Cassia's quest before she will anoint items. This also applies to the Blight Stash Tab.
Strategy
The most important thing to do in a Blight encounter is to keep the minions stalled. If you leave a lane unprotected, you'll have to scramble to defend the pump on your own, which takes away time for you to put down towers. Prioritize building stalling towers (Chilling, Seismic, Summoning) over damage towers (Fireball, Shock Nova) first and have them covered by Empowering Towers whenever possible. An empowered Tier 3 Chilling and/or Seismic tower is usually enough to hold down a lane. Tier 4 stalling towers are not that much better at defending than their Tier 3 counterparts. If the Blight encounter has delayed lanes, wait for them to spawn in if possible. Be sure to account for enemy tower resistances.
Damaging towers are more valuable in Blighted maps than small Blight encounters. Meteor Towers synergize well with stalling towers and are very effective at clearing enemies once you have your defenses established. Other damage towers aren't as damaging, but are effective in the right positions. They are significantly better as Tier 4 towers than Tier 3.
For ring anointments, Your Chilling Towers freeze enemies for 0.2 seconds while they are affected by chilling beams (Opalescent/Silver) is often considered to be one of the best in the game. Other generally good or budget ring anointments include:
- Your Meteor Towers create Burning Ground for 3 seconds on Hit (Indigo/Violet) (This burning ground ignores resilience to fire towers)
- Your Meteor Towers drop an additional Meteor (Verdant/Opalescent)
- Your Freezebolt Tower deal full damage to Cold Enemies (Verdant/Crimson)
- Your Scout Towers have 25% increased Range (Teal/Violet)
- Your Empowering Towers have 25% increased Effect (Sepia/Azure)
Related items
Lua error: not enough memory.
Towers
List of towers
Tower upgrades
Rewards
Completing a blighted map or a blight encounter on a regular map will grant many of the following:
| Image | Type | Typical drops |
|---|---|---|
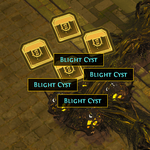 |
Random | Random assortment of items including armour, weapons and common currency |
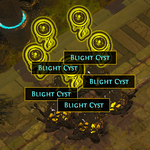 |
Blight | Oils, small chance for rare oils like Lua error: Internal error: The interpreter exited with status 1., Lua error: Internal error: The interpreter exited with status 1. and Blighted Maps |
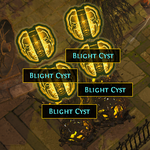 |
Currency | Common currency, can contain Lua error: Internal error: The interpreter exited with status 1.s Small chance for Lua error: Internal error: The interpreter exited with status 1.s, Lua error: Internal error: The interpreter exited with status 1.s, Lua error: Internal error: The interpreter exited with status 1.s, Lua error: Internal error: The interpreter exited with status 1.s |
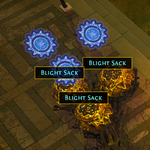 |
Harbinger | Lua error: Internal error: The interpreter exited with status 1.s, Beachhead map, chance for Lua error: Internal error: The interpreter exited with status 1.s and Lua error: Internal error: The interpreter exited with status 1.s |
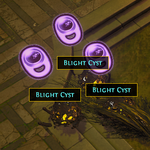 |
Jewelry | Rings, Amulets, Jewels, Abyss Jewels and Belts, which may be veiled, fractured, or influenced |
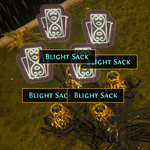 |
Divination Cards | 1 Lua error: Internal error: The interpreter exited with status 1. |
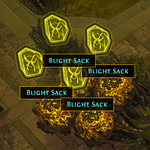 |
Fossils | Fossils, Resonators |
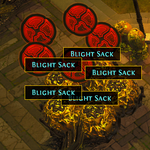 |
Map Fragments | Scarabs, Lua error: Internal error: The interpreter exited with status 1./Dawn/Noon/Midnight, Lua error: Internal error: The interpreter exited with status 1., Small chance for valuable map fragments |
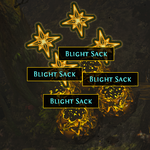 |
Maps | White and yellow maps (T1 to T10). Small chance for red maps (T11+). |
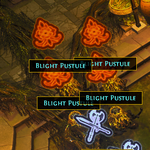 |
Uniques | Low level unique items, small chance for unique maps and valuable uniques like Lua error: Internal error: The interpreter exited with status 1.. |
 |
Armour | Armour, some of which may be veiled, fractured, 30 quality, or influenced |
 |
Weapons | Weapons, some of which may be veiled, fractured, 30 quality, or influenced |
 |
Abyss | Abyss Jewels, Stygian Vise belts |
 |
Essences | All tiers of Essences, small chance for Deafening Essences or Lua error: Internal error: The interpreter exited with status 1. |
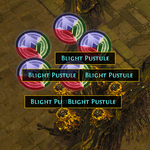 |
Gems | Skill gems, which may have levels and quality. Does not contain Transfigured or Awakened gems |
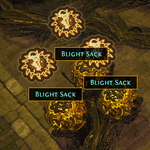 |
Talismans | Corrupted Talismans |
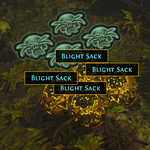 |
Labyrinth | Lua error: Internal error: The interpreter exited with status 1. |
| Ultimatum | Catalysts, small chance for valuable Lua error: Internal error: The interpreter exited with status 1.s and Lua error: Internal error: The interpreter exited with status 1.s | |
| Delirium | Lua error: Internal error: The interpreter exited with status 1.s, Cluster Jewels, Delirium orbs | |
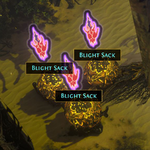 |
Breach | Breach Splinters, Lua error: Internal error: The interpreter exited with status 1., Breach Scarabs, and rarely Breachstones or Empowered Breachstones |
 |
Legion | Legion Splinters, Incubators |
|
Scarab | Scarabs |
Ruthless mode
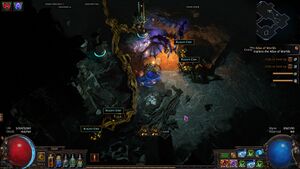
Reward chests from Blight encounters in Ruthless mode lack reward icons, and drop generic items, oils, or Blighted maps.
Related Atlas passive skills
Lua error: Internal error: The interpreter exited with status 1.
Related Sextant modifiers
Lua error: Internal error: The interpreter exited with status 1.
Version history
| Version | Changes |
|---|---|
| 3.20.1 |
|
| 3.20.0 |
|
| 3.17.0 |
|
| 3.14.3c |
|
| 3.14.0c |
|
| 3.14.0 |
|
| 3.12.0 |
|
| 3.8.0 |
|
See also
References
- ↑ https://youtu.be/s1GNBQsNRUQ?t=2582
- ↑ Chris (April 9, 2021). "Path of Exile: Ultimatum Content Reveal". Path of Exile Youtube Channel. Retrieved April 9, 2021.


