Map:Vaal Temple Map (Atlas of Worlds): Difference between revisions
>Qetuth m (link to boss page) |
m (→top: Item template) |
||
| (98 intermediate revisions by 26 users not shown) | |||
| Line 1: | Line 1: | ||
{{Item | |||
| | |rarity_id = normal | ||
| | |name = Vaal Temple Map | ||
| | |class_id = Map | ||
| | |size_x = 1 | ||
| | |size_y = 1 | ||
}} | |drop_level = 83 | ||
|drop_rarities_ids = normal, magic, rare, unique | |||
|tags = top_tier_map, indoors_area, dungeon, temple, not_for_sale, cannot_be_twinned, map, default | |||
|metadata_id = Metadata/Items/Maps/MapAtlasVaalTemple | |||
|help_text = Travel to this Map by using it in the Templar Laboratory or a personal Map Device. Maps can only be used once. | |||
|map_tier = 16 | |||
|map_guild_character = > | |||
|map_area_id = MapAtlasVaalTemple | |||
|map_series = Atlas of Worlds | |||
|map_area_level = 83 | |||
|inventory_icon = Vaal Temple Map (Atlas of Worlds) | |||
|drop_enabled = False | |||
|release_version = 2.4.0 | |||
}} | |||
''' | '''Vaal Temple Map''' can only be obtained by [[corrupted|corrupting]] a Tier 15 or higher [[map]], or in exchange for a full set of {{il|Lingering Remnants}}. | ||
*[[K'aj Q'ura]] | |||
*[[K'aj Y'ara'az]] | ==Map Type== | ||
*[[K'aj A'alai]] | Indoors. Based on the {{il|page=Vaal Pyramid Map (Atlas of Worlds)|name=Vaal Pyramid Map}} | ||
==Boss== | |||
* [[K'aj Q'ura]] | |||
* [[K'aj Y'ara'az]] | |||
* [[K'aj A'alai]] | |||
== Mechanics == | |||
The three bosses are located in the final room in an inactive state and cannot be damaged in any way until they are triggered to fight by walking near them. Killing each boss will spill a very large [[AoE]] black mist around its corpse that inflicts physical degeneration. This physical degen is only overcome with [[Endurance Charge]], {{il|Immortal Call}}, a large health pool with high regen, or a highly effective leech. Killing any 2 of 3 bosses will significantly amplify the power of the final boss. All three bosses have the same amount of health. Rearranging the order of killing each boss can increase or decrease the difficulty for a player depending on the strengths and weaknesses of their character. Killing all 3 bosses will remove all black mist from the area. | |||
'''K'aj Q'ura''' | |||
* Uses a physical [[AoE]] {{il|Cleave}} that applies 2 stacks of [[bleed]]. When he becomes the final boss, he attacks faster and stacks 8 bleed per hit. | |||
* Uses a fast-moving physical [[AoE]] {{il|Cyclone}} that leaves a red coloured [[desecrated ground]] with Chaos Degeneration. He normally uses this only when far away from the player. In final stage, he will use it liberally with higher speed and very quick successions. | |||
* After being killed, [[Whipping Miscreation]] begin to spawn from portals. | |||
'''K'aj Y'ara'az''' | |||
* Uses a hybrid physical and fire {{il|Dual Strike}}. Ignites the player. When he becomes the final boss, he attacks faster and deals higher damage. | |||
* Casts Enrage self-buff for a limited duration which visually depicts him on fire. The buff increases fire damage and reflects % damage dealt to him back to the player as a fire elemental damage. As a final boss, enrage significantly boosts fire damage and reflects a very high amount of damage as fire. The reflect increases in magnitude as it is closer to death. | |||
'''K'aj A'alai''' | |||
* Fires 1 to 3 physical projectiles. Higher projectile quantities have slower projectile speed. When she becomes the final boss, she attacks with higher physical damage. | |||
* Uses a physical projectile [[AoE]] {{il|Rain of Arrows}}. | |||
* Casts a physical [[Firestorm]]* that lasts 4 seconds. This spell lasts 30 seconds when she's the final boss. It can easily stack over previous casts and deal fatal amounts of damage. | |||
* After being killed, [[Tentacle Miscreation]] begin to spawn from portals. | |||
<nowiki>*</nowiki>This spell can become invisible if the player dies and returns to the area while the spell is still in effect. When no player is present in the instance, the Firestorm effect is paused and will resume once a player returns. | |||
== Strategy == | |||
The first two bosses should be killed in close proximity to each other and away from the entrance into the room. This is because the physical degeneration is very difficult to survive for a prolonged period and you do not want it obstructing movement. Physical damage reduction, eHP (in the form of health, energy shield, and damage conversion) and chaos resistance is important when you want to stand and fight back. The fight is sustained with high mobility, high efficiency leech and health flasks. Flasks with remove-bleed modifier (Staunching) are needed as well. | |||
Killing Y'ara'az (Dual Striker) does not spawn any sort of enemy reinforcements to kill as a source of flask recharge, so it is typically killed second or last. A'alai is the only ranged boss and is much harder to lure. Melee characters often do not choose her be the final boss as they will end up fighting her in the physical degen mist. | |||
Deciding on the last boss to kill ultimately comes down to your ability to survive against extremely high reflect, chaos damage(potentially covering half the room) and high physical spell damage; And which of those you think is the easiest to survive. | |||
==Divination card== | |||
* A full set of {{il|Lingering Remnants}} can be exchanged for a [[corrupted]] [[rare]] {{il|page=Vaal Temple Map (Atlas of Worlds)|name=Vaal Temple Map}}. | |||
{{Area item drops|area_id=MapAtlasVaalTemple}} | |||
{{Map variants}} | |||
{{#lst:Vaal Temple Map|version history}} | |||
Latest revision as of 15:44, 30 May 2024
Map Tier: 16
Guild Character: >Travel to this Map by using it in the Templar Laboratory or a personal Map Device. Maps can only be used once.
Drop disabled
Drop level: 83Vendor Offer
1x Scroll FragmentMetadata
Item class: Map
Metadata ID: Metadata/Items/Maps/MapAtlasVaalTemple
| Id | MapAtlasVaalTemple |
|---|---|
| Act | 11 |
| Area level | 83 |
| Bosses | K'aj Q'ura K'aj Y'ara'az K'aj A'alai |
| Area type tags | dungeon, temple |
| Tags | indoors_area, map, cannot_be_twinned, einharmaps, vaal_pyramid_area, triple_boss_map |
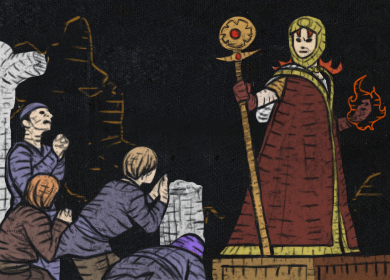
| The Shaper: Voices. Visions. Violence. They will haunt these grounds for all of eternity. |

_area_screenshot.jpg)
Vaal Temple Map can only be obtained by corrupting a Tier 15 or higher map, or in exchange for a full set of ![]() Lingering Remnants
Lingering Remnants Lingering Remnants
 16
16![]() Vaal Temple Map
Vaal Temple Map![]()
Item Level: 83
CorruptedNever dying, yet not living,
Endlessly they wander
beneath the harvest moon.![]() .
.
Map Type
Indoors. Based on the ![]() Vaal Pyramid MapVaal Pyramid MapMap Level: 70
Vaal Pyramid MapVaal Pyramid MapMap Level: 70
Map Tier: 3
Guild Character: GTravel to this Map by using it in the Templar Laboratory or a personal Map Device. Maps can only be used once.![]()
Boss
Mechanics
The three bosses are located in the final room in an inactive state and cannot be damaged in any way until they are triggered to fight by walking near them. Killing each boss will spill a very large AoE black mist around its corpse that inflicts physical degeneration. This physical degen is only overcome with Endurance Charge, ![]() Immortal CallImmortal CallSpell, Duration, Guard
Immortal CallImmortal CallSpell, Duration, Guard
Level: (1-20)
Cost: (21-36) Mana
Cooldown Time: 3.00 sec
Can Store 1 Use(s)
Cast Time: InstantRequires Level 34Take less Physical and Elemental Damage for a short time. Consumes up to 5 Endurance Charges to lengthen the buff and further lessen Physical Damage taken. Shares a cooldown with other Guard skills.Base duration is 1.00 seconds
20% increased Buff Duration per Endurance Charge removed
This Skill's Cooldown does not recover during its effect
(25-34)% less Elemental Damage taken
(25-35)% less Physical Damage taken
15% less Physical Damage taken per Endurance Charge removed
Additional Effects From 1-20% Quality:
(1-20)% increased Cooldown Recovery RatePlace into an item socket of the right colour to gain this skill. Right click to remove from a socket.![]()
![]() , a large health pool with high regen, or a highly effective leech. Killing any 2 of 3 bosses will significantly amplify the power of the final boss. All three bosses have the same amount of health. Rearranging the order of killing each boss can increase or decrease the difficulty for a player depending on the strengths and weaknesses of their character. Killing all 3 bosses will remove all black mist from the area.
, a large health pool with high regen, or a highly effective leech. Killing any 2 of 3 bosses will significantly amplify the power of the final boss. All three bosses have the same amount of health. Rearranging the order of killing each boss can increase or decrease the difficulty for a player depending on the strengths and weaknesses of their character. Killing all 3 bosses will remove all black mist from the area.
K'aj Q'ura
- Uses a physical AoE
 CleaveCleaveAttack, AoE, Physical, Melee
Level: (1-20)
Cost: 6 Mana
Attack Speed: 80% of base
Attack Damage: (125-237)% of base
Effectiveness of Added Damage: (125-237)%
AoE Radius: 20The character swings their weapon (or both weapons if dual wielding) in an arc, damaging monsters in an area in front of them. Only works with Axes and Swords.When Dual Wielding, Deals 60% Damage from each Weapon combined
(2-75) to (3-113) Added Attack Physical Damage
+(0-1) metre to radius
Additional Effects From 1-20% Quality:
+0.1 metres to radius per Nearby Enemy, up to a maximum of +1 metrePlace into an item socket of the right colour to gain this skill. Right click to remove from a socket.
 that applies 2 stacks of bleed. When he becomes the final boss, he attacks faster and stacks 8 bleed per hit.
 - Uses a fast-moving physical AoE
 CycloneCycloneAttack, AoE, Movement, Channelling, Physical, Melee
Level: (1-20)
Cost: 2 Mana
Attack Speed: 300% of base
Attack Damage: (44-59)% of base
Effectiveness of Added Damage: (44-59)%
AoE Radius: 1.6Requires Level 28Channel this skill to move towards a targeted location while spinning constantly attacking enemies in an area around you. While channelling this skill, you cannot be knocked back.(5-28) to (8-42) Added Attack Physical Damage
10% increased Area of Effect per 0.1 metre additional Melee Strike Range
30% less Movement Speed
Additional Effects From 1-20% Quality:
(0.5-10)% more Movement SpeedPlace into an item socket of the right colour to gain this skill. Right click to remove from a socket.
 that leaves a red coloured desecrated ground with Chaos Degeneration. He normally uses this only when far away from the player. In final stage, he will use it liberally with higher speed and very quick successions.
 - After being killed, Whipping Miscreation begin to spawn from portals.
K'aj Y'ara'az
- Uses a hybrid physical and fire
 Dual StrikeDual StrikeCritical, Attack, Melee, Strike
Level: (1-20)
Cost: 5 Mana
Attack Speed: 70% of base
Attack Damage: (125-244)% of base
Effectiveness of Added Damage: (125-244)%Attacks with both weapons, dealing the damage of both in one strike. Dual wield only. Does not work with wands.100% more Critical Strike Chance against Enemies that are on Full Life
60% more Damage with Hits and Ailments against Enemies that are on Full Life
Additional Effects From 1-20% Quality:
+(1.5-30)% more Damage with Hits and Ailments against Enemies that are on Full LifePlace into an item socket of the right colour to gain this skill. Right click to remove from a socket.
 . Ignites the player. When he becomes the final boss, he attacks faster and deals higher damage.
 - Casts Enrage self-buff for a limited duration which visually depicts him on fire. The buff increases fire damage and reflects % damage dealt to him back to the player as a fire elemental damage. As a final boss, enrage significantly boosts fire damage and reflects a very high amount of damage as fire. The reflect increases in magnitude as it is closer to death.
K'aj A'alai
- Fires 1 to 3 physical projectiles. Higher projectile quantities have slower projectile speed. When she becomes the final boss, she attacks with higher physical damage.
- Uses a physical projectile AoE
 Rain of ArrowsRain of ArrowsAttack, AoE, Projectile, Bow
Level: (1-20)
Cost: (7-11) Mana
Attack Damage: (48-60)% of base
Effectiveness of Added Damage: (48-60)%
AoE Radius: 24Requires Level 12Fires multiple arrows into the air, to land in sequence after a delay, starting at the targeted location and spreading outwards in all directions. Each arrow deals damage in an area around it. Half of the arrows will land directly on targets if there are targets in their range.Fires (18-22) Arrows
Additional Effects From 1-20% Quality:
Fires +(0.2-4) ArrowsPlace into an item socket of the right colour to gain this skill. Right click to remove from a socket.
 .
. - Casts a physical Firestorm* that lasts 4 seconds. This spell lasts 30 seconds when she's the final boss. It can easily stack over previous casts and deal fatal amounts of damage.
- After being killed, Tentacle Miscreation begin to spawn from portals.
*This spell can become invisible if the player dies and returns to the area while the spell is still in effect. When no player is present in the instance, the Firestorm effect is paused and will resume once a player returns.
Strategy
The first two bosses should be killed in close proximity to each other and away from the entrance into the room. This is because the physical degeneration is very difficult to survive for a prolonged period and you do not want it obstructing movement. Physical damage reduction, eHP (in the form of health, energy shield, and damage conversion) and chaos resistance is important when you want to stand and fight back. The fight is sustained with high mobility, high efficiency leech and health flasks. Flasks with remove-bleed modifier (Staunching) are needed as well.
Killing Y'ara'az (Dual Striker) does not spawn any sort of enemy reinforcements to kill as a source of flask recharge, so it is typically killed second or last. A'alai is the only ranged boss and is much harder to lure. Melee characters often do not choose her be the final boss as they will end up fighting her in the physical degen mist.
Deciding on the last boss to kill ultimately comes down to your ability to survive against extremely high reflect, chaos damage(potentially covering half the room) and high physical spell damage; And which of those you think is the easiest to survive.
Divination card
- A full set of
 Lingering RemnantsLingering Remnants16
 Vaal Temple Map
Item Level: 83
CorruptedNever dying, yet not living,
Endlessly they wander
beneath the harvest moon. can be exchanged for a corrupted rare
  Vaal Temple MapVaal Temple MapMap Level: 83
Map Tier: 16
Guild Character: >Travel to this Map by using it in the Templar Laboratory or a personal Map Device. Maps can only be used once. .
.
Items found in this area
The following drop-restricted items can drop in this area.
| Item | Drop Level |
|---|---|
 Last Hope Last Hope 3Mortal HopeAs their civilisation crumbled, the Vaal looked to their queen. In her, they saw a way out. In them, she saw a burden she was happy to free herself from. 3Mortal HopeAs their civilisation crumbled, the Vaal looked to their queen. In her, they saw a way out. In them, she saw a burden she was happy to free herself from. | 53 |
Map variants
| Item | Map Tier | Map Level | Map Series |
|---|---|---|---|
Map Tier: 16 Guild Character: >Area contains 10 additional guarded Vaal VesselsVoices. Visions. Violence. They will haunt these grounds for all of eternity.Travel to this Map by using it in a personal Map Device. Maps can only be used once. | 16 | 83 | Necropolis |
Map Tier: 16 Guild Character: >Area contains 10 additional guarded Vaal VesselsVoices. Visions. Violence. They will haunt these grounds for all of eternity.Travel to this Map by using it in a personal Map Device. Maps can only be used once. | 16 | 83 | Affliction |
Map Tier: 16 Guild Character: >Area contains 10 additional guarded Vaal VesselsVoices. Visions. Violence. They will haunt these grounds for all of eternity.Travel to this Map by using it in a personal Map Device. Maps can only be used once. | 16 | 83 | Ancestor |
Map Tier: 16 Guild Character: >Area contains 10 additional guarded Vaal VesselsVoices. Visions. Violence. They will haunt these grounds for all of eternity.Travel to this Map by using it in a personal Map Device. Maps can only be used once. | 16 | 83 | Crucible |
Map Tier: 16 Guild Character: >Area contains 10 additional guarded Vaal VesselsVoices. Visions. Violence. They will haunt these grounds for all of eternity.Travel to this Map by using it in a personal Map Device. Maps can only be used once. | 16 | 83 | The Forbidden Sanctum |
Map Tier: 16 Guild Character: >Area contains 10 additional guarded Vaal VesselsVoices. Visions. Violence. They will haunt these grounds for all of eternity.Travel to this Map by using it in a personal Map Device. Maps can only be used once. | 16 | 83 | Kalandra |
Map Tier: 16 Guild Character: >Area contains 10 additional guarded Vaal VesselsVoices. Visions. Violence. They will haunt these grounds for all of eternity.Travel to this Map by using it in a personal Map Device. Maps can only be used once. | 16 | 83 | Sentinel |
Map Tier: 16 Guild Character: >Area contains 10 additional guarded Vaal VesselsTravel to this Map by using it in a personal Map Device. Maps can only be used once. | 16 | 83 | Archnemesis |
Map Tier: 16 Guild Character: >Voices. Visions. Violence. They will haunt these grounds for all of eternity.Travel to this Map by using it in a personal Map Device. Maps can only be used once. | 16 | 83 | Scourge |
Map Tier: 16 Guild Character: >Voices. Visions. Violence. They will haunt these grounds for all of eternity.Travel to this Map by using it in a personal Map Device. Maps can only be used once. | 16 | 83 | Expedition |
Map Tier: 16 Guild Character: >Voices. Visions. Violence. They will haunt these grounds for all of eternity.Travel to this Map by using it in a personal Map Device. Maps can only be used once. | 16 | 83 | Ritual |
Map Tier: 16 Guild Character: >Voices. Visions. Violence. They will haunt these grounds for all of eternity.Travel to this Map by using it in a personal Map Device. Maps can only be used once. | 16 | 83 | Heist |
Map Tier: 16 Guild Character: >Voices. Visions. Violence. They will haunt these grounds for all of eternity.Travel to this Map by using it in a personal Map Device. Maps can only be used once. | 16 | 83 | Harvest |
Map Tier: 16 Guild Character: >Voices. Visions. Violence. They will haunt these grounds for all of eternity.Travel to this Map by using it in a personal Map Device. Maps can only be used once. | 16 | 83 | Delirium |
Map Tier: 16 Guild Character: >Voices. Visions. Violence. They will haunt these grounds for all of eternity.Travel to this Map by using it in a personal Map Device. Maps can only be used once. | 16 | 83 | Metamorph |
Map Tier: 16 Guild Character: >Voices. Visions. Violence. They will haunt these grounds for all of eternity.Travel to this Map by using it in a personal Map Device. Maps can only be used once. | 16 | 83 | Blight |
Map Tier: 16 Guild Character: >Voices. Visions. Violence. They will haunt these grounds for all of eternity.Travel to this Map by using it in the Templar Laboratory or a personal Map Device. Maps can only be used once. | 16 | 83 | Legion |
Map Tier: 16 Guild Character: >Voices. Visions. Violence. They will haunt these grounds for all of eternity.Travel to this Map by using it in the Templar Laboratory or a personal Map Device. Maps can only be used once. | 16 | 83 | Synthesis |
Map Tier: 16 Guild Character: >Voices. Visions. Violence. They will haunt these grounds for all of eternity.Travel to this Map by using it in the Templar Laboratory or a personal Map Device. Maps can only be used once. | 16 | 83 | Betrayal |
Map Tier: 16 Guild Character: >Travel to this Map by using it in the Templar Laboratory or a personal Map Device. Maps can only be used once. | 16 | 83 | War for the Atlas |
Map Tier: 16 Guild Character: >Travel to this Map by using it in the Templar Laboratory or a personal Map Device. Maps can only be used once. | 16 | 83 | Atlas of Worlds |
Map Tier: 14 Guild Character: >Travel to this Map by using it in the Templar Laboratory or a personal Map Device. Maps can only be used once. | 14 | 81 | The Awakening |
Map Tier: 14 Guild Character: §Travel to this Map by using it in the Templar Laboratory or a personal Map Device. Maps can only be used once. | 14 | 79 | Original |
Version history
| Version | Changes |
|---|---|
| 3.24.0b |
|
| 3.22.0 |
|
| 3.18.0 |
|
| 3.17.1 |
|
| 3.17.0 |
|
| 3.9.2c |
|
| 3.9.0 |
|
| 3.5.0 |
|
| 3.1.0 |
|
| 2.4.0 |
|
| 1.1.0 |
|