Blight (game mechanic): Difference between revisions
No edit summary |
No edit summary |
||
| Line 18: | Line 18: | ||
Blights were introduced in the [[Blight league]]. Characters must complete least 1 map Blight encounter in a new league to complete Cassia's quest before she will [[anointment|anoint]] items. This also applies to the [[Blight Stash Tab]]. | Blights were introduced in the [[Blight league]]. Characters must complete least 1 map Blight encounter in a new league to complete Cassia's quest before she will [[anointment|anoint]] items. This also applies to the [[Blight Stash Tab]]. | ||
A maximum of one Blight can spawn per zone naturally; this maximum is shared between the random chance to spawn a Blight, and guaranteed Blight from [[Blight Scarab]]s, [[sextant]] mods, enchantments, or the Blight [[Kirac]] mod. However, it is possible to spawn up to 2 additional Blights over this maximum: | A maximum of one Blight can spawn per zone naturally; this maximum is shared between the random chance to spawn a Blight, and guaranteed Blight from [[Blight Scarab]]s, [[sextant]] mods, enchantments, or the Blight [[Kirac]] mod. However, it is possible to spawn up to 2 additional Blights over this maximum:<ref>https://www.reddit.com/r/pathofexile/comments/xz10pe/so_apparently_you_can_have_3_blights_in_a_map/</ref> | ||
# [[Mycelial Swarm]] Notable on the [[Atlas Passive Skill Tree]] | # [[Mycelial Swarm]] Notable on the [[Atlas Passive Skill Tree]] | ||
Revision as of 10:15, 16 October 2022
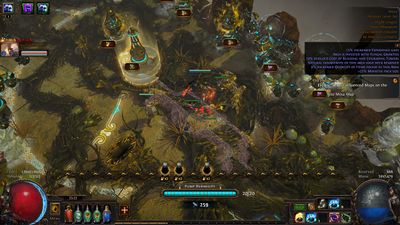
Blights are tower defense-like encounters that can spawn from Fungal Growths in any map area, which will always be accompanied by Sister Cassia. This encounter is considered Extra Content and has a baseline 8% chance to appear in any non-unique map area.
Blight encounters are also found in Blighted maps, which are a modified version of existing maps, which contains no regular monsters and instead contains a single Blight encounter. Blights in Blighted maps are far larger, spawn a significantly increased amount of enemies and bosses, and provide a greater quantity and variety of rewards. Players can trade Blighted maps. Most Atlas passives that affect Blights in maps do not affect Blighted maps. There is also a pinnacle version of Blighted maps called Blight-ravaged maps.
Mechanics
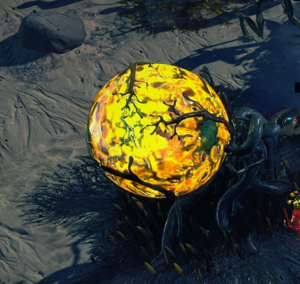
Once players interact with the Fungal Growth, Cassia will place a purification pump on the growth, causing it to spawn roots in random directions. At the end of each root is a portal that spawns enemies that slowly move towards the core, only stopping to attack units in its way. The Blight can spawn up to 8 roots, increasing with zone level. Players will be given a short preparation time before the Blight starts spawning monsters. Players can skip this by pressing a button that appears on the bottom right during this preparation period.
Some roots will spawn after a delay, and sometimes a root will have multiplied monster density (indicated by a multiplier). An icon corresponding to a tower can appear over each root, indicating which tower it is resistant to. Along the paths of the roots, players can construct a tower in specified areas. Towers cost resources to build or upgrade, which are given at the start and also acquired from killing blighted enemies.
When an enemy reaches the core, it will lower the pump's durability by a fixed amount and despawn. The pump has 10 durability in maps (20 in Blighted maps), and the amount of durability lowered is based on the monster's rarity (1 for normal, 2 for magic, 5 for rare, 10 for unique). When the pump's durability reaches 0, the Blight encounter fails and monsters will stop spawning.
Once all enemies from each portal/lane are defeated, reward chests will spawn at the location of each portal. These chests remain once spawned even if the pump is destroyed and the Blight encounter is failed. Blights always reward at least one oil or one Blighted map. Oil rewards chests have a baseline ~15% chance to drop a Blighted Map.
Blights were introduced in the Blight league. Characters must complete least 1 map Blight encounter in a new league to complete Cassia's quest before she will anoint items. This also applies to the Blight Stash Tab.
A maximum of one Blight can spawn per zone naturally; this maximum is shared between the random chance to spawn a Blight, and guaranteed Blight from Blight Scarabs, sextant mods, enchantments, or the Blight Kirac mod. However, it is possible to spawn up to 2 additional Blights over this maximum:[1]
- Mycelial Swarm Notable on the Atlas Passive Skill Tree
- Fortune Favours the Brave, while Blight is available as a Kirac mod
Spawn chance
Blights were the main focus of the temporary Blight leagues. After the leagues ended, Blight was added to the core game, but spawns much less often than in the Blight leagues. By default maps have an 8% chance to have a Blight encounter.[2]
In some leagues, a Zana crafted mod allows players to force Blight to spawn. The Zana mod also has a hidden property that sets the league flag of the map to the Blight league flag,[3], which is necessary to chance some of the unique items released in the Blight league. GGG also declared some unique are added to core drop pool in the version 3.14.0 reveal video, such as Blight-specific unique ![]() Badge of the BrotherhoodBadge of the Brotherhood
Badge of the BrotherhoodBadge of the Brotherhood
Turquoise AmuletRequires Level 60+(16-24) to Dexterity and Intelligence(7-10)% increased Cooldown Recovery Rate of Travel Skills per Frenzy Charge
(7-10)% increased Effect of Elusive on you per Power Charge
(20-25)% chance to lose a Frenzy Charge when you use a Travel Skill
(20-25)% chance to lose a Power Charge when you gain Elusive
Your Maximum Frenzy Charges is equal to your Maximum Power ChargesGreater than any blade, agility and intellect will be your weapons.![]() .
.
In addition, by allocating the atlas passive ![]() Spores on the Wind, maps can drop with the enchantment Area contains a Blight EncounterMapAdditionalBlightEnchantment
Spores on the Wind, maps can drop with the enchantment Area contains a Blight EncounterMapAdditionalBlightEnchantment
Intrinsic
Area contains a Blight Encounter. The enchantment and the Zana mod is not the same .
Lastly, using Blight Scarab can also force spawn Blight encounter. However, this is not stackable to other source of the Blight encounter.
Strategy
- Rare and/or Unique Enemies are capable of moving faster and having more life. They are also capable of running past a characters minions instead of stopping and attacking them like normal and magic enemies do.(unconfirmed) These three factors make it easy for them to run past a player with low offense and/or nothing to slow them down. Using slow effects and/or knockback can help to give the player time before the enemy reaches the pump. With a lot of hits per second and knockback and slow, it is possible to not have to worry about the enemy reaching the pump no matter how much time passes. This can be very useful for characters who have low damage.
- Towers - In most situations empowering towers are the best tower per cost. They upgrade the power of multiple useful towers nearby. Some towers have multiple effects that are affected by empowering towers. This makes empowering towers improve those towers more than others. Each tower can only be upgraded by 1 empowering tower max. Choosing between damage and/or slowing towers will depend on your build. A build with pretty good damage but no slowing effects on enemies will probably do best with towers that slow enemies. A build with plenty of slow and knockback effects, but not so great damage, will probably want damaging towers. Enemies can resist some towers greatly and therefore varying damage types and/or slow types will increase the chances of enemies being affected significantly by your towers. Rings can be anointed with the same tower mod on both to stack. This can be useful for stronger mods like Your Temporal Towers also grant you 20% increased action speed, which give 40% action speed with 2 rings. Action speed does not affect minions or other players
Related items
Lua error: not enough memory.
Towers
List of towers
Tower upgrades
Rewards
Completing a blighted map or a blight encounter on a regular map will grant many of the following:
| Image | Type | Typical drops |
|---|---|---|
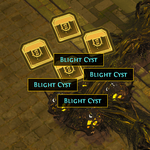 |
Random | Random assortment of items including armour, weapons and common currency |
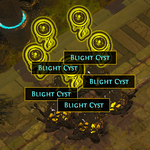 |
Blight | Oils, small chance for rare oils like Lua error: Internal error: The interpreter exited with status 1., Lua error: Internal error: The interpreter exited with status 1. and Blighted Maps |
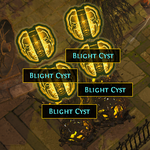 |
Currency | Common currency, can contain Lua error: Internal error: The interpreter exited with status 1.s Small chance for Lua error: Internal error: The interpreter exited with status 1.s, Lua error: Internal error: The interpreter exited with status 1.s, Lua error: Internal error: The interpreter exited with status 1.s, Lua error: Internal error: The interpreter exited with status 1.s |
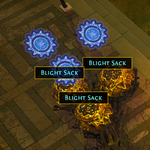 |
Harbinger | Lua error: Internal error: The interpreter exited with status 1.s, Beachhead map, chance for Lua error: Internal error: The interpreter exited with status 1.s and Lua error: Internal error: The interpreter exited with status 1.s |
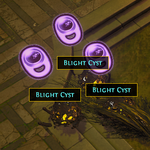 |
Jewelry | Rings, Amulets, Jewels, Abyss Jewels and Belts, which may be veiled, fractured, or influenced |
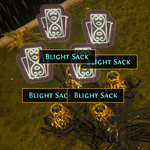 |
Divination Cards | 1 Lua error: Internal error: The interpreter exited with status 1. |
 |
Fossils | Fossils, Resonators |
 |
Map Fragments | Scarabs, Lua error: Internal error: The interpreter exited with status 1./Dawn/Noon/Midnight, Lua error: Internal error: The interpreter exited with status 1., Small chance for valuable map fragments |
 |
Maps | White and yellow maps (T1 to T10). Small chance for red maps (T11+). |
 |
Uniques | Low level unique items, small chance for unique maps and valuable uniques like Lua error: Internal error: The interpreter exited with status 1.. |
 |
Armour | Armour, some of which may be veiled, fractured, 30 quality, or influenced |
 |
Weapons | Weapons, some of which may be veiled, fractured, 30 quality, or influenced |
 |
Abyss | Abyss Jewels, Stygian Vise belts |
 |
Essences | All tiers of Essences, small chance for Deafening Essences or Lua error: Internal error: The interpreter exited with status 1. |
 |
Gems | Skill gems, which may have levels and quality. Does not contain Transfigured or Awakened gems |
 |
Talismans | Corrupted Talismans |
 |
Labyrinth | Lua error: Internal error: The interpreter exited with status 1. |
| Ultimatum | Catalysts, small chance for valuable Lua error: Internal error: The interpreter exited with status 1.s and Lua error: Internal error: The interpreter exited with status 1.s | |
| Delirium | Lua error: Internal error: The interpreter exited with status 1.s, Cluster Jewels, Delirium orbs | |
 |
Breach | Breach Splinters, Lua error: Internal error: The interpreter exited with status 1., Breach Scarabs, and rarely Breachstones or Empowered Breachstones |
 |
Legion | Legion Splinters, Incubators |
|
Scarab | Scarabs |
Version history
| Version | Changes |
|---|---|
| 3.17.0 |
|
| 3.14.3c |
|
| 3.14.0 |
|
| 3.12.0 |
|
| 3.8.0 |
|
See also
References
- ↑ https://www.reddit.com/r/pathofexile/comments/xz10pe/so_apparently_you_can_have_3_blights_in_a_map/
- ↑ Version 3.9.0 patch notes cite 10%, followed by Version 3.14.0 patch notes citing a 20% reduction.
- ↑ Lua error: Internal error: The interpreter exited with status 1.
- ↑ Chris (April 9, 2021). "Path of Exile: Ultimatum Content Reveal". Path of Exile Youtube Channel. Retrieved April 9, 2021.


