Cells MapMap Level: 74 Map Tier: 7 Guild Character: 5Travel to this Map by using it in the Templar Laboratory or a personal Map Device. Maps can only be used once.
Acquisition Drop disabled Drop level: 74Vendor Prices
This map is based on The Crematorium area. Since version 3.1.0 it is a legacy variant of Cells MapCells MapMap Level: 70 Map Tier: 3 Guild Character: ÚTravel to this Map by using it in the Templar Laboratory or a personal Map Device. Maps can only be used once..
Casts FirestormFirestormSpell, AoE, Duration, Fire Level: (1-20) Cost: (13-25) Mana Cast Time: 0.75 sec Critical Strike Chance: 6.00% Effectiveness of Added Damage: 80%Requires Level 28Flaming bolts rain down over the targeted area. They explode when landing, dealing damage to nearby enemies.Base duration is 1.40 seconds Deals (23-361) to (35-541) Fire Damage One impact every 0.15 seconds Base radius is 1.3 metres First Impact has 100% more Area of Effect First Impact deals 325% more Damage with Hits and Ailments Maximum 3 Firestorms at a time
Additional Effects From 1-20% Quality: Base radius is (0.01-0.2) metresPlace into an item socket of the right colour to gain this skill. Right click to remove from a socket. with duration increased to around 8 second.
Throws Fire Bombs.
Summons Molten Skeletons.
Strategy
Because of the extreme duration of her Firestorm, Megaera can create a deadly zone by casting it multiple times. Most of her damage can be avoided with Decoy Totems or by taking the fight to another spot when too many Firestorms stack in one place. A barred wall limits movement along one of the walls in her cell, but can be bypassed with skills such as Lightning Warp. Molten Skeletons deal Fire damage and burn ground on death or when they expire. In maps that increase boss' casting speed or area of effect, as well as twinned maps, increasing maximum fire resistance might be required. Leaving doors around the area closed and using movement skills to get to the other side can ensure an escape route.
The PenitentThe Penitent5Unset RingFirst, I gave my wealth, and we went hungry. Next, I gave my land, and we were homeless. Then, I gave my family, and I was alone. Last, I gave my eyes, and all I could dream was mine.
68
The WretchedThe Wretched6BeltNecromancers, believe me, are more terrifying than their thralls.
68
Walkthroughs
Click to load content
Map variants
Item
Map Tier
Map Level
Map Series
Cells MapCells MapMap Level: 71 Map Tier: 4 Guild Character: ÚLife crushed together. Left to crumble to dust.Travel to this Map by using it in a personal Map Device. Maps can only be used once.
4
71
Necropolis
Cells MapCells MapMap Level: 72 Map Tier: 5 Guild Character: ÚLife crushed together. Left to crumble to dust.Travel to this Map by using it in a personal Map Device. Maps can only be used once.
5
72
Ancestor
Cells MapCells MapMap Level: 77 Map Tier: 10 Guild Character: ÚLife crushed together. Left to crumble to dust.Travel to this Map by using it in a personal Map Device. Maps can only be used once.
10
77
Crucible
Cells MapCells MapMap Level: 70 Map Tier: 3 Guild Character: ÚLife crushed together. Left to crumble to dust.Travel to this Map by using it in a personal Map Device. Maps can only be used once.
3
70
Kalandra
Cells MapCells MapMap Level: 82 Map Tier: 15 Guild Character: ÚLife crushed together. Left to crumble to dust.Travel to this Map by using it in a personal Map Device. Maps can only be used once.
15
82
Sentinel
Cells MapCells MapMap Level: 72 Map Tier: 5 Guild Character: ÚLife crushed together. Left to crumble to dust.Travel to this Map by using it in a personal Map Device. Maps can only be used once.
5
72
Archnemesis
Cells MapCells MapMap Level: 80 Map Tier: 13 Guild Character: ÚLife crushed together. Left to crumble to dust.Travel to this Map by using it in a personal Map Device. Maps can only be used once.
13
80
Scourge
Cells MapCells MapMap Level: 83 Map Tier: 16 Guild Character: ÚLife crushed together. Left to crumble to dust.Travel to this Map by using it in a personal Map Device. Maps can only be used once.
16
83
Expedition
Cells MapCells MapMap Level: 72 Map Tier: 5 Guild Character: ÚLife crushed together. Left to crumble to dust.Travel to this Map by using it in a personal Map Device. Maps can only be used once.
5
72
Ritual
Cells MapCells MapMap Level: 77 Map Tier: 10 Guild Character: ÚLife crushed together. Left to crumble to dust.Travel to this Map by using it in a personal Map Device. Maps can only be used once.
10
77
Heist
Cells MapCells MapMap Level: 77 Map Tier: 10 Guild Character: ÚLife crushed together. Left to crumble to dust.Travel to this Map by using it in a personal Map Device. Maps can only be used once.
10
77
Harvest
Cells MapCells MapMap Level: 77 Map Tier: 10 Guild Character: ÚLife crushed together. Left to crumble to dust.Travel to this Map by using it in a personal Map Device. Maps can only be used once.
10
77
Delirium
Cells MapCells MapMap Level: 77 Map Tier: 10 Guild Character: ÚLife crushed together. Left to crumble to dust.Travel to this Map by using it in a personal Map Device. Maps can only be used once.
10
77
Metamorph
Cells MapCells MapMap Level: 75 Map Tier: 8 Guild Character: ÚLife crushed together. Left to crumble to dust.Travel to this Map by using it in a personal Map Device. Maps can only be used once.
8
75
Blight
Cells MapCells MapMap Level: 73 Map Tier: 6 Guild Character: ÚLife crushed together. Left to crumble to dust.Travel to this Map by using it in the Templar Laboratory or a personal Map Device. Maps can only be used once.
6
73
Legion
Cells MapCells MapMap Level: 76 Map Tier: 9 Guild Character: ÚLife crushed together. Left to crumble to dust.Travel to this Map by using it in the Templar Laboratory or a personal Map Device. Maps can only be used once.
9
76
Synthesis
Cells MapCells MapMap Level: 74 Map Tier: 7 Guild Character: ÚLife crushed together. Left to crumble to dust.Travel to this Map by using it in the Templar Laboratory or a personal Map Device. Maps can only be used once.
7
74
Betrayal
Cells MapCells MapMap Level: 70 Map Tier: 3 Guild Character: ÚTravel to this Map by using it in the Templar Laboratory or a personal Map Device. Maps can only be used once.
3
70
War for the Atlas
Cells MapCells MapMap Level: 74 Map Tier: 7 Guild Character: 5Travel to this Map by using it in the Templar Laboratory or a personal Map Device. Maps can only be used once.
7
74
Atlas of Worlds
Shaped Cells MapShaped Cells MapMap Level: 79 Map Tier: 12 Guild Character: 5Travel to this Map by using it in the Templar Laboratory or a personal Map Device. Maps can only be used once.
12
79
Atlas of Worlds
Cells MapCells MapMap Level: 75 Map Tier: 8 Guild Character: 5Travel to this Map by using it in the Templar Laboratory or a personal Map Device. Maps can only be used once.
8
75
The Awakening
Cells MapCells MapMap Level: 73 Map Tier: 8 Guild Character: 5Travel to this Map by using it in the Templar Laboratory or a personal Map Device. Maps can only be used once.
The following Maps have been added back to the Atlas: Arsenal, Barrows, Belfry, Cells, Cold River, Courthouse, Defiled Cathedral, Desert Spring, Dungeon, Excavation, Forbidden Woods, Fungal Hollow, Graveyard, Lair, Lava Lake, Mausoleum, Phantasmagoria, Pit, Primordial Pool, Shipyard, Shrine, Silo, Sulphur Vents, Sunken City, Terrace, Tower, Toxic Sewer, and Waterways.
The following Maps have been removed from the Atlas: Alleyways, Arachnid Tomb, Barrows, Beach, Cells, Cold River, Courthouse, Dungeon, Excavation, Factory, Fungal Hollow, Geode, Graveyard, Haunted Mansion, Lava Lake, Leyline, Malformation, Mausoleum, Pen, Phantasmagoria, Pit, Primordial Blocks, Primordial Pool, Silo, Sulphur Vents, Sunken City, Terrace, Tower, and Waterways.
The following Maps have been added back to the Atlas: Arid Lake, Armoury, Barrows, Beach, Belfry, Cells, Chateau, Conservatory, Core, Crystal Ore, Desert Spring, Dig, Excavation, Fields, Flooded Mine, Fungal Hollow, Geode, Jungle Valley, Lighthouse, Malformation, Marshes, Pit, Racecourse, Ramparts, Relic Chambers, Scriptorium, Siege, Stagnation, Tower, Tropical Island, Waste Pool, and Wharf.
The following Maps have been removed from the Atlas: Arena, Arid Lake, Armoury, Barrows, Belfry, Bramble Valley, Cells, Chateau, Dig, Excavation, Fungal Hollow, Jungle Valley, Lava Chamber, Marshes, Mud Geyser, Park, Pen, Racecourse, Ramparts, Stagnation, Summit, Vault, Waste Pool, Waterways, and Wharf.
The entire Atlas has been reworked. Many map names have changed, as have their balance, tier and position on the Atlas. Many maps have also had their boss fights swapped or completely reworked.
The rules used to generate monsters in endgame maps have been significantly reworked and rebalanced around the rate at which we expect players to reliably clear out the map. In general, narrow, linear maps will contain fewer total monsters than maps with complex layouts. We will be closely monitoring and adjusting the balance of this change and expect to make further changes and improvements over time.
Shavronne the Sickening became the new map boss of Cells Map. [Undocumented This change was not documented by any official sources. It was discovered through player testing or datamining.]

_area_screenshot.jpg)


 FirestormFirestormSpell, AoE, Duration, Fire
 with duration increased to around 8 second.
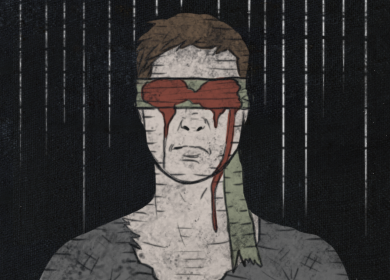 The Penitent
 5
5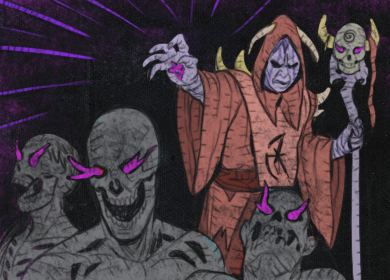 The Wretched
 6BeltNecromancers, believe me, are more terrifying than their thralls.