|help_text = Travel to this Map by using it in the Templar Laboratory or a personal Map Device. Maps can only be used once.
|purchase_cost_normal1_name = Orb of Chance
|purchase_cost_normal1_amount = 2
|purchase_cost_magic1_name = Orb of Chance
|purchase_cost_magic1_amount = 3
|purchase_cost_rare1_name = Orb of Chance
|purchase_cost_rare1_amount = 4
|purchase_cost_unique1_name = Chaos Orb
|purchase_cost_unique1_amount = 10
|map_tier = 3
|map_guild_character = G
|map_area_id = MapAtlasVaalPyramid
|unique_map_guild_character = g
|unique_map_area_id = MapAtlasVaalPyramidUnique_
|unique_map_area_level = 70
|map_series = Atlas of Worlds
|map_area_level = 70
|inventory_icon = Vaal Pyramid Map (Atlas of Worlds)
|drop_enabled = False
|release_version = 2.4.0
}}
[[File:Vaal pyramid t3.png|thumb]]
'''Vaal Pyramid''' [[map]] is based on the [[Ancient Pyramid]] zone in [[Act 2]]. It has 3 sections connected by stairs.
'''Map type''': Indoors
'''Map type''': Indoors
'''Boss''': Atziri's Chosen (a unique [[Vaal Fallen]])
==Boss Arena==
*Resist Fire
Arena is located on the 3rd level and resembles the Vaal Oversoul's room. Entrance seals when the portal on the far side of the room is approached until the bosses are killed.
*Undead
*Inflicts Elemental Status Effects
*Allies Deal Extra Physical Damage
'''Vendor''': Produced by 3 [[Wharf]] (level 67) maps;
The bosses appear from a portal on the floor sequentially with 8-10 seconds between the spawns. The spawn order is [[The Fallen Queen]], then [[The Hollow Lady]], then [[The Broken Prince]].
Vaal Pyramid MapMap Level: 70 Map Tier: 3 Guild Character: GTravel to this Map by using it in the Templar Laboratory or a personal Map Device. Maps can only be used once.
Acquisition Drop disabled Drop level: 70Vendor Prices
Arena is located on the 3rd level and resembles the Vaal Oversoul's room. Entrance seals when the portal on the far side of the room is approached until the bosses are killed.
Ethereal KnivesEthereal KnivesSpell, Projectile, Physical Level: (1-20) Cost: (5-20) Mana Cast Time: 0.60 sec Critical Strike Chance: 6.00% Effectiveness of Added Damage: 220% Projectile Speed: 1300Fires an arc of knives outwards in front of the caster which deal physical damage.Deals (7-949) to (10-1423) Physical Damage Fires (10-13) Projectiles
Additional Effects From 1-20% Quality: Fires +(0.1-2) ProjectilesPlace into an item socket of the right colour to gain this skill. Right click to remove from a socket.
Viper StrikeViper StrikeAttack, Duration, Melee, Strike, Chaos Level: (1-20) Cost: 5 Mana Attack Damage: (90-154)% of base Effectiveness of Added Damage: (90-154)%Hits enemies, converting some of your physical damage to chaos damage and inflicting poison which will be affected by modifiers to skill duration. If dual wielding, will strike with both weapons. Requires a claw, dagger or sword.30% less Attack Speed if Dual Wielding Each Weapon Hits separately if Dual Wielding, dealing 20% less Damage Base duration is 4.00 seconds (5-169) to (7-254) Added Chaos Damage 60% of Physical Damage Converted to Chaos Damage 60% chance to Poison on Hit
Additional Effects From 1-20% Quality: Base duration is (0.05-1) secondsPlace into an item socket of the right colour to gain this skill. Right click to remove from a socket.
Casts ReaveReaveAttack, AoE, Melee Level: (1-20) Cost: 6 Mana Attack Damage: (170-250)% of base Effectiveness of Added Damage: (170-250)% AoE Radius: 20Requires Level 12Attacks an area in front of you. Each Reave that hits an enemy grants stages, which you will begin to lose after a short period without hitting anything. Only works with Daggers, Claws, and One-Handed Swords.4 Maximum Stages +(0-0.2) metres to radius 50% more Area of Effect for each stage
Additional Effects From 1-20% Quality: +(0.1-2) to maximum StagesPlace into an item socket of the right colour to gain this skill. Right click to remove from a socket.
Smoke MineSmoke MineMine, Spell, AoE, Duration, Movement, Travel, Blink Level: (1-20) Cost: (6-13) Mana Reservation: (6-13) Mana Cooldown Time: 5.00 sec Can Store 3 Use(s) Cast Time: 0.50 secRequires Level 10Throws a mine that will teleport you to it when detonated. It covers both your escape and arrival with a cloud of smoke that blinds enemies, and gives you a temporary buff to movement speed. Shares a cooldown with other Blink skills.Mine lasts 8 seconds Base duration is (4.00-5.00) seconds Base secondary duration is 1.00 seconds Increases and Reductions to Mine Duration also apply to this Skill's Buff Duration Only one Mine of this type can Detonate in each Detonation Sequence Buff grants (20-29)% increased Movement Speed Mines cannot be Re-armed Mine Detonation is Instant
Additional Effects From 1-20% Quality: Buff grants (1-20)% increased Movement SpeedPlace into an item socket of the right colour to gain this skill. Right click to remove from a socket.
There are currently no unique items for this base item type.
Map variants
Item
Map Tier
Map Level
Map Series
Vaal Pyramid MapVaal Pyramid MapMap Level: 71 Map Tier: 4 Guild Character: ~A good slave is driven by only two thoughts: service and sacrifice.Travel to this Map by using it in a personal Map Device. Maps can only be used once.
4
71
Necropolis
Vaal Pyramid MapVaal Pyramid MapMap Level: 71 Map Tier: 4 Guild Character: ~A good slave is driven by only two thoughts: service and sacrifice.Travel to this Map by using it in a personal Map Device. Maps can only be used once.
4
71
Affliction
Vaal Pyramid MapVaal Pyramid MapMap Level: 71 Map Tier: 4 Guild Character: ~A good slave is driven by only two thoughts: service and sacrifice.Travel to this Map by using it in a personal Map Device. Maps can only be used once.
4
71
Ancestor
Vaal Pyramid MapVaal Pyramid MapMap Level: 71 Map Tier: 4 Guild Character: ~A good slave is driven by only two thoughts: service and sacrifice.Travel to this Map by using it in a personal Map Device. Maps can only be used once.
4
71
Crucible
Vaal Pyramid MapVaal Pyramid MapMap Level: 71 Map Tier: 4 Guild Character: ~A good slave is driven by only two thoughts: service and sacrifice.Travel to this Map by using it in a personal Map Device. Maps can only be used once.
4
71
The Forbidden Sanctum
Vaal Pyramid MapVaal Pyramid MapMap Level: 71 Map Tier: 4 Guild Character: ~A good slave is driven by only two thoughts: service and sacrifice.Travel to this Map by using it in a personal Map Device. Maps can only be used once.
4
71
Kalandra
Vaal Pyramid MapVaal Pyramid MapMap Level: 79 Map Tier: 12 Guild Character: ~A good slave is driven by only two thoughts: service and sacrifice.Travel to this Map by using it in a personal Map Device. Maps can only be used once.
12
79
Sentinel
Vaal Pyramid MapVaal Pyramid MapMap Level: 79 Map Tier: 12 Guild Character: ~A good slave is driven by only two thoughts: service and sacrifice.Travel to this Map by using it in a personal Map Device. Maps can only be used once.
12
79
Archnemesis
Vaal Pyramid MapVaal Pyramid MapMap Level: 71 Map Tier: 4 Guild Character: ~A good slave is driven by only two thoughts: service and sacrifice.Travel to this Map by using it in a personal Map Device. Maps can only be used once.
4
71
Scourge
Vaal Pyramid MapVaal Pyramid MapMap Level: 69 Map Tier: 2 Guild Character: ~A good slave is driven by only two thoughts: service and sacrifice.Travel to this Map by using it in a personal Map Device. Maps can only be used once.
2
69
Expedition
Vaal Pyramid MapVaal Pyramid MapMap Level: 70 Map Tier: 3 Guild Character: ~A good slave is driven by only two thoughts: service and sacrifice.Travel to this Map by using it in a personal Map Device. Maps can only be used once.
3
70
Ritual
Vaal Pyramid MapVaal Pyramid MapMap Level: 70 Map Tier: 3 Guild Character: ~A good slave is driven by only two thoughts: service and sacrifice.Travel to this Map by using it in a personal Map Device. Maps can only be used once.
3
70
Heist
Vaal Pyramid MapVaal Pyramid MapMap Level: 70 Map Tier: 3 Guild Character: ~A good slave is driven by only two thoughts: service and sacrifice.Travel to this Map by using it in a personal Map Device. Maps can only be used once.
3
70
Harvest
Vaal Pyramid MapVaal Pyramid MapMap Level: 70 Map Tier: 3 Guild Character: ~A good slave is driven by only two thoughts: service and sacrifice.Travel to this Map by using it in a personal Map Device. Maps can only be used once.
3
70
Delirium
Vaal Pyramid MapVaal Pyramid MapMap Level: 70 Map Tier: 3 Guild Character: ~A good slave is driven by only two thoughts: service and sacrifice.Travel to this Map by using it in a personal Map Device. Maps can only be used once.
3
70
Metamorph
Vaal Pyramid MapVaal Pyramid MapMap Level: 78 Map Tier: 11 Guild Character: ~A good slave is driven by only two thoughts: service and sacrifice.Travel to this Map by using it in a personal Map Device. Maps can only be used once.
11
78
Blight
Vaal Pyramid MapVaal Pyramid MapMap Level: 79 Map Tier: 12 Guild Character: ~A good slave is driven by only two thoughts: service and sacrifice.Travel to this Map by using it in the Templar Laboratory or a personal Map Device. Maps can only be used once.
12
79
Legion
Vaal Pyramid MapVaal Pyramid MapMap Level: 76 Map Tier: 9 Guild Character: ~A good slave is driven by only two thoughts: service and sacrifice.Travel to this Map by using it in the Templar Laboratory or a personal Map Device. Maps can only be used once.
9
76
Synthesis
Vaal Pyramid MapVaal Pyramid MapMap Level: 72 Map Tier: 5 Guild Character: ~A good slave is driven by only two thoughts: service and sacrifice.Travel to this Map by using it in the Templar Laboratory or a personal Map Device. Maps can only be used once.
5
72
Betrayal
Vaal Pyramid MapVaal Pyramid MapMap Level: 75 Map Tier: 8 Guild Character: ~Travel to this Map by using it in the Templar Laboratory or a personal Map Device. Maps can only be used once.
8
75
War for the Atlas
Vaal Pyramid MapVaal Pyramid MapMap Level: 70 Map Tier: 3 Guild Character: GTravel to this Map by using it in the Templar Laboratory or a personal Map Device. Maps can only be used once.
3
70
Atlas of Worlds
Shaped Vaal Pyramid MapShaped Vaal Pyramid MapMap Level: 75 Map Tier: 8 Guild Character: GTravel to this Map by using it in the Templar Laboratory or a personal Map Device. Maps can only be used once.
8
75
Atlas of Worlds
Vaal Pyramid MapVaal Pyramid MapMap Level: 70 Map Tier: 3 Guild Character: GTravel to this Map by using it in the Templar Laboratory or a personal Map Device. Maps can only be used once.
3
70
The Awakening
Vaal Pyramid MapVaal Pyramid MapMap Level: 68 Map Tier: 3 Guild Character: YTravel to this Map by using it in the Templar Laboratory or a personal Map Device. Maps can only be used once.
The entire Atlas has been reworked. Many map names have changed, as have their balance, tier and position on the Atlas. Many maps have also had their boss fights swapped or completely reworked.
The rules used to generate monsters in endgame maps have been significantly reworked and rebalanced around the rate at which we expect players to reliably clear out the map. In general, narrow, linear maps will contain fewer total monsters than maps with complex layouts. We will be closely monitoring and adjusting the balance of this change and expect to make further changes and improvements over time.
Most existing maps have been revamped to have more balanced monster composition, layouts, boss fights and rewards.
Replaced Atziri's Chosen with The Fallen Queen,The Hollow Lady and The Broken Prince [Undocumented This change was not documented by any official sources. It was discovered through player testing or datamining.]

_area_screenshot.jpg)

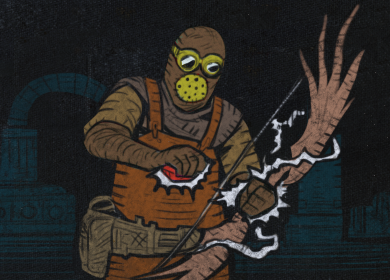 The Inventor
 610x
610x 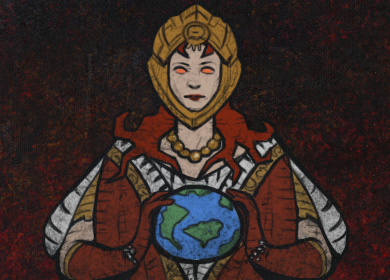 The Queen
 16
16