|help_text = Travel to this Map by using it in the Eternal Laboratory or a personal Map Device. Maps can only be used once.
|help_text = Travel to this Map by using it in the Templar Laboratory or a personal Map Device. Maps can only be used once.
|map_tier = 2
|purchase_cost_normal1_name = Orb of Chance
|map_guild_character = b
|purchase_cost_normal1_amount = 1
|map_area_id = MapAtlasFactory
|purchase_cost_magic1_name = Orb of Chance
|map_area_level = 69
|purchase_cost_magic1_amount = 2
|purchase_cost_rare1_name = Orb of Chance
|purchase_cost_rare1_amount = 3
|purchase_cost_unique1_name = Chaos Orb
|purchase_cost_unique1_amount = 10
|map_tier = 2
|map_guild_character = b
|map_area_id = MapAtlasFactory
|map_series = Atlas of Worlds
|map_area_level = 69
|inventory_icon = Factory Map (Atlas of Worlds)
|drop_enabled = False
|release_version = 2.4.0
}}
}}
[[File:Factory t2.png|thumb]]
'''Factory''' [[map]] is based on [[The Warehouse District]] zone in [[Act 3]]. Since [[version 3.1.0]] ([[War for the Atlas]]) it became a [[legacy variant]] of {{il|page=Factory Map (War for the Atlas)}}. Using this legacy variant would generate the new layout and boss from the new version, but retained the tier (2), instead of tier 11.
'''Vendor''':
==Boss Arena (Atlas of Worlds)==
* Produced by three {{il|page=Crystal Ore Map|item_name=Crystal Ore Maps}}.
Arena is large, with big device decoration in the middle. It seals when the boss is engaged until killed. The boss is located on the bottom left side and the magic pack of monsters on the bottom right.
* Three {{il|page=Factory Map|item_name=Factory Maps}} yield one {{il|page=Channel Map}}.
Factory MapMap Level: 69 Map Tier: 2 Guild Character: bTravel to this Map by using it in the Templar Laboratory or a personal Map Device. Maps can only be used once.
Acquisition Drop disabled Drop level: 69Vendor Prices
Factorymap is based on The Warehouse District zone in Act 3. Since version 3.1.0 (War for the Atlas) it became a legacy variant of Factory MapFactory MapMap Level: 78 Map Tier: 11 Guild Character: ÎTravel to this Map by using it in the Templar Laboratory or a personal Map Device. Maps can only be used once.. Using this legacy variant would generate the new layout and boss from the new version, but retained the tier (2), instead of tier 11.
Arena is large, with big device decoration in the middle. It seals when the boss is engaged until killed. The boss is located on the bottom left side and the magic pack of monsters on the bottom right.
Casts VortexVortexSpell, AoE, Cold, Duration, Nova Level: (1-20) Cost: (13-25) Mana Cast Time: 0.75 sec Critical Strike Chance: 6.00% Effectiveness of Added Damage: 270% AoE Radius: 2Requires Level 28An icy blast explodes around the caster, dealing cold damage to enemies, and leaving behind a whirling vortex which deals cold damage over time and chills enemies caught in it.Deals (49-779) to (73-1169) Cold Damage Base duration is 3.00 seconds Deals (116-2316.1) Base Cold Damage per second Modifiers to Spell Damage apply to this Skill's Damage Over Time effect Base radius is 2 metres Base secondary radius is 2 metres
Additional Effects From 1-20% Quality: +(0.01-0.2) metres to radiusPlace into an item socket of the right colour to gain this skill. Right click to remove from a socket. Casts FrostboltFrostboltSpell, Projectile, Cold Level: (1-20) Cost: (6-25) Mana Cast Time: 0.75 sec Critical Strike Chance: 5.00% Effectiveness of Added Damage: 360% Projectile Speed: 375Fires a slow-moving projectile that pierces through enemies, dealing cold damage.Deals (9-1594) to (13-2392) Cold Damage Projectiles Pierce all Targets
Additional Effects From 1-20% Quality: (1-20)% increased Cold DamagePlace into an item socket of the right colour to gain this skill. Right click to remove from a socket. Enemies are slowed Teleports away
Struck by LightningStruck by Lightning3Electrocuting Jewellery Item Level:76'Lightning never strikes the same place twice' is really just wishful thinking.
There are currently no unique items for this base item type.
Map variants
Item
Map Tier
Map Level
Map Series
Factory MapFactory MapMap Level: 75 Map Tier: 8 Guild Character: ÎRepetition. Convention. Duplication. Creation distilled to perfection.Travel to this Map by using it in a personal Map Device. Maps can only be used once.
8
75
Ancestor
Factory MapFactory MapMap Level: 77 Map Tier: 10 Guild Character: ÎRepetition. Convention. Duplication. Creation distilled to perfection.Travel to this Map by using it in a personal Map Device. Maps can only be used once.
10
77
Crucible
Factory MapFactory MapMap Level: 74 Map Tier: 7 Guild Character: ÎRepetition. Convention. Duplication. Creation distilled to perfection.Travel to this Map by using it in a personal Map Device. Maps can only be used once.
7
74
The Forbidden Sanctum
Factory MapFactory MapMap Level: 70 Map Tier: 3 Guild Character: ÎRepetition. Convention. Duplication. Creation distilled to perfection.Travel to this Map by using it in a personal Map Device. Maps can only be used once.
3
70
Kalandra
Factory MapFactory MapMap Level: 80 Map Tier: 13 Guild Character: ÎRepetition. Convention. Duplication. Creation distilled to perfection.Travel to this Map by using it in a personal Map Device. Maps can only be used once.
13
80
Sentinel
Factory MapFactory MapMap Level: 82 Map Tier: 15 Guild Character: ÎRepetition. Convention. Duplication. Creation distilled to perfection.Travel to this Map by using it in a personal Map Device. Maps can only be used once.
15
82
Expedition
Factory MapFactory MapMap Level: 70 Map Tier: 3 Guild Character: ÎRepetition. Convention. Duplication. Creation distilled to perfection.Travel to this Map by using it in a personal Map Device. Maps can only be used once.
3
70
Ritual
Factory MapFactory MapMap Level: 76 Map Tier: 9 Guild Character: ÎRepetition. Convention. Duplication. Creation distilled to perfection.Travel to this Map by using it in a personal Map Device. Maps can only be used once.
9
76
Heist
Factory MapFactory MapMap Level: 76 Map Tier: 9 Guild Character: ÎRepetition. Convention. Duplication. Creation distilled to perfection.Travel to this Map by using it in a personal Map Device. Maps can only be used once.
9
76
Harvest
Factory MapFactory MapMap Level: 76 Map Tier: 9 Guild Character: ÎRepetition. Convention. Duplication. Creation distilled to perfection.Travel to this Map by using it in a personal Map Device. Maps can only be used once.
9
76
Delirium
Factory MapFactory MapMap Level: 76 Map Tier: 9 Guild Character: ÎRepetition. Convention. Duplication. Creation distilled to perfection.Travel to this Map by using it in a personal Map Device. Maps can only be used once.
9
76
Metamorph
Factory MapFactory MapMap Level: 74 Map Tier: 7 Guild Character: ÎRepetition. Convention. Duplication. Creation distilled to perfection.Travel to this Map by using it in a personal Map Device. Maps can only be used once.
7
74
Blight
Factory MapFactory MapMap Level: 75 Map Tier: 8 Guild Character: ÎRepetition. Convention. Duplication. Creation distilled to perfection.Travel to this Map by using it in the Templar Laboratory or a personal Map Device. Maps can only be used once.
8
75
Legion
Factory MapFactory MapMap Level: 77 Map Tier: 10 Guild Character: ÎRepetition. Convention. Duplication. Creation distilled to perfection.Travel to this Map by using it in the Templar Laboratory or a personal Map Device. Maps can only be used once.
10
77
Synthesis
Factory MapFactory MapMap Level: 78 Map Tier: 11 Guild Character: ÎRepetition. Convention. Duplication. Creation distilled to perfection.Travel to this Map by using it in the Templar Laboratory or a personal Map Device. Maps can only be used once.
11
78
Betrayal
Factory MapFactory MapMap Level: 78 Map Tier: 11 Guild Character: ÎTravel to this Map by using it in the Templar Laboratory or a personal Map Device. Maps can only be used once.
11
78
War for the Atlas
Factory MapFactory MapMap Level: 69 Map Tier: 2 Guild Character: bTravel to this Map by using it in the Templar Laboratory or a personal Map Device. Maps can only be used once.
2
69
Atlas of Worlds
Shaped Factory MapShaped Factory MapMap Level: 74 Map Tier: 7 Guild Character: bTravel to this Map by using it in the Templar Laboratory or a personal Map Device. Maps can only be used once.
The following Maps have been removed from the Atlas: Alleyways, Arachnid Tomb, Barrows, Beach, Cells, Cold River, Courthouse, Dungeon, Excavation, Factory, Fungal Hollow, Geode, Graveyard, Haunted Mansion, Lava Lake, Leyline, Malformation, Mausoleum, Pen, Phantasmagoria, Pit, Primordial Blocks, Primordial Pool, Silo, Sulphur Vents, Sunken City, Terrace, Tower, and Waterways.
The following Maps have been added back to the Atlas: Alleyways, Arena, Barrows, Bog, Colonnade, Core, Crystal Ore, Desert, Factory, Foundry, Fungal Hollow, Lava Lake, Mud Geyser, Park, Pit, Ramparts, Reef, Residence, Sepulchre, Sunken City, Terrace, Tropical Island, Villa, and Wharf.
The entire Atlas has been reworked. Many map names have changed, as have their balance, tier and position on the Atlas. Many maps have also had their boss fights swapped or completely reworked.
The rules used to generate monsters in endgame maps have been significantly reworked and rebalanced around the rate at which we expect players to reliably clear out the map. In general, narrow, linear maps will contain fewer total monsters than maps with complex layouts. We will be closely monitoring and adjusting the balance of this change and expect to make further changes and improvements over time.
Mother Phyia is removed as the map boss. Pesquin, the Mad Baron became the new map boss. [Undocumented This change was not documented by any official sources. It was discovered through player testing or datamining.]

_area_screenshot.jpg)

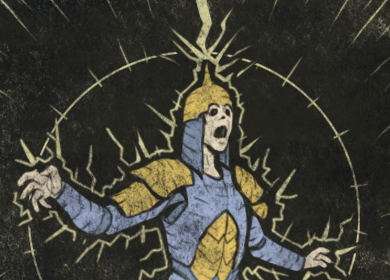 Struck by Lightning
 3Electrocuting Jewellery