Last updated on March 4, 2023.
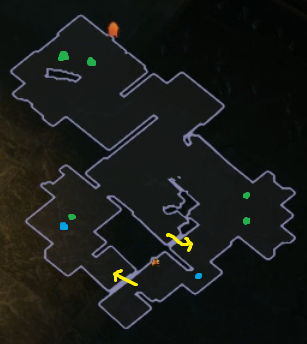
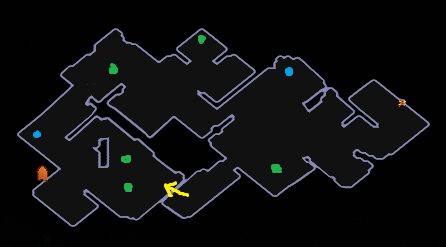
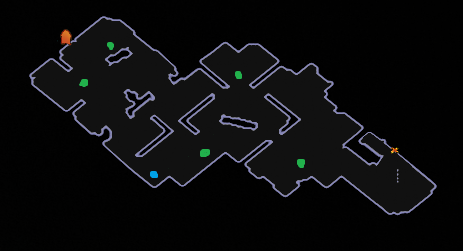
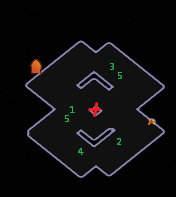
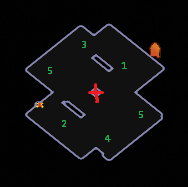
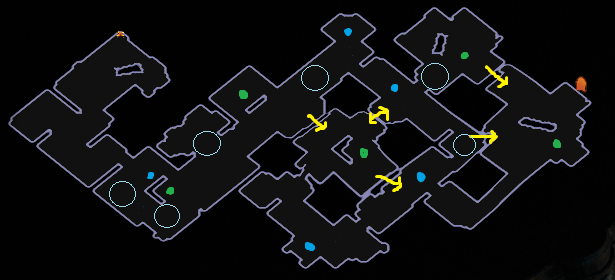
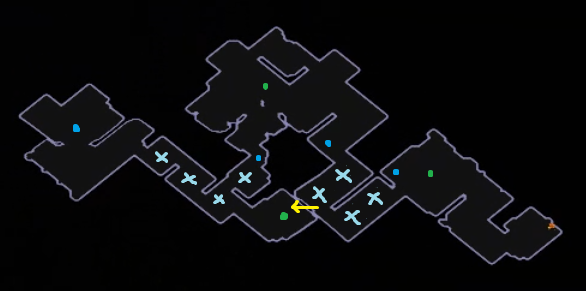
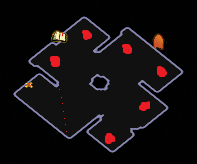
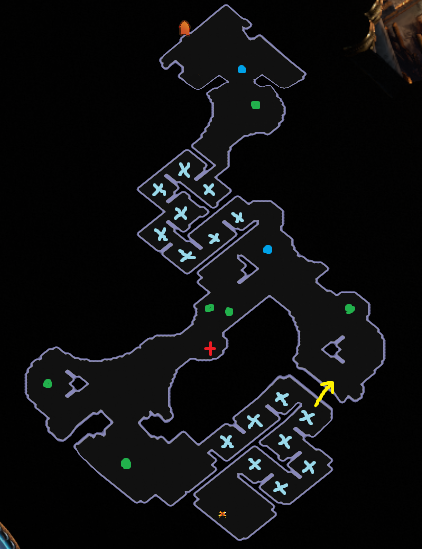
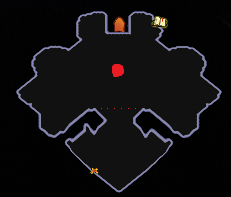
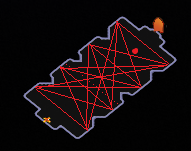
This guide explains layouts of rooms in the Forbidden Sanctum, as well as tips to navigate safely for challenge runs. Note that these layouts may be mirrored vertically/horizontally, or rotated.
Legend
- Enemies:
- Red dot: Boss/miniboss
- Green dot: Guard
- Green number: Guards, spawning in waves
- Blue dot: Regular monster
- Blue/green line between dots: Alternative spawn locations
- Traps:
- Red cross: Fire Skull
- Blue X: Mana Rune Square
- Light blue circle: Ice Trap
- Red circle: Rolling Exarch Boulder
- Red solid line: Laser
- Misc:
- Red dotted line: Boss/miniboss aggro proximity (for pre-stacking mines/traps, etc)
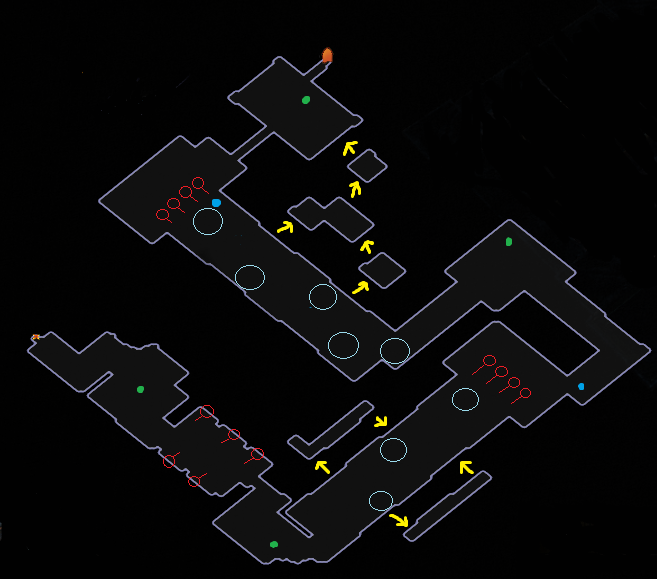
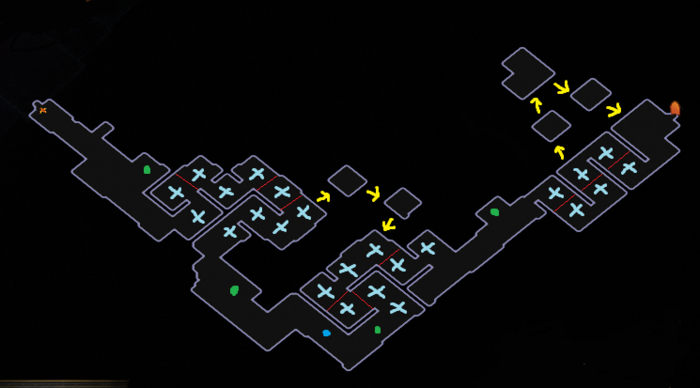
- Yellow arrows: Shortcuts/gaps/ledges
Floor 1
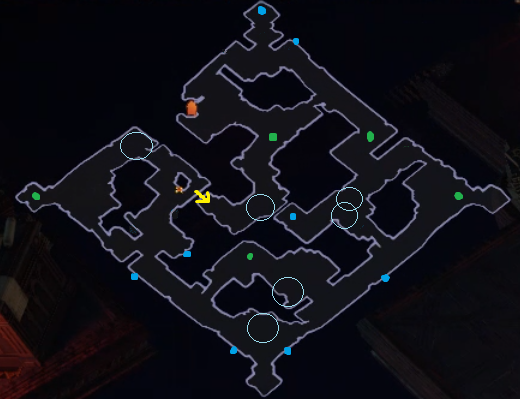
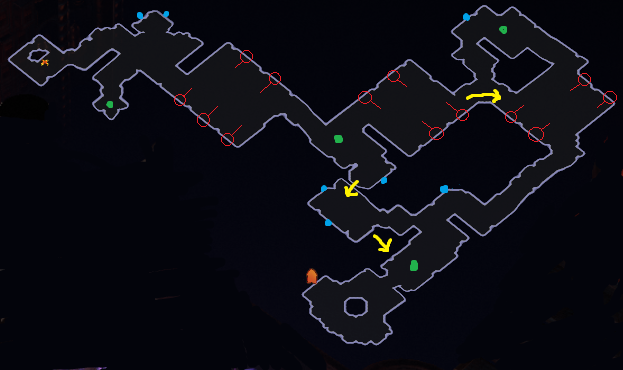
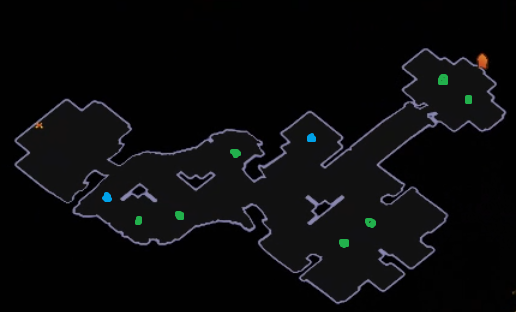
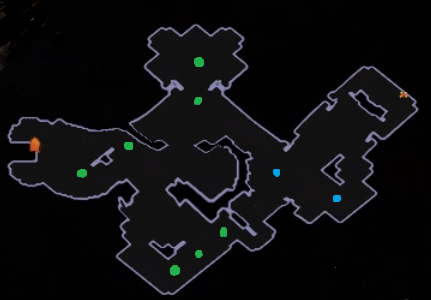
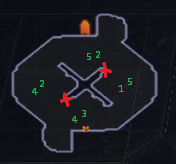
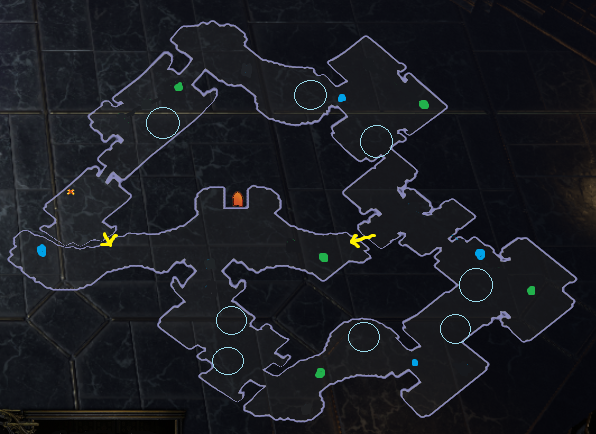
Forbidden Sanctum Floor 1 annotated minimaps
| Minimap |
Room Name |
Strategy
|
 |
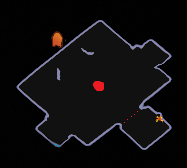
Chambers of Inscription
(Layout 1/3)
Defeat all the Guards |
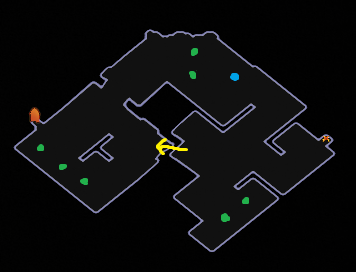
Blue dots represent relative trigger locations of the untargetable dog-like enemies. They must be walked through to become targetable. Jumping up the ledge allows a better vantage point for the two guards on the right side.
|
 |
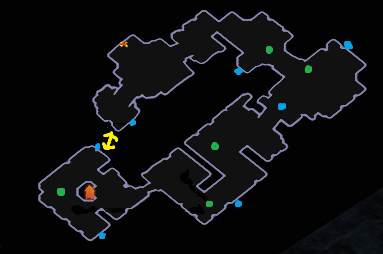
Chambers of Inscription
(Layout 2/3)
Defeat all the Guards |
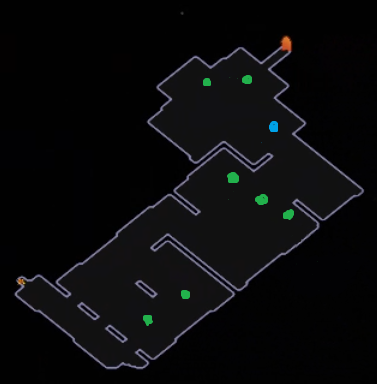
The two guards near the exit can be targeted from the nearby ledge; doing so will prevent them from aggroing you when walking from the north side.
|
 |
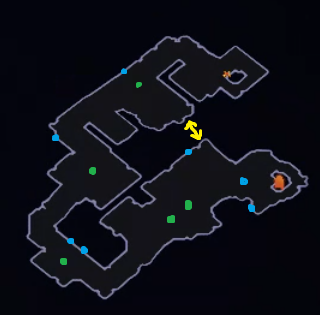
Chambers of Inscription
(Layout 3/3)
Defeat all the Guards |
The table in the center does not have projectile collision. Be careful as the guard to the left of it may wander.
|
 |
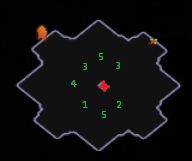
Templar Annals
(Layout 1/2)
Defeat all the Guards |
|
 |
Templar Annals
(Layout 2/2)
Defeat all the Guards |
|
 |
Abandoned Library
Find the Exit |
After approaching the first jumpable ledge, proceed through the southern edge path to reduce the aggro from guards.
|
 |
Holy Trials
Find the Exit |
The first ledge skips a large portion of this room. Be careful of the guard on the ledge; try to kill it before jumping up.
|
 |
Scriptorium
(Miniboss Room) |
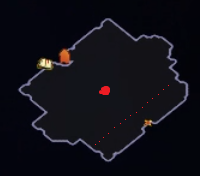
The boss in the center cannot be directly targeted. Defeat the 6 clones around it to progress. The boss' rune skills increase in pattern area as clones are defeated, so it is generally advised to try to lower all clones' life and then kill them in quick succession.
|
 |
Candlelit Chapel
(Boss Room) |
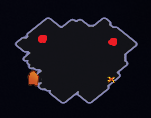
Stick close to the boss and stay behind it to prevent random hits from the Blazing Salvo projectiles it fires from its back. Be mindful of its jump attack.
|
Floor 2
Forbidden Sanctum Floor 2 annotated minimaps
| Minimap |
Room Name |
Strategy
|
 |
Derelict Caverns
(Layout 1/2)
Defeat all the Guards |
Going through the shortcut and working backwards through the guards may be safer due to better visibility. The first guard may aggro to the left if the player is not behind the bookcase.
|
 |
Derelict Caverns
(Layout 2/2)
Defeat all the Guards |
|
 |
Battlegrounds
Defeat all the Guards |
No blockages in this arena. Keep moving in a circular motion. It may be easier to go counterclockwise if starting from the right, or clockwise if starting from the left.
|
 |
Decrepit Cellar
Find the Exit |
Jumping the first gap and rushing to the exit is the fastest route. Be careful of projectile-using monsters near the jump, and the guard near the stairs.
|
 |
Gauntlet
Find the Exit |
Jumping the ledge after the first set of boulders will skip two more boulder sections.
|
 |
Reliquary
(Miniboss Room) |
This boss moves and attacks quickly, and fires random arcing projectiles when it moves. It is recommended to burst this boss down if possible, as its area denial worsens as its life goes lower, filling the arena with rows of coffins.
|
 |
Experimentation Chamber
(Boss Room) |
The bosses will immediately aggro out of grace after a short pause. It is generally advised to kill Braom first if possible as his skills are more unpredictable when enraged. After killing one boss, the other boss aggros and uses additional skills. Uzar's Blood Orb can be dodged by continuously moving until it detonates; avoid the blood pool after the boss dies until it despawns as it may rarely persist and drain Resolve.
|
Floor 3
Forbidden Sanctum Floor 3 annotated minimaps
| Minimap |
Room Name |
Strategy
|
 |
Unholy Lair
(Layout 1/2)
Defeat all the Guards |
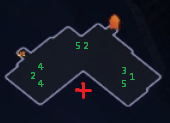
Guards may wander. Be careful of the aggro range of the two guards in the middle.
|
 |
Unholy Lair
(Layout 2/2)
Defeat all the Guards |
Guards may wander. Do the north and south guards before going towards the stairs.
|
 |
Infernum
Defeat all the Guards |
It may be easier to go counterclockwise if possible to ensure the guard has no time to wander away into a corner. The small piece of wall behind the flaming skulls cannot be jumped over, but does not block projectiles. The long wall dividing the two skulls is solid.
|
 |
Halls of Worship
Find the Exit |
Jumping up the ledge and going to the center will skip this entire room.
|
 |
Crucible
Find the Exit |
Jumping up the ledge in the middle of the first trap will skip several guards and the flaming skull.
|
 |
Sanctum Bellum
(Miniboss Room) |
Burst this boss down before it can use its orbital lasers or slam attacks.
|
 |
Hall of Mirrors
(Boss Room) |
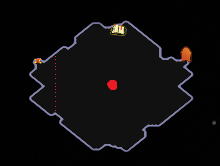
The boss will aggro approximately 1/3 of the way into the room. Keep moving in circles around it to avoid its slashing attack, and run away when it uses the dash attack due to the nova of projectiles. Some players find that running back towards the entrance may be useful to have more time to hit the boss if it cannot be bursted. Avoid the center of the room if possible. Lasers will fire randomly to any of the four mirrors on the other side.
|
Floor 4
Forbidden Sanctum Floor 4 annotated minimaps
| Minimap |
Room Name |
Strategy
|
 |
Lost Catacombs
(Layout 1/2)
Defeat all the Guards |
After defeating the south and north pairs of guards, it is easier to snipe a guard or two near the the entrance from the ledge rather than engaging all three at once.
|
 |
Lost Catacombs
(Layout 2/2)
Defeat all the Guards |
Try to snipe each guard from behind the walls of the first and second group of guards. The monster between group 2 and 3 may wander.
|
 |
Desecrated Crypt
Defeat all the Guards |
Run to the opposite side of the room at the start of arena fight to be ahead of the laser. Use jump skills as necessary to cross the flaming skull beam, or slow down to slow the degree of rotation of the beam.
|
 |
Undercroft
Find the Exit |
Can be fairly easily rushed through either of the shortcuts, or directly through the center of the room.If going through the center path, stick to the wall away from the flaming skull to reduce guard aggro.
|
 |
Entombment
(Layout 1/2)
Find the Exit |
Go slow. Utilize skills like  Frost WallSpell, Duration, Cold Frost WallSpell, Duration, Cold
Level: (1-20)
Cost: (9-33) Mana
Cooldown Time: 3.00 sec
Can Store 3 Use(s)
Cast Time: 0.50 secRequires Level 4Creates a wall of ice which holds back enemies. Targets under the wall are damaged and pushed back.Deals (8-462) to (12-693) Cold Damage
Base duration is (3.00-4.90) seconds
0.15 seconds between appearance of Wall sections
Wall will be (2.8-5.6) meters long
Additional Effects From 1-20% Quality:
(2-40)% increased Cooldown Recovery RatePlace into an item socket of the right colour to gain this skill. Right click to remove from a socket.  or or  Searing BondSpell, Totem, Fire Searing BondSpell, Totem, Fire
Level: (1-20)
Cost: (18-51) Mana
Cast Time: 1.00 secRequires Level 12Summons a totem that casts a beam of fire at you and each other totem you control, dealing burning damage to enemies caught in the beam. Enemies near either end of a beam also suffer burning damage.+1 to maximum number of Summoned Totems
Totem lasts 8 seconds
Deals (32.1-3899.6) Base Fire Damage per second
Modifiers to Spell Damage apply to this Skill's Damage Over Time effect
Summons a Totem which uses this Skill
Additional Effects From 1-20% Quality:
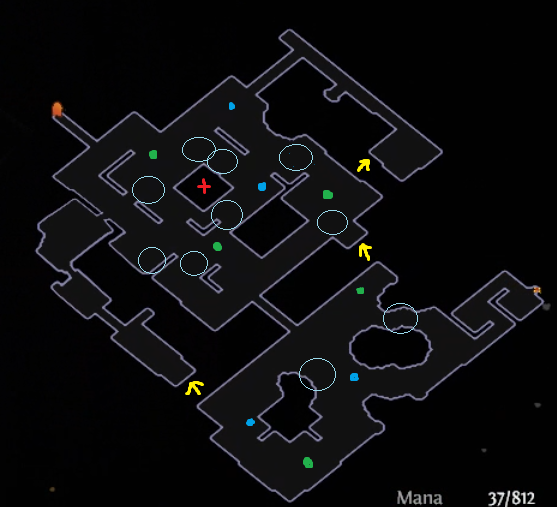
+(0.1-2) to maximum number of Summoned TotemsPlace into an item socket of the right colour to gain this skill. Right click to remove from a socket.  to block boulders and proceed upwards. the first shortcuts are not useful and can be ignored. Watch out for the wandering enemies in the second and third set of boulders by firing ahead of you. In the third set, it is possible to skip over half the trap by using the shortcut. to block boulders and proceed upwards. the first shortcuts are not useful and can be ignored. Watch out for the wandering enemies in the second and third set of boulders by firing ahead of you. In the third set, it is possible to skip over half the trap by using the shortcut.
|
 |
Entombment
(Layout 2/2)
Find the Exit |
Traps contain both rune squares and lasers. Use a jump skill for better timing. The first shortcut is useful; watch out as the last guard can aggro a player on the second platform of the first shortcut. The second shortcut provides little benefit and can be ignored.
|
 |
Mausoleum
(Miniboss Room) |
Bursting this boss will prevent it from using its massive area denial skills and annoying mechanics.
|
 |
Sanctum Sanctorum
(Boss Room) |
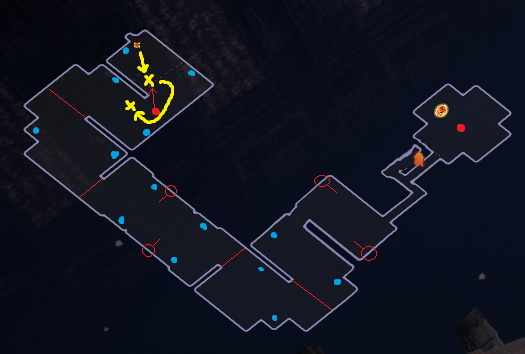
Engage Lycia by moving to the first X, baiting her into using either her dash attack or spinning cleave attack. At the same time, either move right or right then down until you burst her to about 25% life; then hide behind the wall (the second X) before she uses her Beidat beam or telegraphed slam skills.
Once she is phased and the fog dissipated, proceed slowly through the arena, destroying the activated gargoyle enemies as you go. It is possible to jump over the ledge at the second boulder set, but is not advised due to the ease of the trap (don't die like Jungroan). Note that the fog will begin to spawn again after a long delay, so don't remain in the starting area.
Lycia will do a short monologue to setup on in the arena area, so use this time to set up. She will typically immediately use her Beidat beam skill, so jumping or running behind her will give you several seconds to kill her.
|
