Category:Area screenshots
Jump to navigation
Jump to search
Subcategories
This category has the following 2 subcategories, out of 2 total.
C
D
- Delve biome screenshots (7 F)
Media in category "Area screenshots"
The following 200 files are in this category, out of 474 total.
(previous page) (next page)-
 Mineral Pools Map area screenshot.jpg 1,296 × 831; 328 KB
-
 Moon Temple Map area screenshot.jpg 989 × 753; 258 KB
-
 Morbid Hideout area screenshot.jpg 590 × 321; 50 KB
-
 Museum Map area screenshot.jpg 966 × 929; 265 KB
-
 Mystical Clearing area screenshot.png 2,216 × 943; 2.78 MB
-
 NarrowRavine1.png 1,259 × 775; 1.61 MB
-
 Necropolis Map area screenshot.jpg 1,041 × 880; 185 KB
-
 NeglectedCellar1.png 1,259 × 775; 1.3 MB
-
 Nocturnal Hideout area screenshot.jpg 590 × 321; 50 KB
-
 Oba's Cursed Trove area screenshot.jpg 2,267 × 937; 354 KB
-
 Olmec's Sanctum area screenshot.png 1,387 × 1,058; 1.48 MB
-
 Orchard Map area screenshot.jpg 844 × 926; 356 KB
-
 Oriath (Epilogue) area screenshot.jpg 1,920 × 1,080; 2.94 MB
-
 Overgrown Hideout area screenshot.jpg 590 × 321; 98 KB
-
 Overgrown Ruin Map area screenshot.jpg 1,179 × 950; 309 KB
-
 Overgrown Shrine Map area screenshot.jpg 1,405 × 897; 252 KB
-
 Overseer's Tower area screenshot.jpg 955 × 658; 215 KB
-
 Phantasmagoria Map area screenshot.jpg 1,586 × 801; 246 KB
-
 Pier Map area screenshot.jpg 1,257 × 819; 339 KB
-
 Pier Map example layout.png 1,280 × 1,344; 654 KB
-
 Pillars of Arun area screenshot.jpg 1,530 × 935; 328 KB
-
 Pit Map area screenshot.png 1,714 × 829; 2.12 MB
-
 Pit of the Chimera Map area screenshot.jpg 1,364 × 913; 388 KB
-
 Plateau Map area screenshot.jpg 1,606 × 755; 400 KB
-
 Plaza Map area screenshot.jpg 1,054 × 912; 410 KB
-
 Poorjoy's Asylum area screenshot.jpg 1,430 × 1,328; 394 KB
-
 Port Map area screenshot.jpg 960 × 936; 276 KB
-
 Precinct Map area screenshot.jpg 1,204 × 874; 303 KB
-
 Primeval Chamber area screenshot.png 1,227 × 690; 1.24 MB
-
 Primeval Chamber underground area screenshot.png 1,177 × 662; 1.23 MB
-
 Primeval Hideout area screenshot.jpg 590 × 321; 51 KB
-
 Primordial Blocks Map area screenshot.jpg 1,449 × 752; 315 KB
-
 Primordial Pool Map area screenshot.jpg 1,045 × 858; 228 KB
-
 Prisoner's Gate 2 area screenshot.jpg 949 × 660; 186 KB
-
 Prisoner's Gate area screenshot.jpg 1,364 × 942; 297 KB
-
 Promenade Map area screenshot.jpg 1,729 × 805; 304 KB
-
 QuarantinedQuarters1.png 1,259 × 775; 1.38 MB
-
 Racecourse Map area screenshot.jpg 1,634 × 892; 475 KB
-
 Ramparts Map area screenshot.jpg 1,591 × 835; 506 KB
-
 Ravenous Hideout area screenshot.jpg 590 × 321; 41 KB
-
 Reclaimed Barracks area screenshot.png 1,680 × 1,050; 3.42 MB
-
 ReclaimedBarracks0.png 1,680 × 1,050; 3.03 MB
-
 ReclaimedBarracksPath.jpg 1,920 × 1,080; 446 KB
-
 Relic Chambers Map area screenshot.jpg 1,129 × 772; 219 KB
-
 RemoteGluchBoss0.jpg 1,259 × 775; 395 KB
-
 Residence Map area screenshot.jpg 1,435 × 916; 345 KB
-
 Restless Rubble (Frozen Hollow) .png 1,710 × 961; 2.94 MB
-
 Restless Rubble (Fungal Caverns).png 1,497 × 842; 2.31 MB
-
 Restless Rubble (Magma Fissure).png 1,688 × 949; 2.34 MB
-
 Restless Rubble (mines) Chaos Golem.png 1,667 × 937; 2.59 MB
-
 Restless Rubble (mines) Stone Golem.png 1,705 × 958; 2.72 MB
-
 Restricted Collection area screenshot.png 1,920 × 1,080; 2.56 MB
-
 Restricted Gallery area screenshot.png 1,920 × 1,080; 2.51 MB
-
 Ritualist's Hideout area screenshot.jpg 590 × 321; 43 KB
-
 Robber's Trench Hideout area screenshot.jpg 590 × 321; 49 KB
-
 Sacred Chambers area screenshot.png 1,920 × 1,080; 3.54 MB
-
 Sanguine Hideout area screenshot.jpg 590 × 321; 50 KB
-
 Saqawal's Roost area screenshot.jpg 1,280 × 720; 191 KB
-
 Sarn Arena (Act 3) area screenshot.jpg 1,920 × 1,080; 776 KB
-
 Sarn Arena area screenshot.jpg 954 × 656; 262 KB
-
 Screenshot-0036.png 1,920 × 1,080; 2.63 MB
-
 Scriptorium Map area screenshot.jpg 1,160 × 772; 257 KB
-
 SealedCorridors1.png 1,920 × 1,080; 2.99 MB
-
 Secluded Copse area screenshot.png 1,259 × 775; 1.34 MB
-
 Secret Laboratory area screenshot.jpg 1,501 × 844; 136 KB
-
 SecretLaboratory1.png 1,920 × 1,080; 3.04 MB
-
 Seething Chyme area screenshot.png 1,717 × 966; 2.07 MB
-
 Shaped Hideout area screenshot.jpg 590 × 321; 47 KB
-
 Shavronne's Tower area screenshot.jpg 951 × 663; 92 KB
-
 Shipyard Map area screenshot.jpg 1,044 × 740; 215 KB
-
 Shore Map area screenshot.jpg 1,093 × 802; 264 KB
-
 Shrine Map area screenshot.jpg 1,048 × 857; 265 KB
-
 Siege Map area screenshot.jpg 1,190 × 898; 305 KB
-
 Silo Map area screenshot.jpg 1,143 × 825; 201 KB
-
 Simi, the Nature Touched monster screenshot.jpg 421 × 316; 33 KB
-
 Simulacrum (Lioneye's Watch).png 1,584 × 936; 1.79 MB
-
 Skeletal Hideout area screenshot.jpg 590 × 321; 52 KB
-
 Smuggler's Den area screenshot.png 1,521 × 837; 1.25 MB
-
 Spires of Delusion area screenshot.png 1,754 × 964; 2.56 MB
-
 Stagnant Canal area screenshot.jpg 936 × 438; 170 KB
-
 Stagnation Map area screenshot.jpg 1,518 × 911; 395 KB
-
 Stately Hideout area screenshot.jpg 590 × 321; 79 KB
-
 Stonewood Hollow area screenshot.png 751 × 537; 783 KB
-
 Strand Map area screenshot.jpg 1,085 × 924; 250 KB
-
 Strange Sinkhole area screenshot.png 1,600 × 900; 2.54 MB
-
 Sulphur Vents Map area screenshot.jpg 1,245 × 894; 319 KB
-
 Sunken Hideout area screenshot.jpg 590 × 321; 35 KB
-
 Sunken Shingle area screenshot.png 1,698 × 954; 2.19 MB
-
 SunkenShingle1.PNG 755 × 522; 891 KB
-
 Sunspire Hideout area screenshot.jpg 590 × 321; 70 KB
-
 Syndicate Hideout (Fortification) area screenshot.png 2,073 × 783; 2.79 MB
-
 Syndicate Hideout (Intervention) area screenshot 2.png 1,706 × 959; 1.93 MB
-
 Syndicate Hideout (Intervention) area screenshot.png 1,281 × 889; 1.65 MB
-
 Syndicate Hideout (Research) area screenshot.png 1,317 × 889; 2.28 MB
-
 Syndicate Hideout (Transportation) area screenshot.png 1,237 × 921; 1.69 MB
-
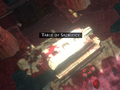 Table of Sacrifice (level 1).png 487 × 365; 282 KB
-
 Temple Map area screenshot.jpg 1,160 × 760; 289 KB
-
 Terrace Map area screenshot.jpg 1,389 × 932; 533 KB
-
 Thaumaturgical Hideout area screenshot.jpg 651 × 366; 59 KB
-
 The Alluring Abyss zone screenshot.png 1,062 × 782; 1.87 MB
-
 The Ancient Pyramid area screenshot.jpg 1,364 × 942; 222 KB
-
 The Apex of Sacrifice area screenshot.png 1,366 × 942; 2.21 MB
-
 The Aqueduct area screenshot.jpg 1,366 × 768; 364 KB
-
 The Archives area screenshot.jpg 1,364 × 942; 186 KB
-
 The Azurite Mine area screenshot.jpg 1,920 × 1,080; 1.24 MB
-
 The Battlefront area screenshot.jpg 1,364 × 942; 291 KB
-
 The Beacon area screenshot.jpg 952 × 658; 191 KB
-
 The Belly of the Beast Level 1 area screenshot.jpg 1,366 × 768; 244 KB
-
 The Belly of the Beast Level 2 area screenshot.jpg 1,366 × 768; 212 KB
-
 The Blackwood area screenshot.jpg 1,364 × 942; 236 KB
-
 The Bridge Encampment area screenshot.jpg 953 × 664; 201 KB
-
 The Brine King's Reef area screenshot.jpg 948 × 660; 134 KB
-
 The Broken Bridge (Act 2) area screenshot.jpg 1,364 × 942; 357 KB
-
 The Broken Bridge 2 area screenshot.jpg 949 × 663; 195 KB
-
 The Burning Cave area screenshot.jpg 350 × 349; 54 KB
-
 The Cage area screenshot.jpg 266 × 266; 111 KB
-
 The Canals area screenshot.jpg 1,920 × 1,080; 1.46 MB
-
 The Catacombs area screenshot.jpg 1,364 × 942; 140 KB
-
 The Cathedral Rooftop area screenshot.jpg 954 × 661; 218 KB
-
 The Cavern of Anger 2 area screenshot.jpg 939 × 663; 124 KB
-
 The Cavern of Anger area screenshot.jpg 1,364 × 942; 161 KB
-
 The Cavern of Wrath area screenshot.jpg 1,364 × 942; 149 KB
-
 The Caverns area screenshot.jpg 1,366 × 768; 300 KB
-
 The Caverns Level 1 area screenshot.jpg 1,364 × 942; 145 KB
-
 The Caverns Level 2 area screenshot.jpg 1,364 × 942; 246 KB
-
 The Chamber of Greed area screenshot.jpg 350 × 350; 123 KB
-
 The Chamber of Innocence area screenshot.jpg 953 × 659; 188 KB
-
 The Chamber of Sins Level 1 area screenshot.jpg 1,364 × 942; 161 KB
-
 The Chamber of Sins Level 2 (Act 2) area screenshot.jpg 1,364 × 942; 269 KB
-
 The Chamber of Sins Level 3 area screenshot.jpg 1,364 × 942; 223 KB
-
 The City of Sarn area screenshot.jpg 1,364 × 942; 405 KB
-
 The Climb area screenshot.jpg 1,364 × 942; 344 KB
-
 The Coast (Act 1) area screenshot.jpg 1,364 × 942; 151 KB
-
 The Coast (Act 6) area screenshot.jpg 928 × 648; 203 KB
-
 The Coves area screenshot.jpg 1,364 × 942; 140 KB
-
 The Coward's Trial area screenshot.jpg 1,216 × 900; 203 KB
-
 The Crematorium area screenshot.jpg 1,364 × 942; 91 KB
-
 The Crossroads (Act 2) area screenshot.jpg 1,364 × 942; 433 KB
-
 The Crypt Level 1 area screenshot.jpg 1,364 × 942; 185 KB
-
 The Crypt Level 2 area screenshot.jpg 1,364 × 942; 158 KB
-
 The Crystal Veins area screenshot.jpg 1,366 × 768; 210 KB
-
 The Den area screenshot.jpg 1,364 × 942; 275 KB
-
 The Diabolic Crypt area screenshot.jpg 360 × 360; 170 KB
-
 The Docks area screenshot.jpg 1,364 × 942; 286 KB
-
 The Dread Thicket (Act 2) area screenshot.jpg 1,280 × 720; 277 KB
-
 The Dried Lake area screenshot.jpg 1,366 × 768; 356 KB
-
 The Dungeon of Anarchy area screenshot.jpg 350 × 349; 45 KB
-
 The Dungeon of Necromancy area screenshot.jpg 350 × 350; 185 KB
-
 The Ebony Barracks area screenshot.jpg 1,364 × 942; 323 KB
-
 The Ember Crypt area screenshot.jpg 360 × 360; 157 KB
-
 The Entrance Hall area screenshot.jpg 350 × 350; 52 KB
-
 The Eternal Laboratory area screenshot.jpg 1,364 × 942; 415 KB
-
 The Fellshrine Ruins (Act 2) area screenshot.jpg 1,364 × 942; 238 KB
-
 The Fellshrine Ruins (Act 2) area screenshot.png 1,261 × 832; 1.85 MB
-
 The Fetid Pool area screenshot.jpg 1,364 × 942; 191 KB
-
 The Flooded Depths area screenshot.jpg 1,364 × 942; 249 KB
-
 The Forbidden Vault.png 649 × 599; 569 KB
-
 The Forest Encampment area screenshot.jpg 1,364 × 942; 427 KB
-
 The Freezing Chamber area screenshot.jpg 350 × 350; 49 KB
-
 The Glittering Cave area screenshot.jpg 400 × 400; 46 KB
-
 The Glittering Crypt area screenshot.jpg 360 × 360; 133 KB
-
 The Grand Arena area screenshot.jpg 1,366 × 768; 380 KB
-
 The Harvest area screenshot.png 1,680 × 1,050; 2.36 MB
-
 The Haunted Dungeon area screenshot.jpg 360 × 360; 188 KB
-
 The Haunted Reliquary area screenshot.jpg 1,338 × 752; 202 KB
-
 The Hedge Maze area screenshot.jpg 1,364 × 942; 336 KB
-
 The Hollow Cave area screenshot.jpg 350 × 350; 41 KB
-
 The Imperial Gardens area screenshot.jpg 1,364 × 942; 343 KB
-
 The Inner Halls Level 1 area screenshot.jpg 400 × 400; 50 KB
-
 The Karui Fortress area screenshot.jpg 960 × 658; 232 KB
-
 The Labyrinth screenshot.jpg 1,738 × 849; 216 KB
-
 The Ledge area screenshot.jpg 1,364 × 942; 262 KB
-
 The Library area screenshot.jpg 1,366 × 768; 237 KB
-
 The Lich's Tomb area screenshot.png 1,231 × 769; 1.59 MB
-
 The Lower Prison (Act 1) area screenshot.jpg 1,364 × 942; 121 KB
-
 The Lower Prison 2 area screenshot.jpg 954 × 662; 90 KB
-
 The Lunaris Temple Level 1 (Act 3) area screenshot.jpg 1,364 × 942; 276 KB
-
 The Lunaris Temple Level 2 (Act 3) area screenshot.jpg 1,364 × 942; 243 KB
-
 The Lunaris Temple Level 2 (Act 3) area screenshot.png 895 × 512; 788 KB
-
 The Market Sewers area screenshot.jpg 1,364 × 942; 145 KB
-
 The Marketplace area screenshot.jpg 1,364 × 942; 590 KB
-
 The Maven's Crucible area screenshot.jpg 2,005 × 641; 543 KB
-
 The Menagerie area screenshot.jpg 1,920 × 1,080; 1.55 MB
-
 The Mines Level 1 area screenshot.jpg 1,366 × 768; 201 KB
-
 The Mines Level 2 area screenshot.jpg 1,366 × 768; 192 KB
-
 The Misty Cave area screenshot.jpg 360 × 360; 169 KB
-
 The Mud Flats (Act 1) area screenshot.jpg 1,364 × 942; 503 KB
-
 The Mud Flats 2 area screenshot.jpg 935 × 655; 206 KB
-
 The Northern Forest area screenshot.jpg 1,366 × 768; 205 KB
-
 The Old Fields area screenshot.jpg 1,364 × 942; 429 KB
-
 The Pale Court area screenshot.jpg 1,278 × 864; 1.46 MB
-
 The Rasping Halls area screenshot.jpg 350 × 350; 41 KB
-
 The Ravaged Square area screenshot.jpg 1,920 × 1,080; 1.42 MB
-
 The Ridge area screenshot.jpg 954 × 658; 182 KB
-
 The Riverways (Act 2) area screenshot.jpg 1,364 × 942; 519 KB
-
 The Riverways 2 area screenshot.jpg 946 × 657; 242 KB
-
 The Ruined Square area screenshot.jpg 937 × 660; 196 KB
-
 The Sacred Grove area screenshot.jpg 753 × 582; 426 KB
-
 The Sacred Grove area.png 1,665 × 906; 2.01 MB
-
 The Sarn Encampment area screenshot.jpg 1,364 × 942; 304 KB


_area_screenshot.jpg)


_.png)
.png)
.png)
_Chaos_Golem.png)
_Stone_Golem.png)


_area_screenshot.jpg)


.png)


_area_screenshot_2.png)
_area_screenshot.png)
_area_screenshot.png)
.png)


_area_screenshot.jpg)


_area_screenshot.jpg)


_area_screenshot.jpg)
_area_screenshot.jpg)


_area_screenshot.jpg)


_area_screenshot.jpg)


_area_screenshot.jpg)
_area_screenshot.png)


_area_screenshot.jpg)

_area_screenshot.jpg)
_area_screenshot.jpg)
_area_screenshot.png)


_area_screenshot.jpg)


_area_screenshot.jpg)


_area_screenshot.png)
_area_screenshot.png)